
In this post we’ll cover all of the tools you’ll need to have a successful in-person sales session or a remote sales session using Skype or Zoom.
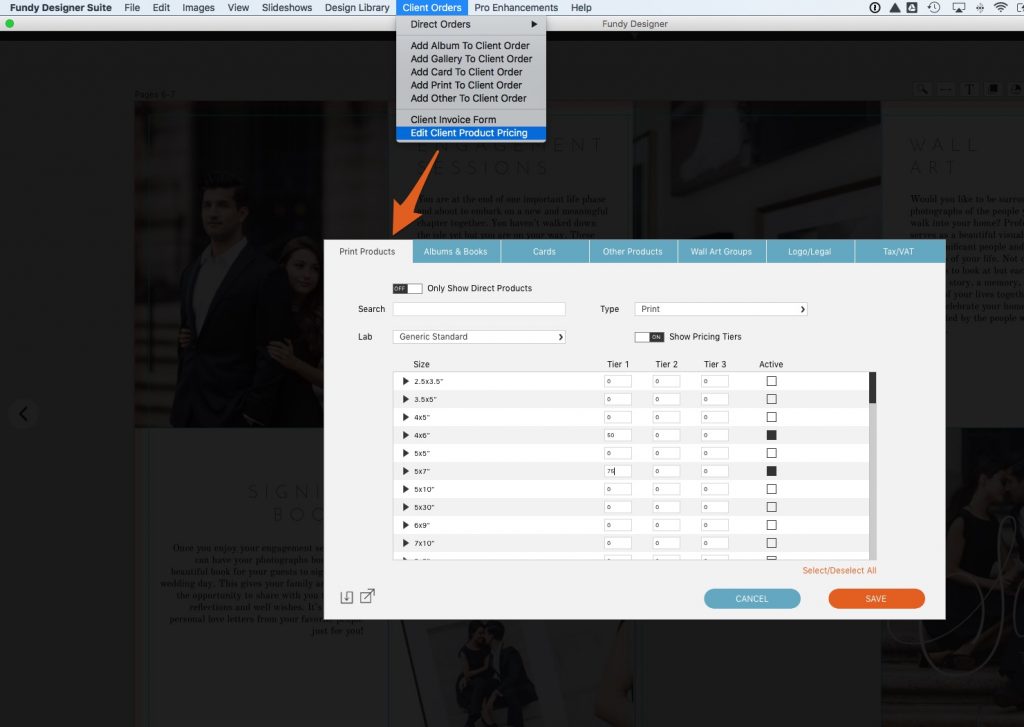
Before conducting a sales session we recommend inputting all of your pricing into Fundy Designer for your albums, wall art, cards, prints, and more. This blog post goes over how to easily add your pricing into the software.
Most of our clients who are having successful sales sessions are pre-designing everything. If you would like to do this, be sure to design everything from albums to wall art options to parent albums before the sales session.
Two Screens or One?
Fundy Designer gives you the ability to present to your clients using our client window, while keeping the main window for yourself only. Some of our users prefer to do this and some prefer to show everything to their clients. We will go over both techniques here.

Single Window Technique
When working in a single window simply share your screen on your projector, monitor or TV. If you’re working remotely over Skype or Zoom, you would click the screenshare option so your client can see your screen.
Next, you’ll want to open the Image Browser. Click this button in the bottom right of the software, or you can double click on any photo in Designer view.
To return to the view in the other window, click this icon.
Pro Tip – if you want to toggle between both windows without closing one, use the command+~ (mac) or ctrl+~ (windows). This will allow you to move between the two windows easily.
Using Two Screens
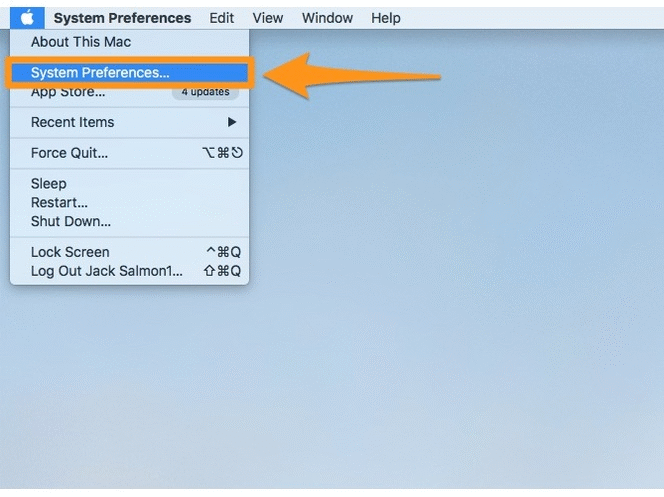
If you are using a TV, projector or second monitor, first go to your computer settings. If you are on a Mac, uncheck the “mirror display” options.
If you are on a Windows computer, you’ll want to use the “Extend Display” option.

Next, open the second window by double clicking on a photo or clicking this icon.
Finally, move that window to your second monitor, TV or projector screen.

Now you can move back and forth between controlling your view and controlling your client’s view.
The Different Client Views
When you open the second window, there are 4 different views, as well as the orders tab.
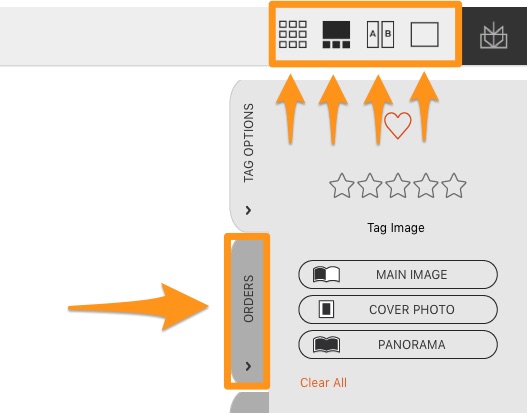
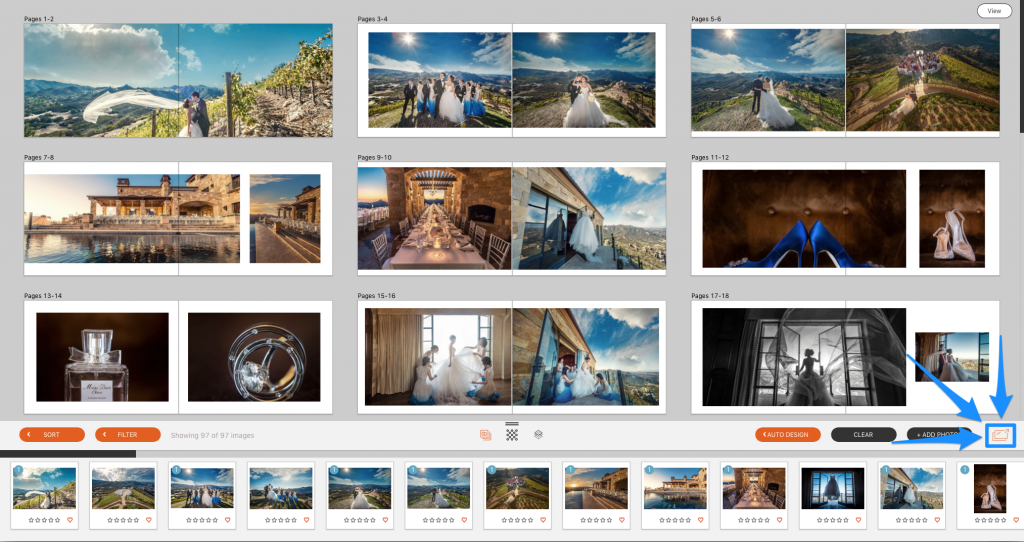
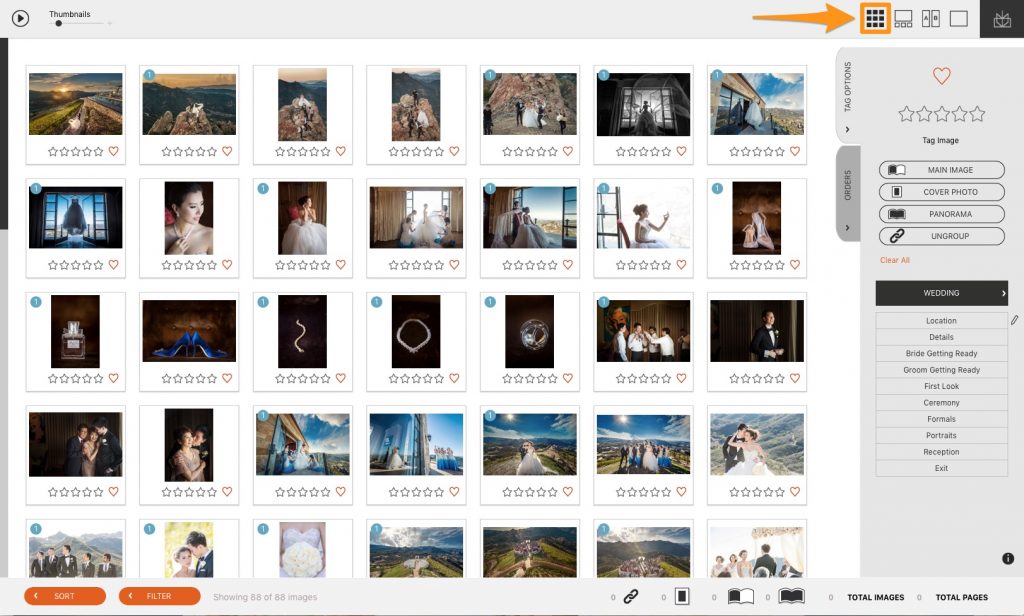
The first view is the Grid View, which shows a Grid of photos. You can quickly go to Grid view by clicking this icon or by using the keyboard shortcut shift+z.
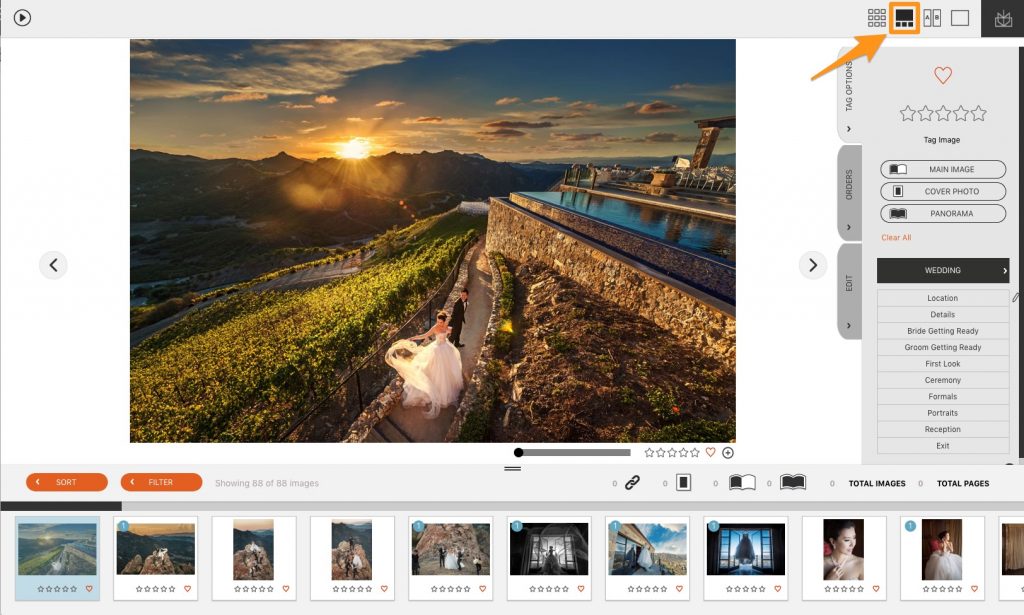
Filmstrip View
The next view is Filmstrip View. Here you can see one individual photo large and the rest of the photos below. To see larger thumbnails, you can drag the thumbnail bar up and down for better views. To access this view, you can click this icon or use the keyboard shortcut SHIFT+x.
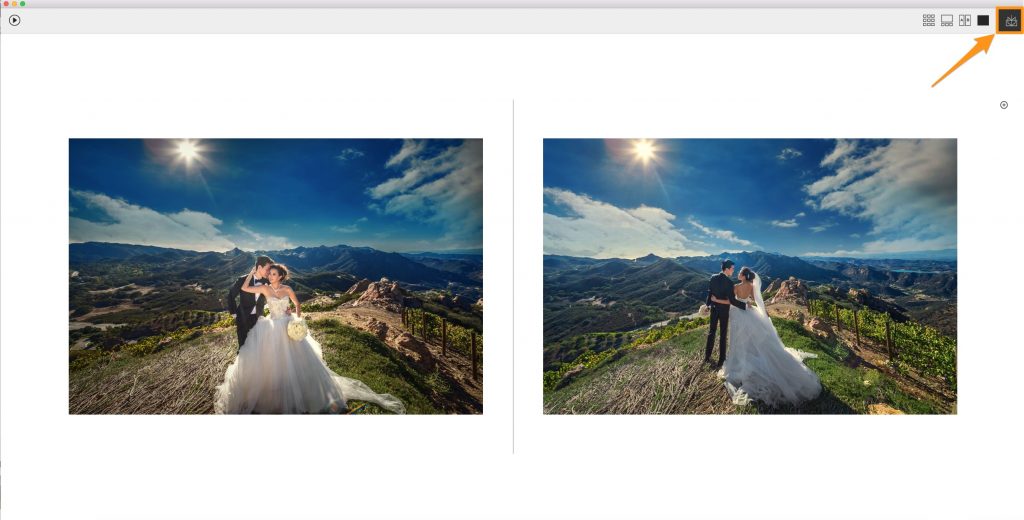
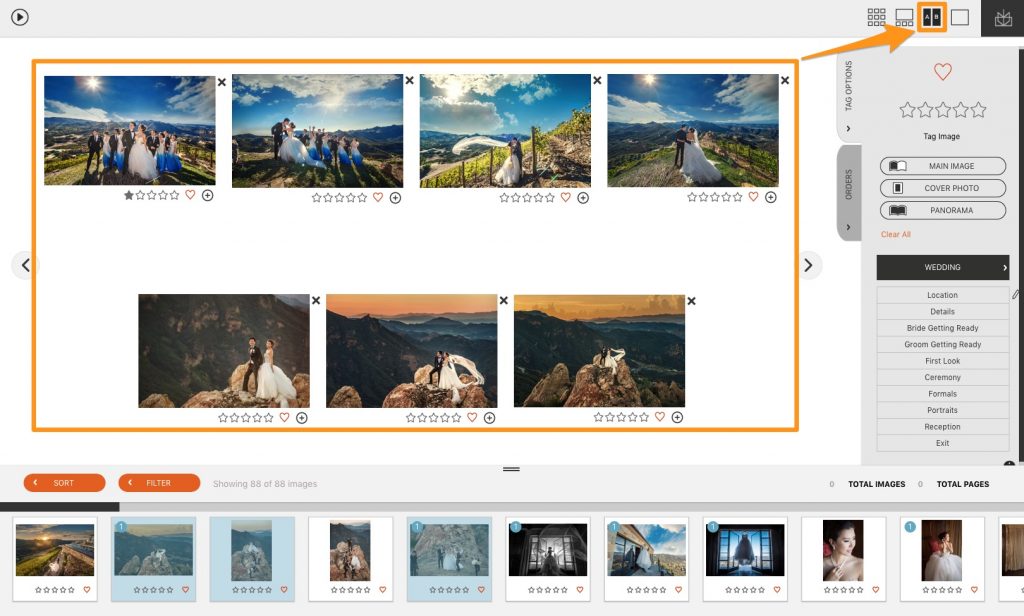
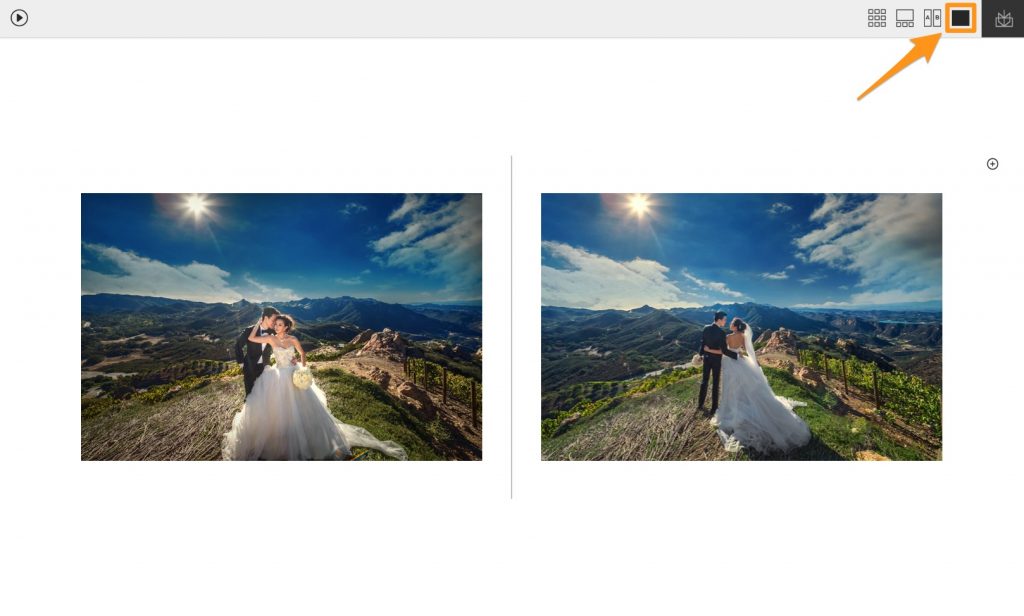
Compare View
Using the command key (Mac) or the ctrl key (Windows) you can select multiple photos to display to your clients. Most photographers will use this feature to help clients choose between similar photos. To access this view, click on this icon or use the keyboard shortcut SHIFT+c.
Design View
This view displays a clutter-free view of whatever is in your design window, whether it be an album spread, a wall gallery or a card design. To access this view, use the keyboard shortcut SHIFT+v or this icon:
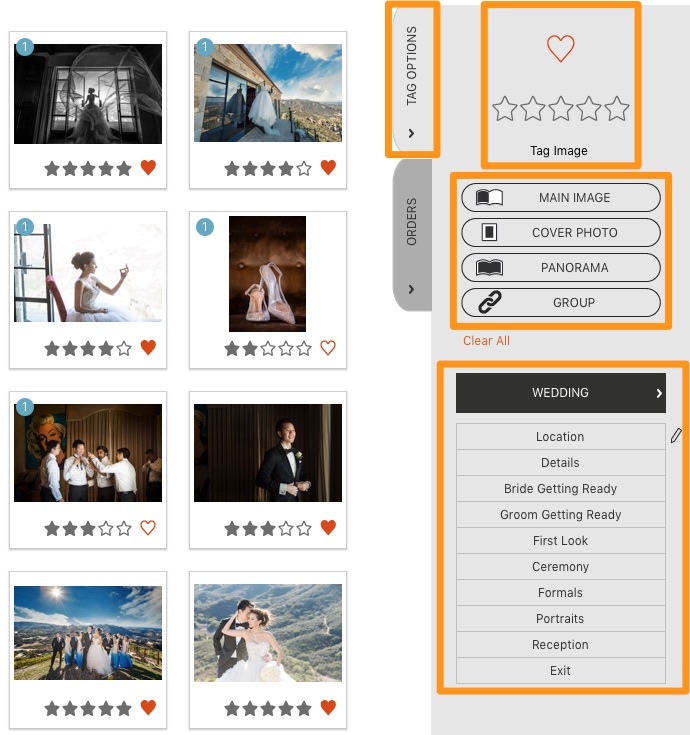
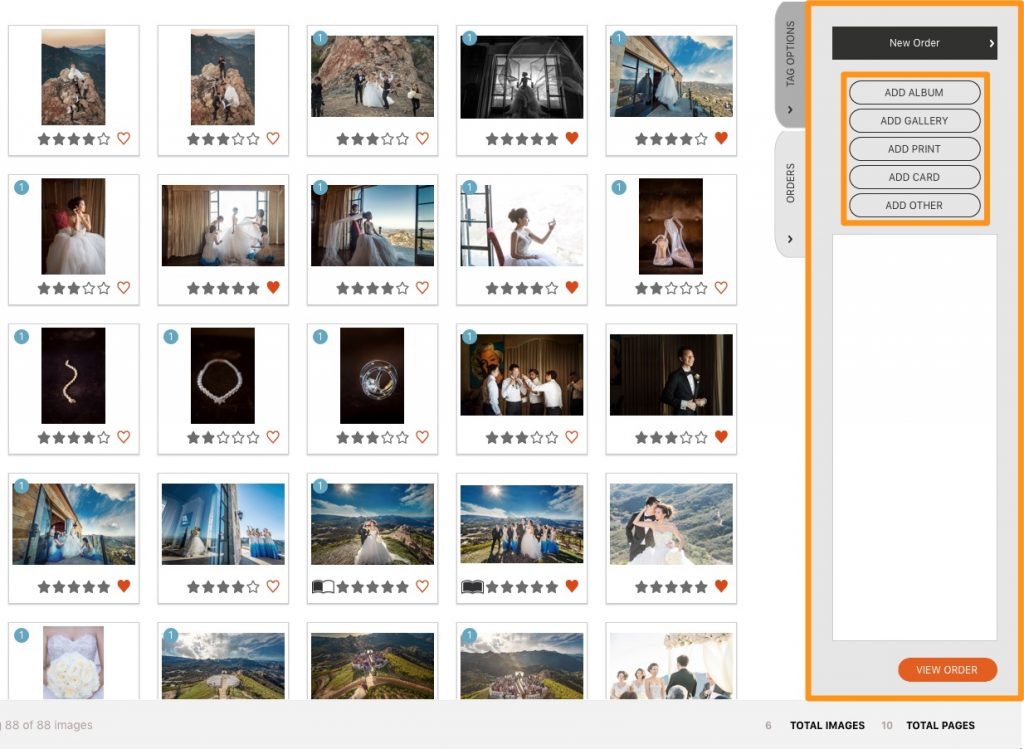
Tagging Photos
Most photographers will use either the heart icon or stars to tag photos in an IPS session. You can also use keywords, for more information on keywords, see this post on Lightroom. To tag a photo with a heart or stars, you can click on any icon. Most photographers will use keyboard shortcuts. To tag a photo with stars, use the 1-5 keys. To tag a photo with hearts you can use the “f” key. To quickly go through a batch of photos with your clients, you can use the up arrow and the down arrow. The up arrow will tag a photo with the heart and move to the next photo. The down arrow will remove a heart or leave it empty and move to the next photo.
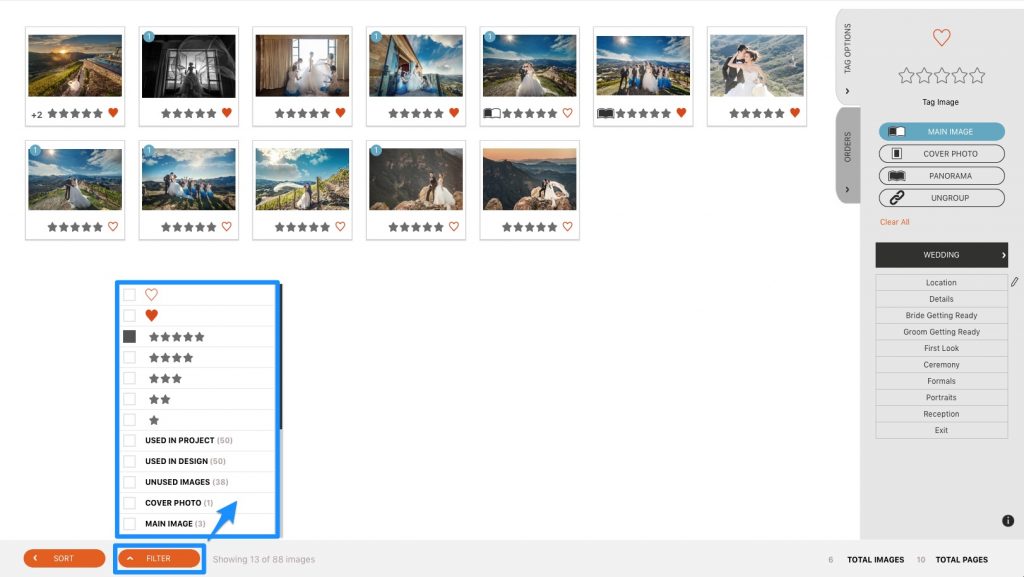
Filtering Photos
After tagging photos with your clients to narrow down to their favorites, you can narrow down to just their favorite photos. Using the Filter menu, you can filter down to just the photos you would like.
The Orders Tab
In the client window, you’ll find the Orders Tab. This is where you can add items to your client order, check their orders, remove items and create separate orders. You can also add items to an order in the photographer’s view, which we will cover.
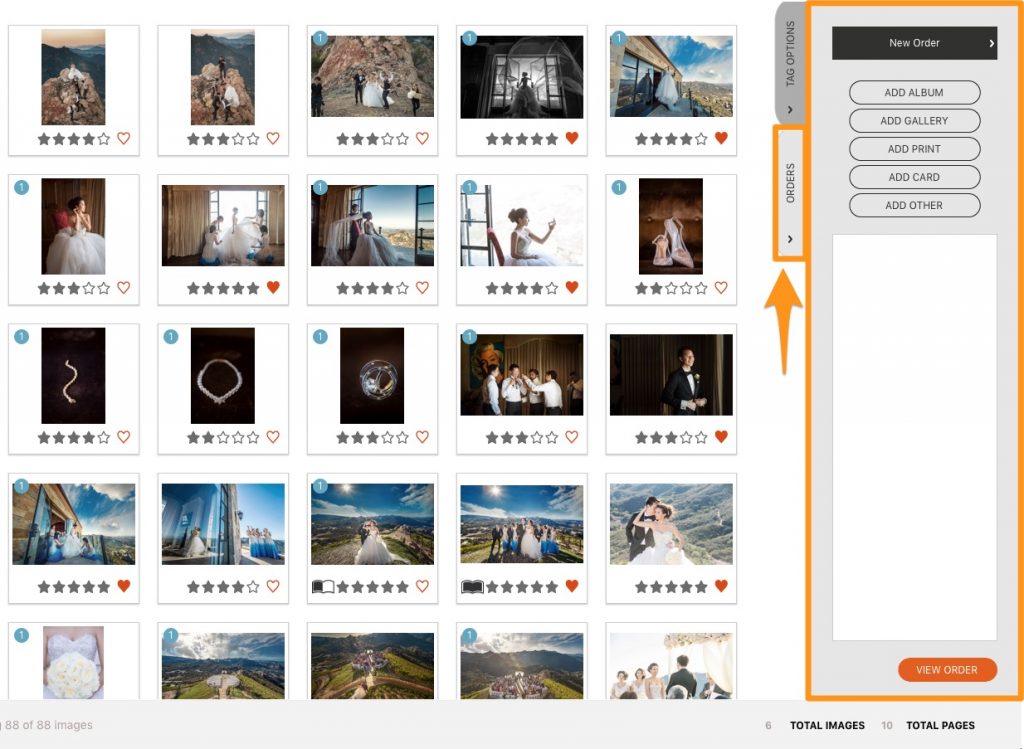
Adding Items to Orders
To add an item to an order in the client window, simply click on the corresponding button. If you’ve added your pricing to the backend, it will auto display or auto calculate any pricing. To add your pricing, see this blog post.
In the photographers design view, use the menu to add an item to a client order. You’ll see the options are the same as in the orders tab.
Creating Additional Orders
If you have parents of the bride and groom, or grandparents of a family shoot that want their own ordering session, you can create a separate order right in the same project.
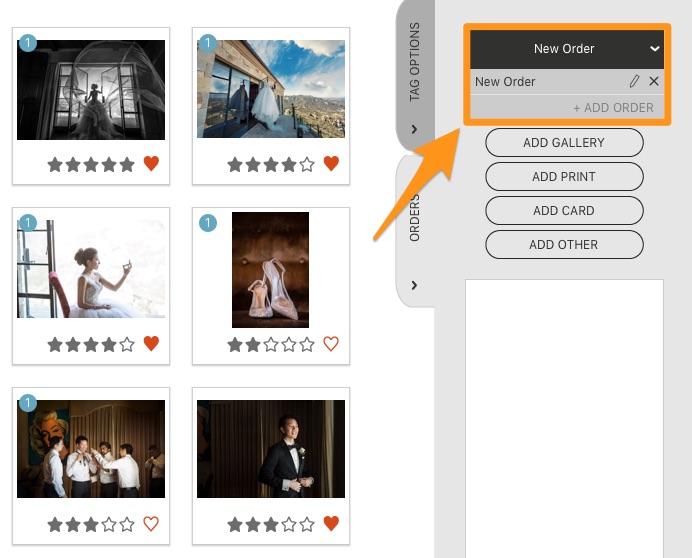
Use this drop down to create a second order and name it appropriately. This makes sure that you have just one project per shoot and everything is stored in it.
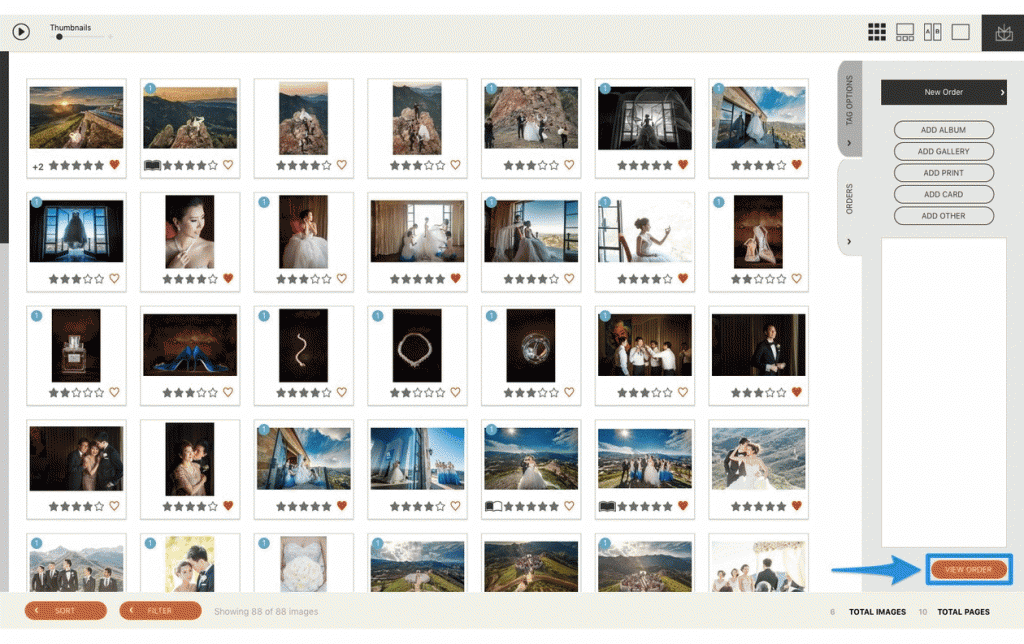
Viewing an Order
To view an order and edit anything it, click the View Order button.
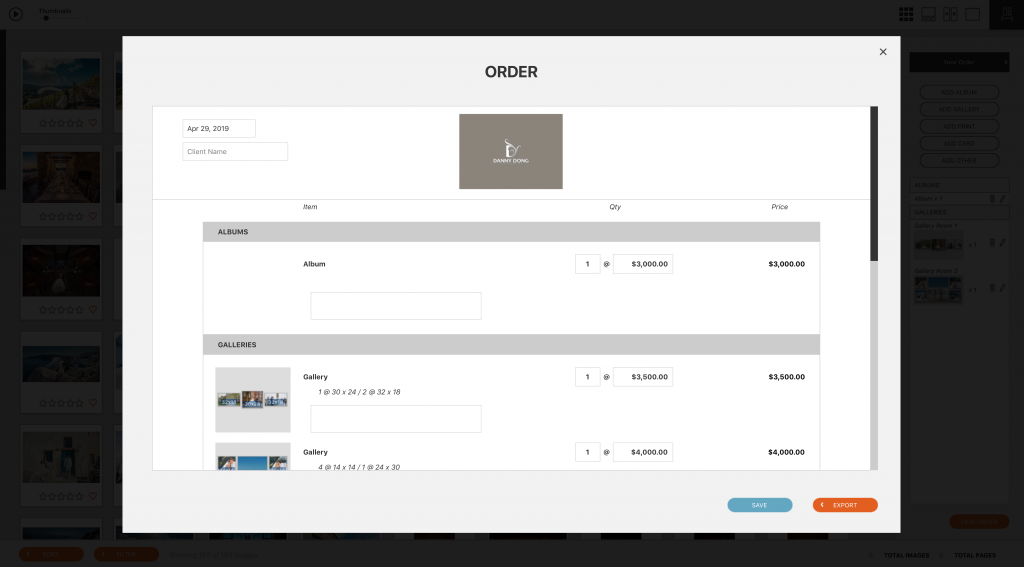
Remember that if you don’t see your logo here or want to change the default, that is under the client pricing setup.
Summary
This has been a brief overview on how to set up an IPS session and use all of the views in Fundy Designer.
To learn how to run an IPS session, see this blog post. To learn how to use the Slideshow feature, see this blog post.
DOWNLOAD THE TRIAL PURCHASE OR UPGRADE
Photos courtesy of Danny Dong Photography


