
In Fundy Designer, you can set up your album, wall art, print pricing and more for big profits. Once set up, creating client IPS orders is a breeze. When you sell that 80 page album, Fundy Designer will calculate that album total for you on the fly.
The Goal
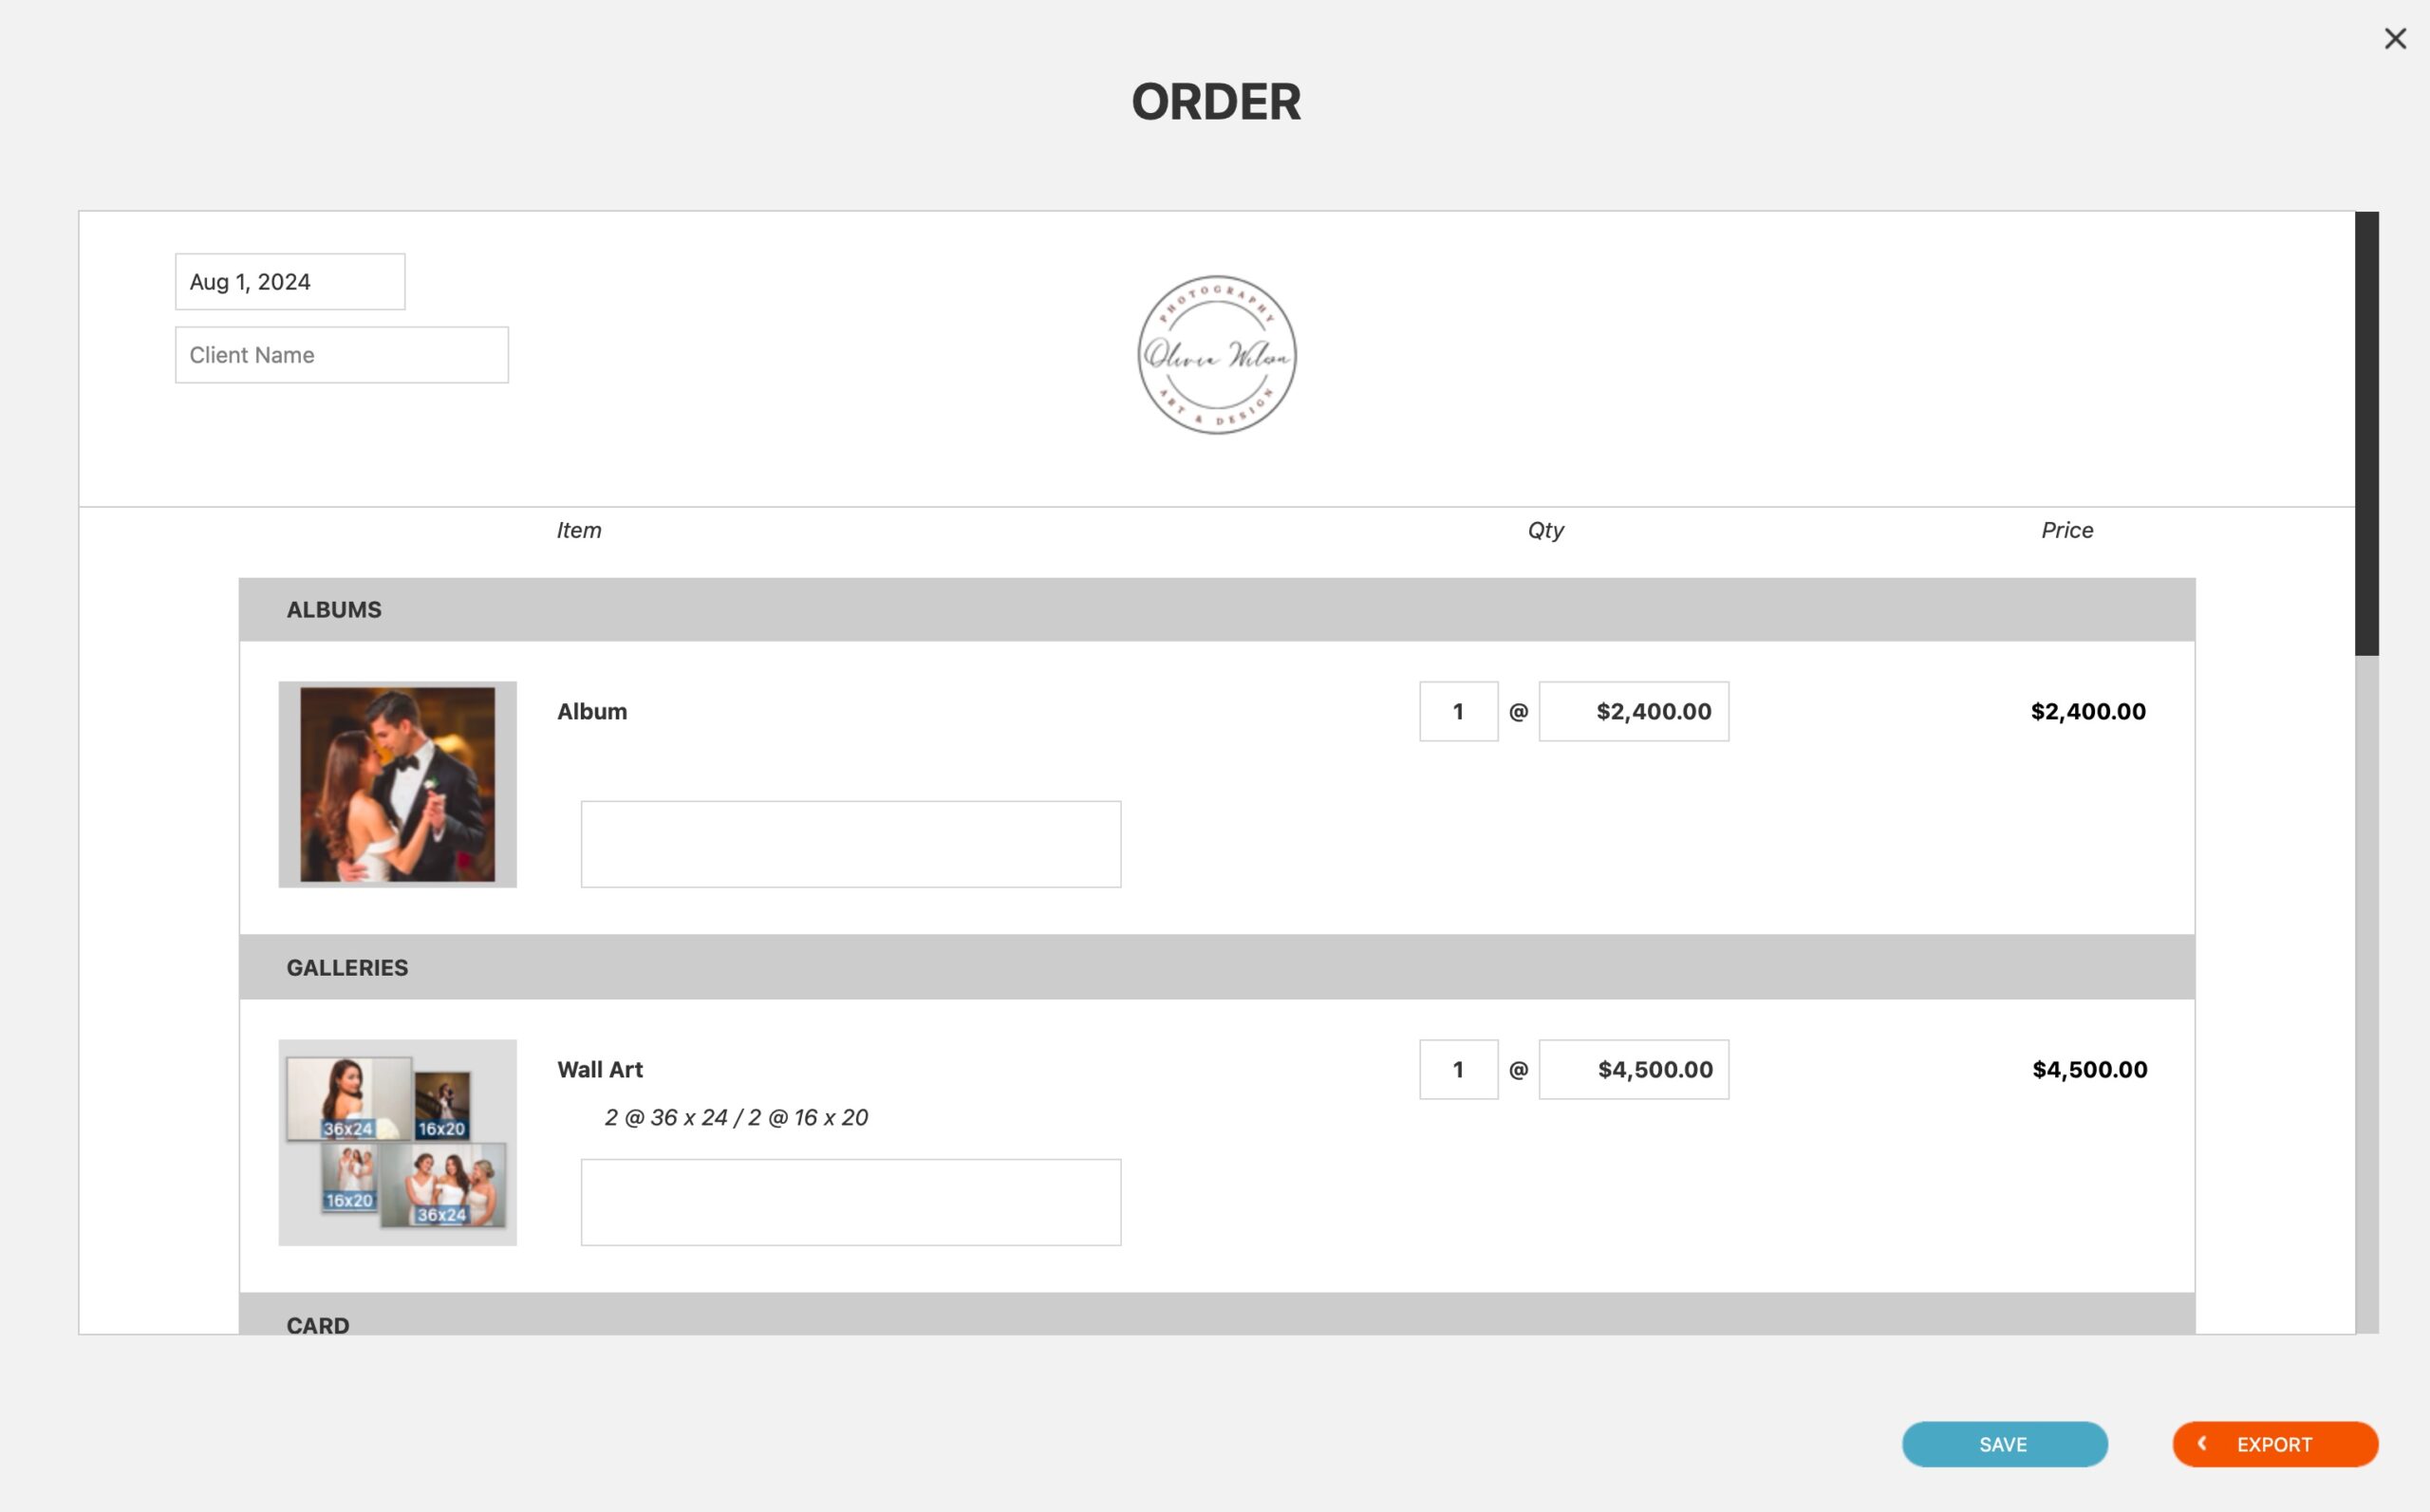
The Goal is to be able to quickly and easily create an order sheet for your clients. After spending just a bit of time inputing your pricing, you’ll be able to create a gorgeous sheet, just like this one.
How and Where?
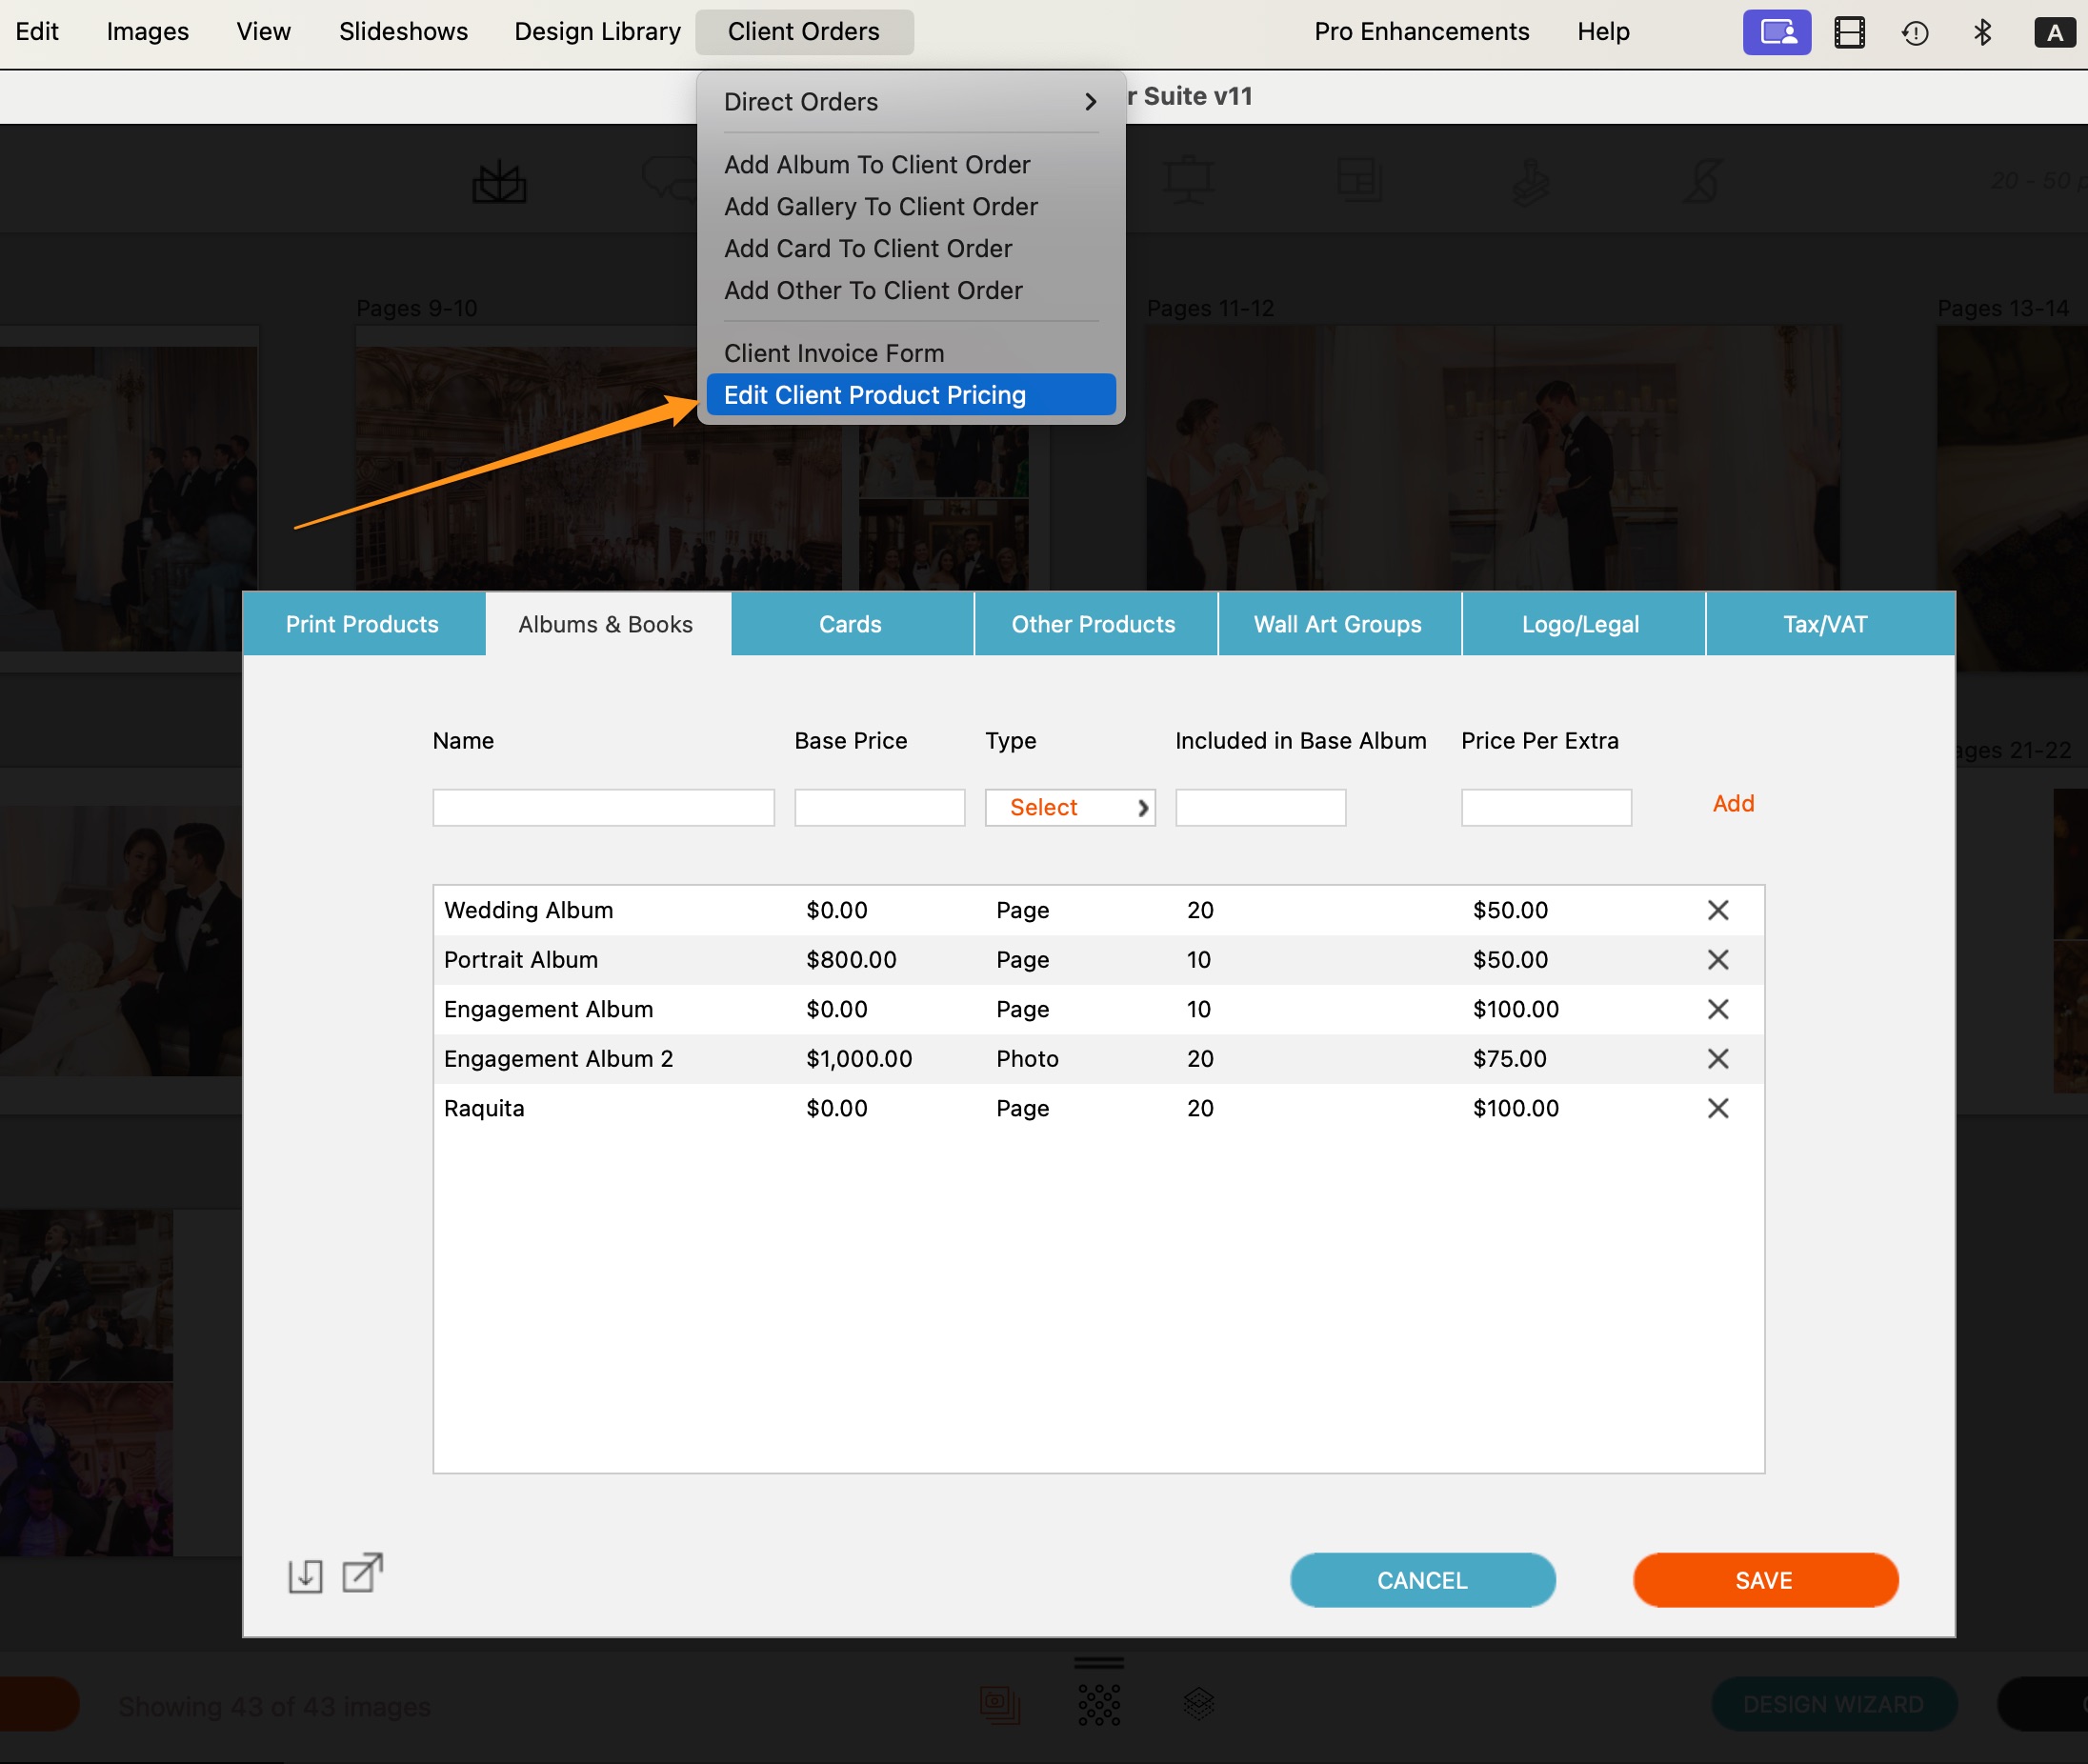
You can set up your print pricing, album pricing, card pricing and more in the client pricing panel.
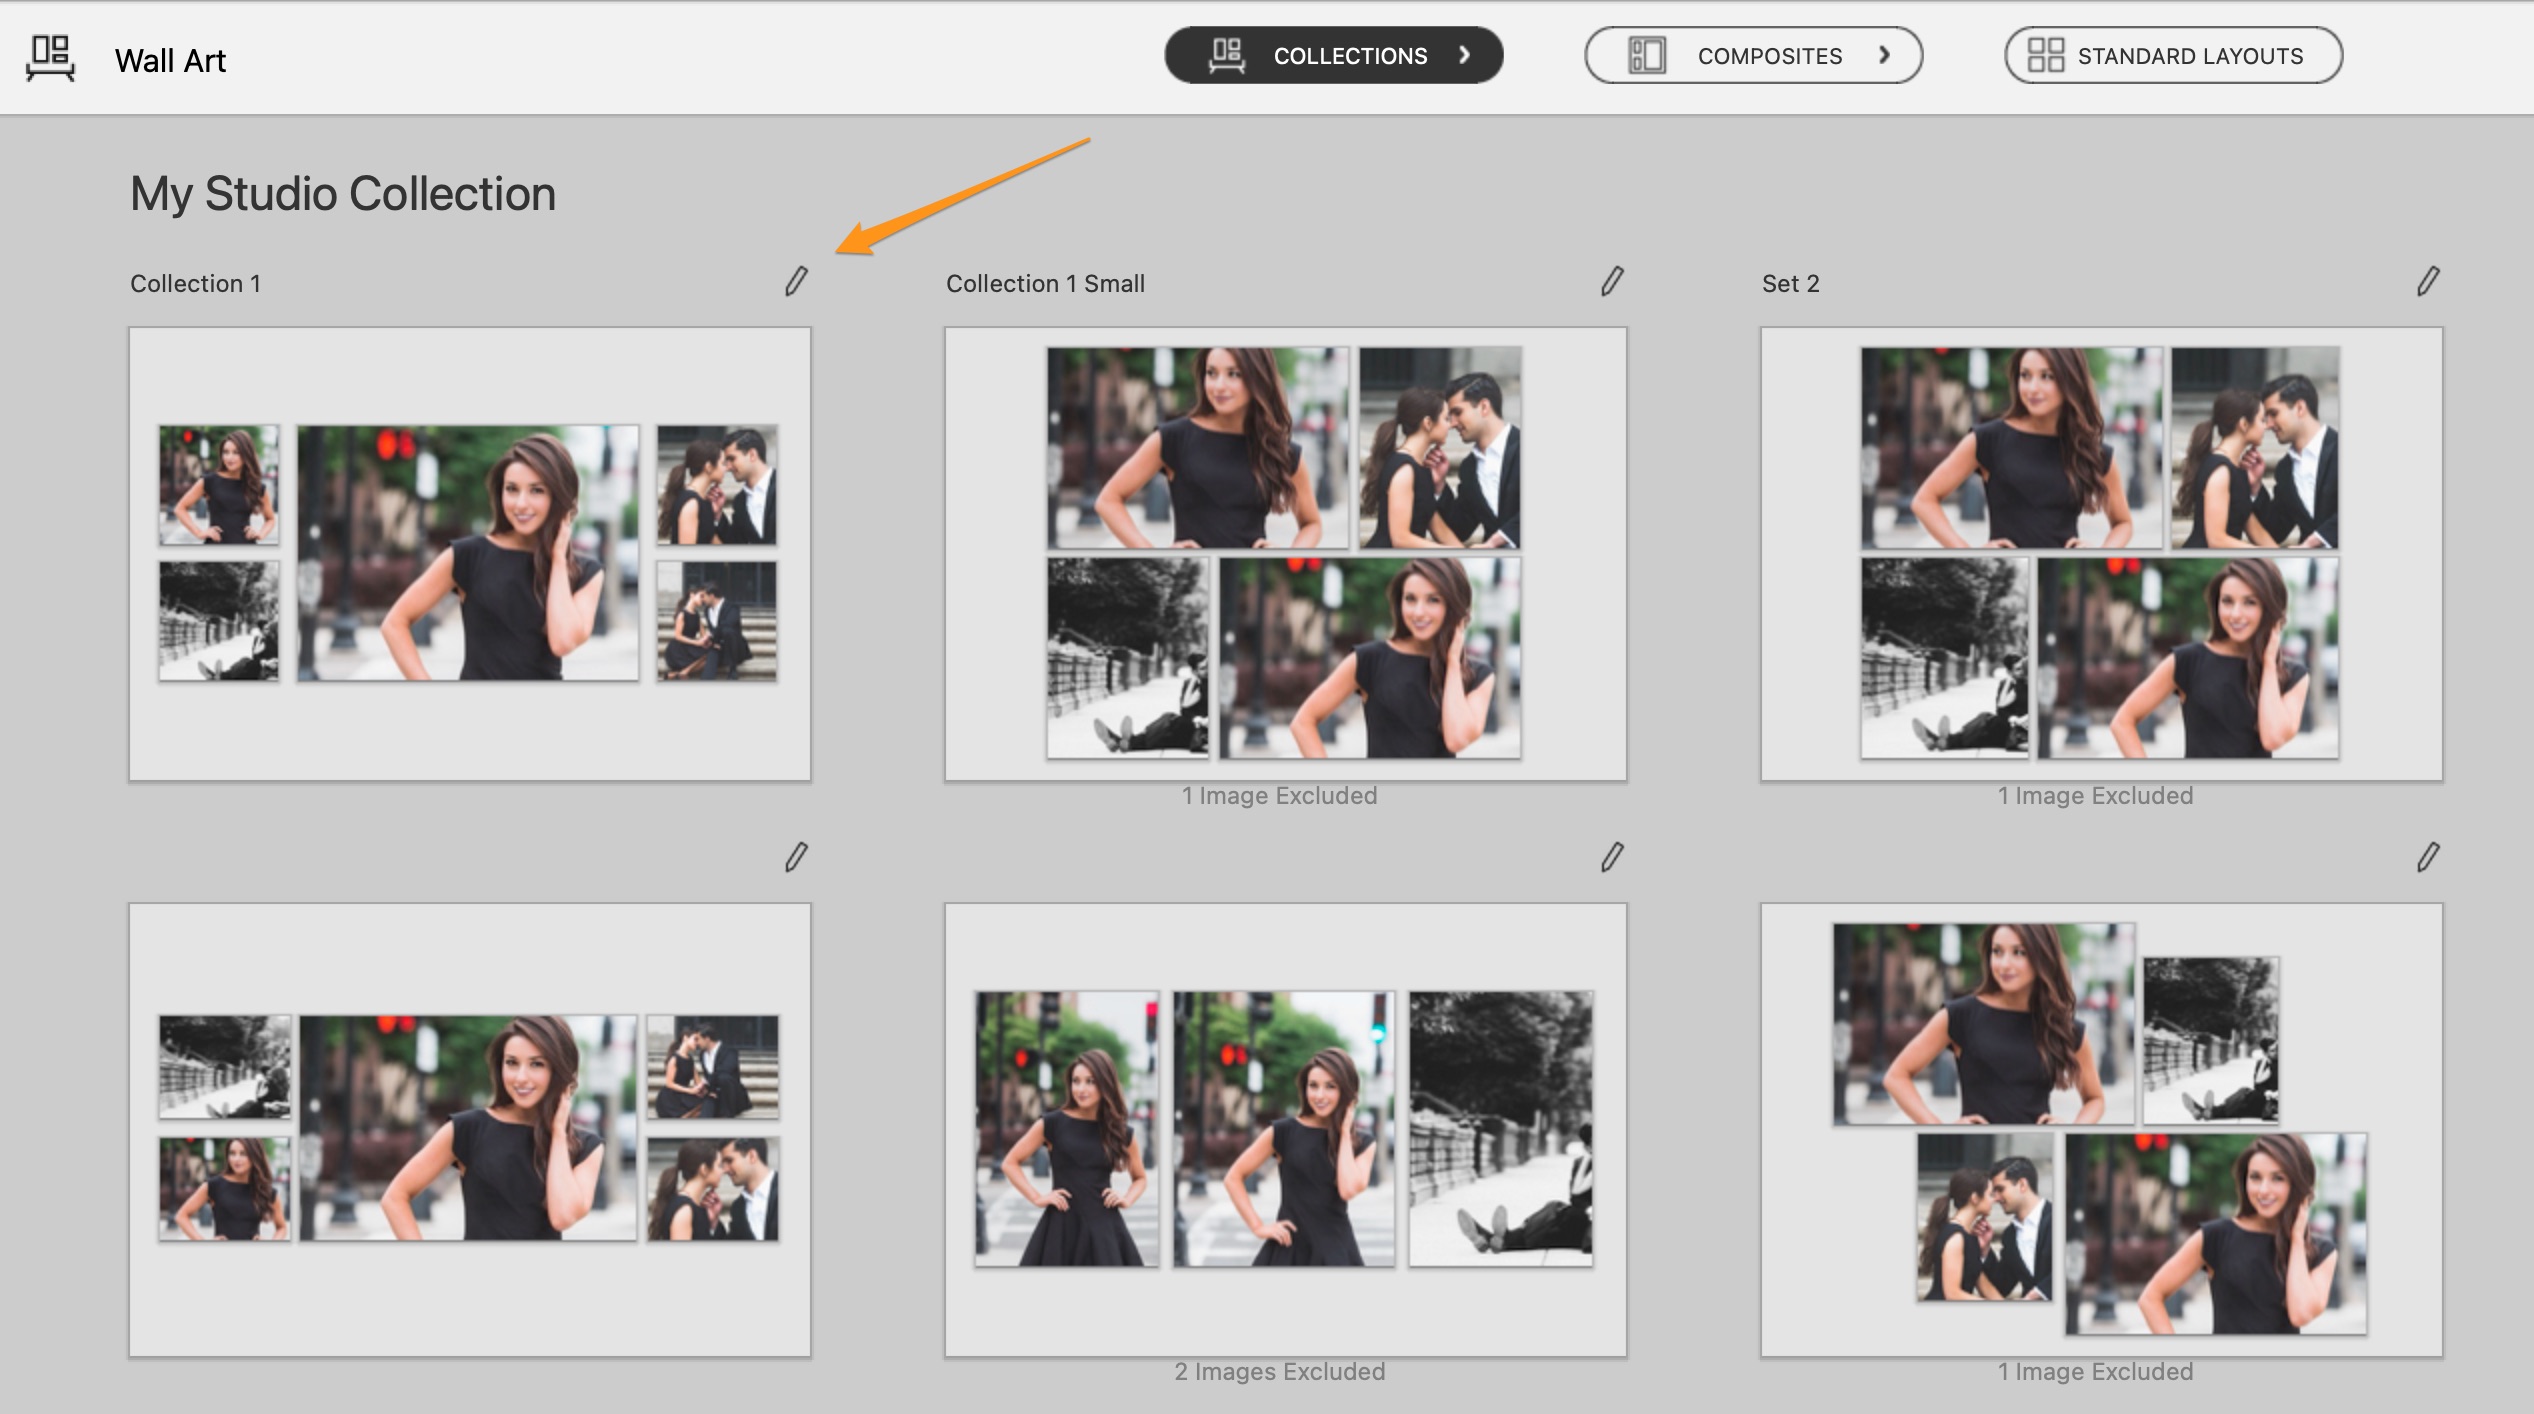
The only exception to this is where you set up your wall art collection pricing. In the Quick Design Picker, just click the edit icon next to the collection you want to name a price.
Need Help Figuring Out How to Price?
We hope that this helps you get up and running on setting up your pricing in Fundy Designer. Need help figuring out what to charge? Download our free pricing calculator here.
Watch Video Tutorial Here:
Ready to set up your pricing? This tutorial walks you through all your pricing set up options step by step. Also, don’t miss our IPS tutorial, right here.
Do it all in Fundy Designer!
New to Fundy Designer? Get started with our free trial! Ready to try the latest version of Fundy Designer? Click here to purchase or upgrade to Fundy Designer v11!