For portrait photographers who do immediate reveals like Jason and Joanne Marino of Imagine photography, Fundy Designer works well. The Marino’s choose to shoot RAW+JPEG and use the JPEGs for the immediate design consultation and the RAWs for final editing and ordering.
Shooting
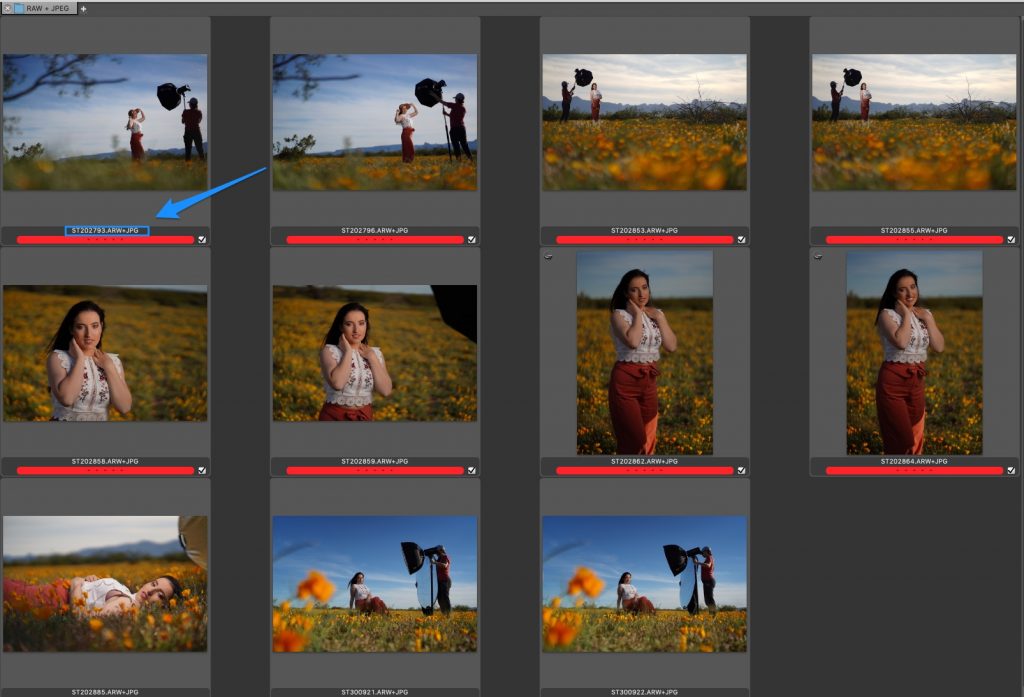
First, set up your camera to shoot RAW + JPEG. While it doesn’t matter the size of the JPEG you choose, we recommend medium or higher.
Important
It is important to remember that the JPEGs and the RAW files MUST have the same names throughout your workflow. So either set your naming in your camera or bulk rename RAW and JPEGs together on import.
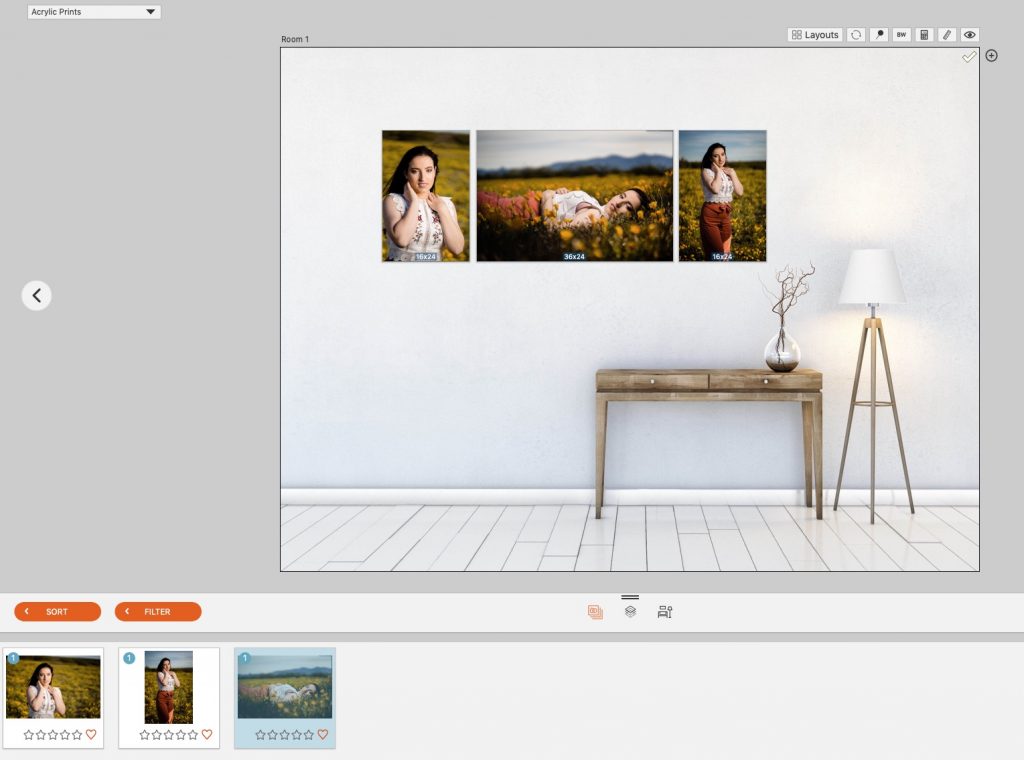
Import the JPEGs
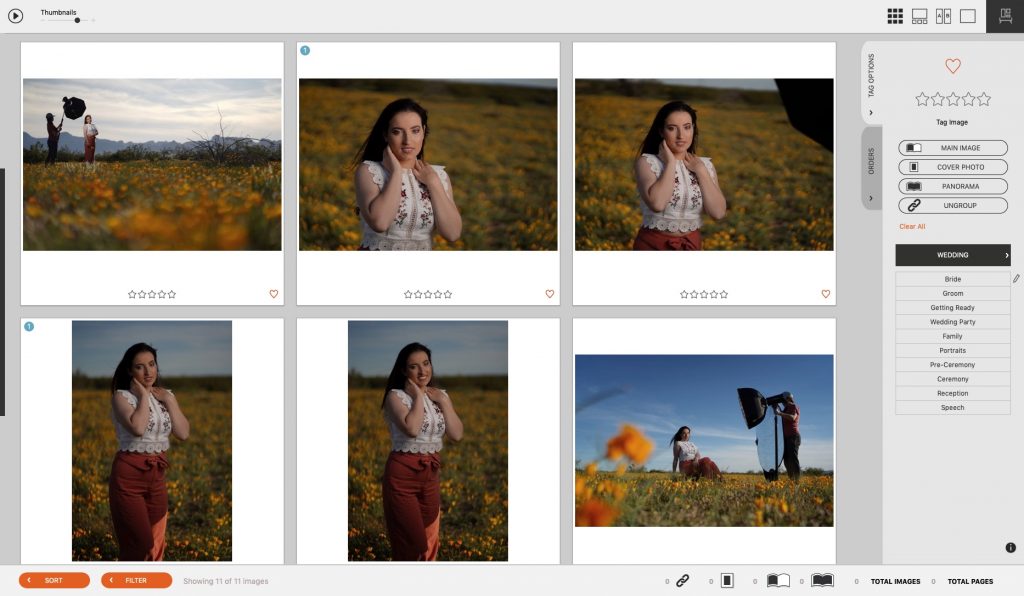
First step is to import the JPEG files into Fundy Designer and then proceed to conduct your design consultation or IPS session. Here is a blog post on how to run an IPS session.
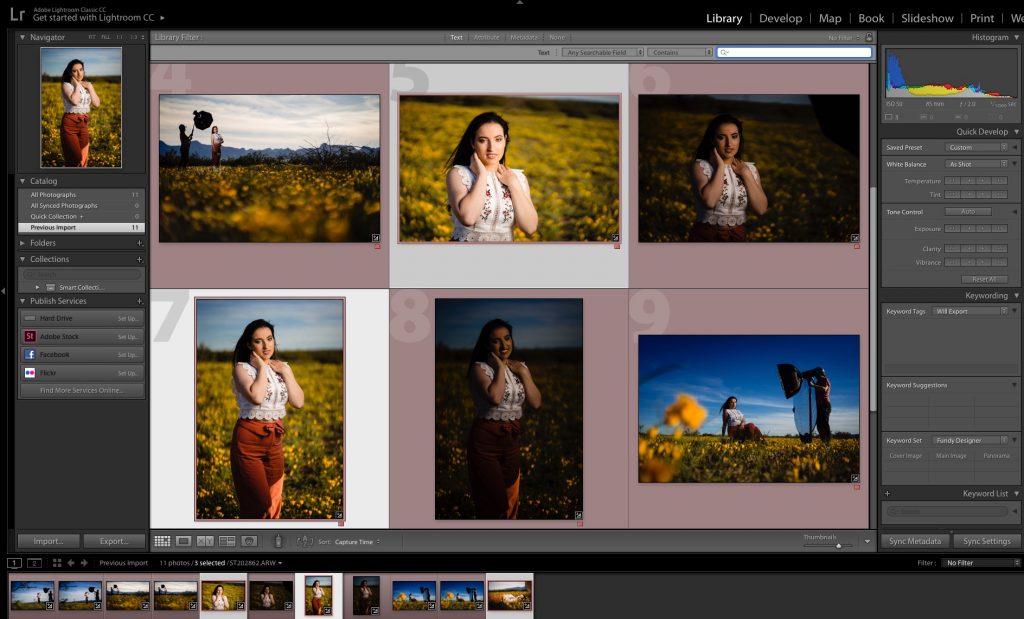
Import RAWs into Lightroom
At this point you’ll want to make sure the RAW files are imported into Lightroom. Make sure the RAW files and the corresponding JPEG files have the same name.
Get Lightroom List
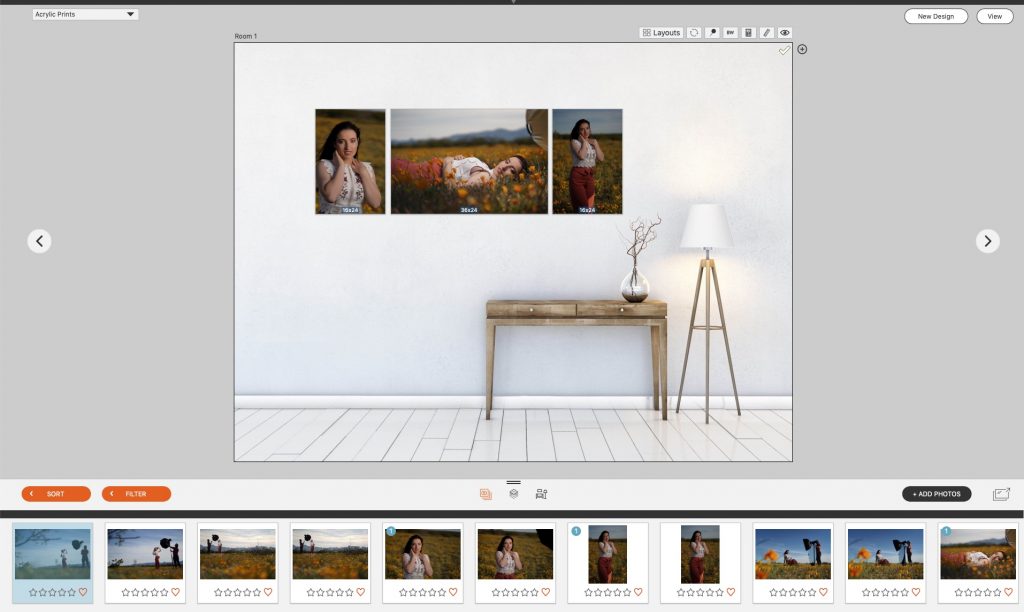
For example, let’s say you sold this wall collection in your IPS. We now need to go back into Lightroom and ONLY retouch these photos.
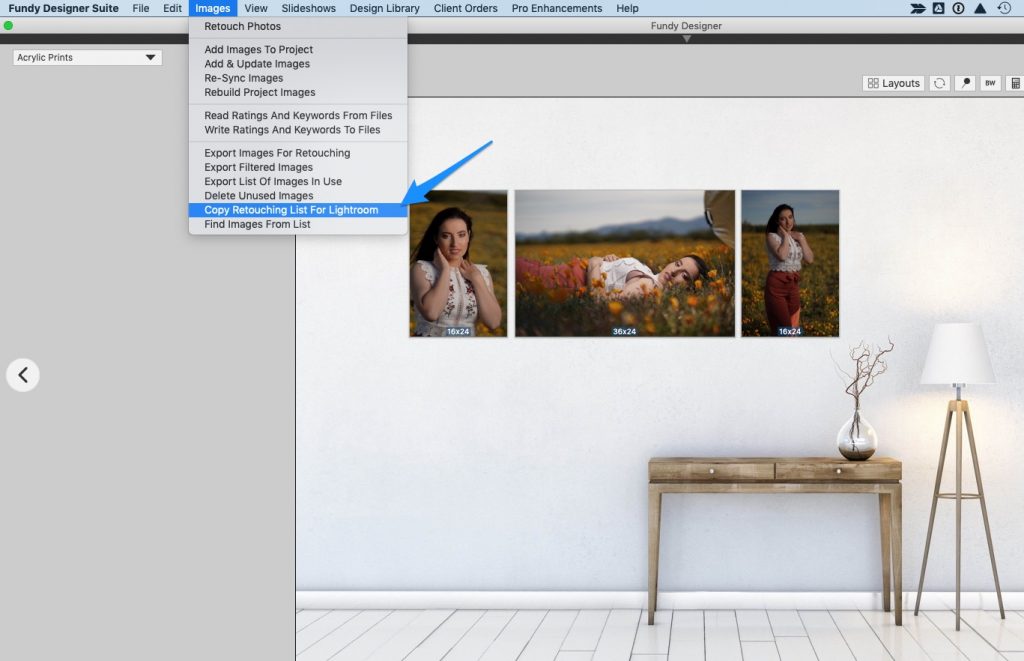
Let’s get the list of images that the client ordered so you can edit just those in Lightroom. Under the Image menu, choose Copy Retouching List For Lightroom.
Now, copy that list and open up Lightroom.
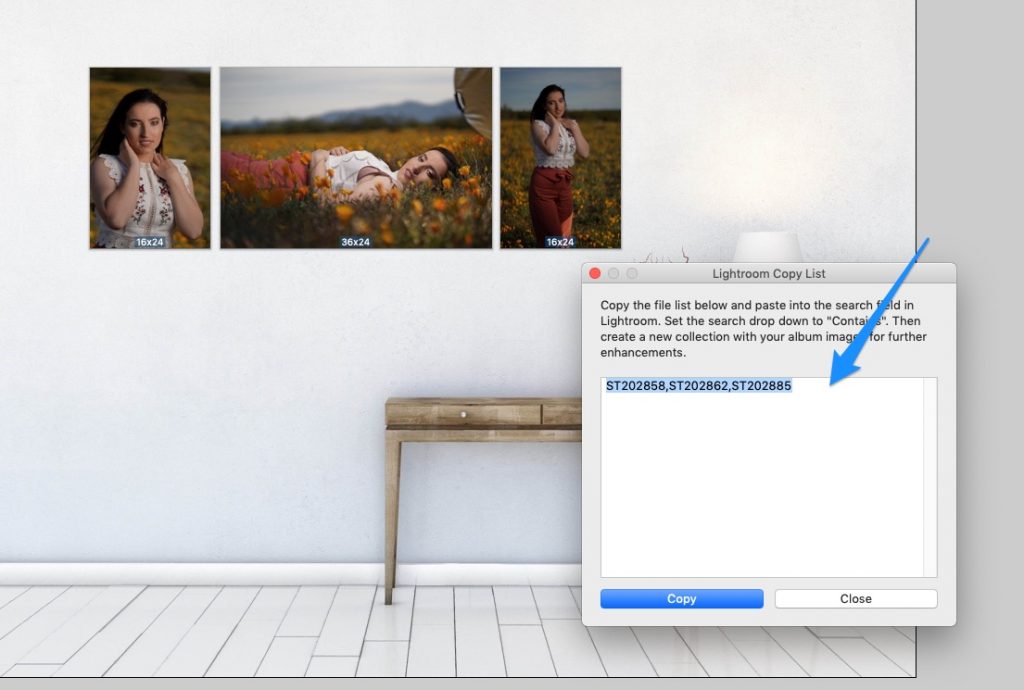
Under the Library menu in Lightroom choose Find. Be sure to change the search term to “Contains” from the default “Contains All.” Paste in your list and Lightroom will find just those photos.

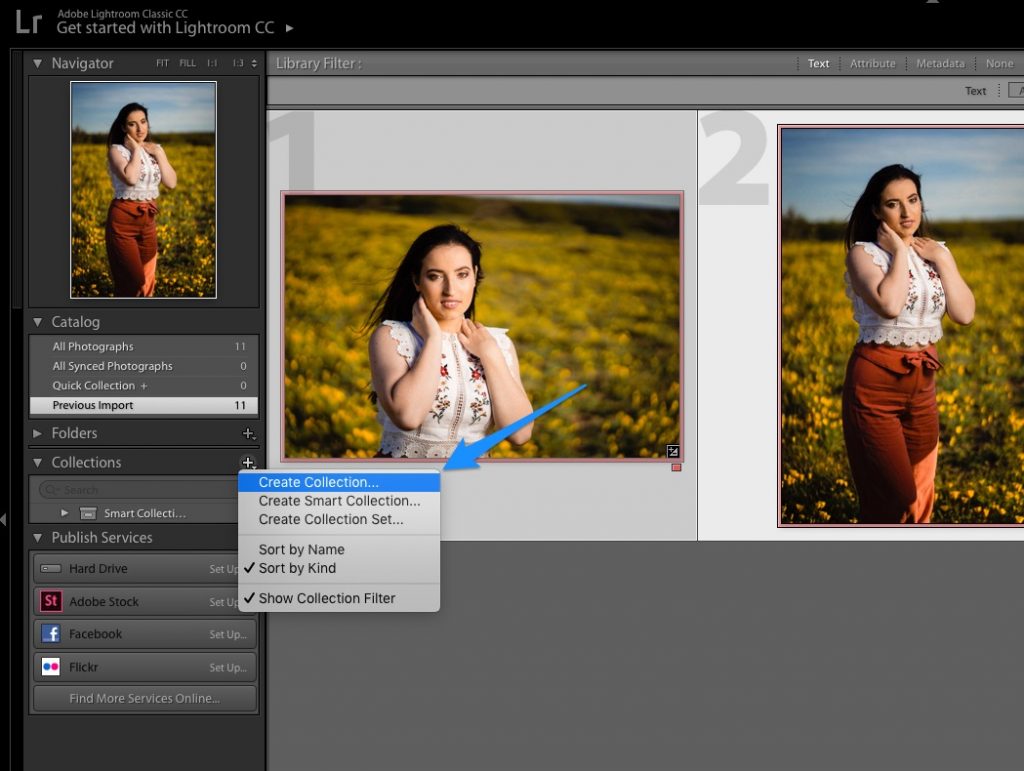
Create a Collection
To make your workflow easier, we recommend creating a collection in Lightroom with just these photos.
Edit and Export
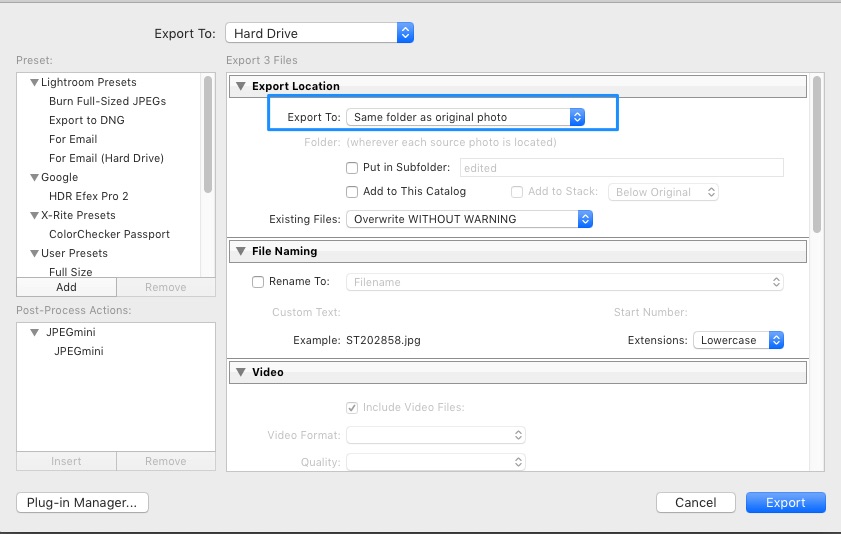
After you finish editing the RAW photos, export the JPEGs into the same folder or a new folder.
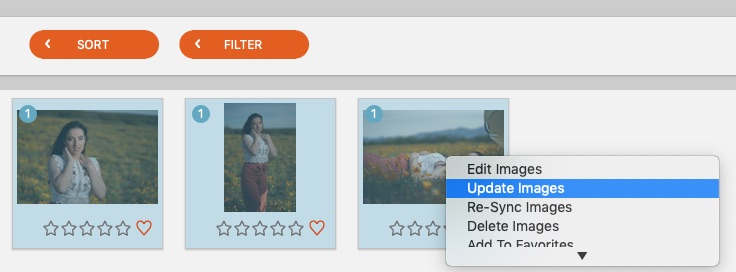
Now choose Images > Update Images to refresh the look of the images (Use Images>Re-sync if the JPEGs are in a different folder.
Export and Order
Now that Fundy Designer is synced to the newly edited images, you can export or order your designs. Note that if you applied Perfectly Clear to your original JPEGs, those same Perfectly Clear setons will apply to the new JPEGs so make sure you give them a look over before ordering. For more information on exporting and ordering, see this blog post.