If you are successfully shooting for the album, storyboarding is like magic in a bottle. Being able to do a rough outline of your album and then hit the auto design, is a huge time saver. In this blog post I’ll show you how to be in full control of the auto design.
For those of you who have seen my CreativeLive segment on Shooting for the Story, you know how much easier it is to design and album when we shoot for the album. All images © Danny Dong Photography.
Three Core Fundamental Designs
In photo design, whether you’re designing an album, a Starbucks ad or a fine art book, there are three core designs: the panorama across two pages, the main and supporting image and the collections of equals. While there are variations on this theme, all album designs (and even wall art designs) fall under these categories.
Three core design types
Here are some examples:
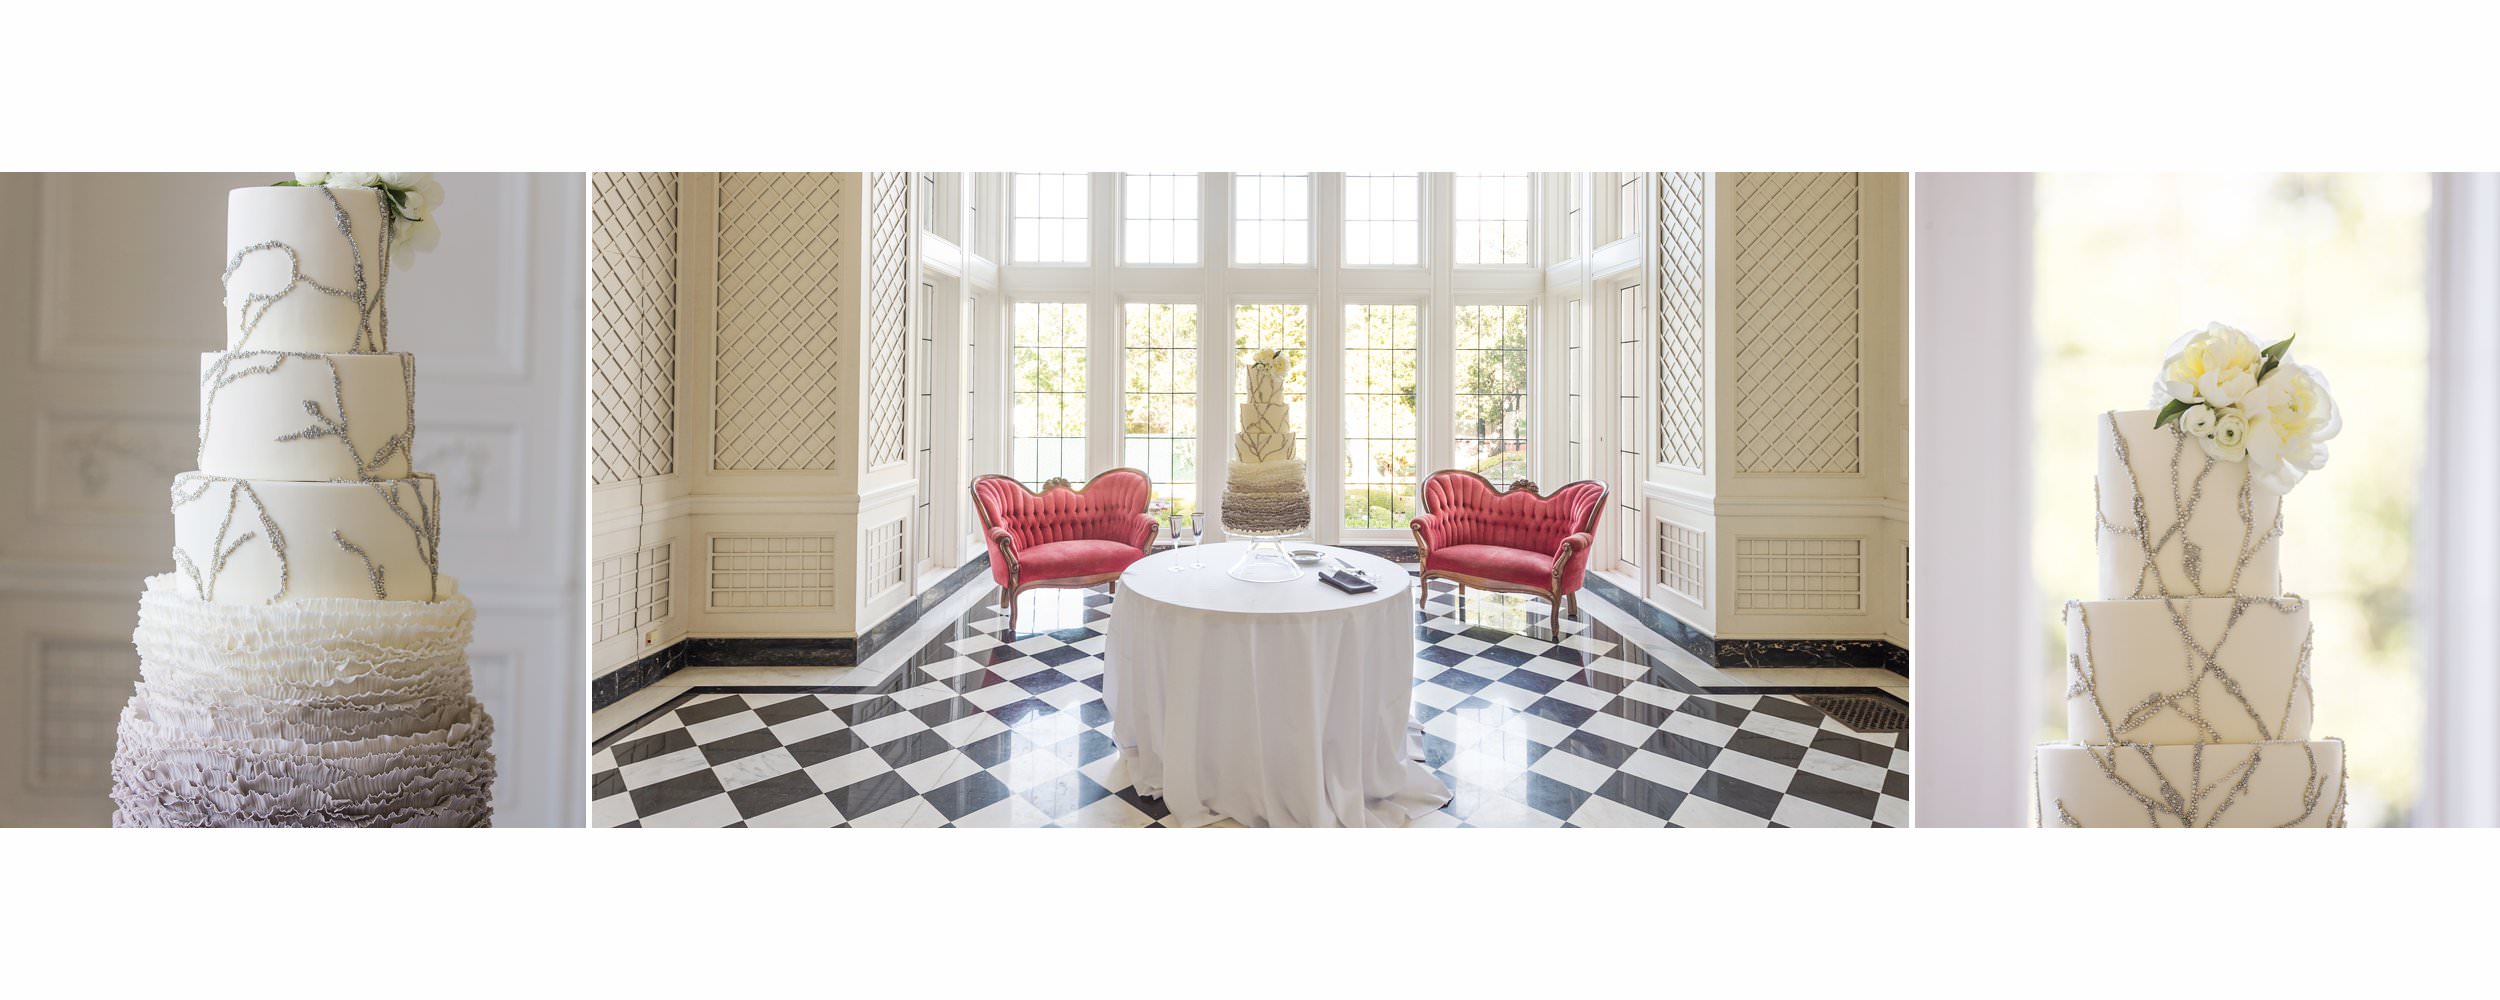
The Hero Shot or Panorama


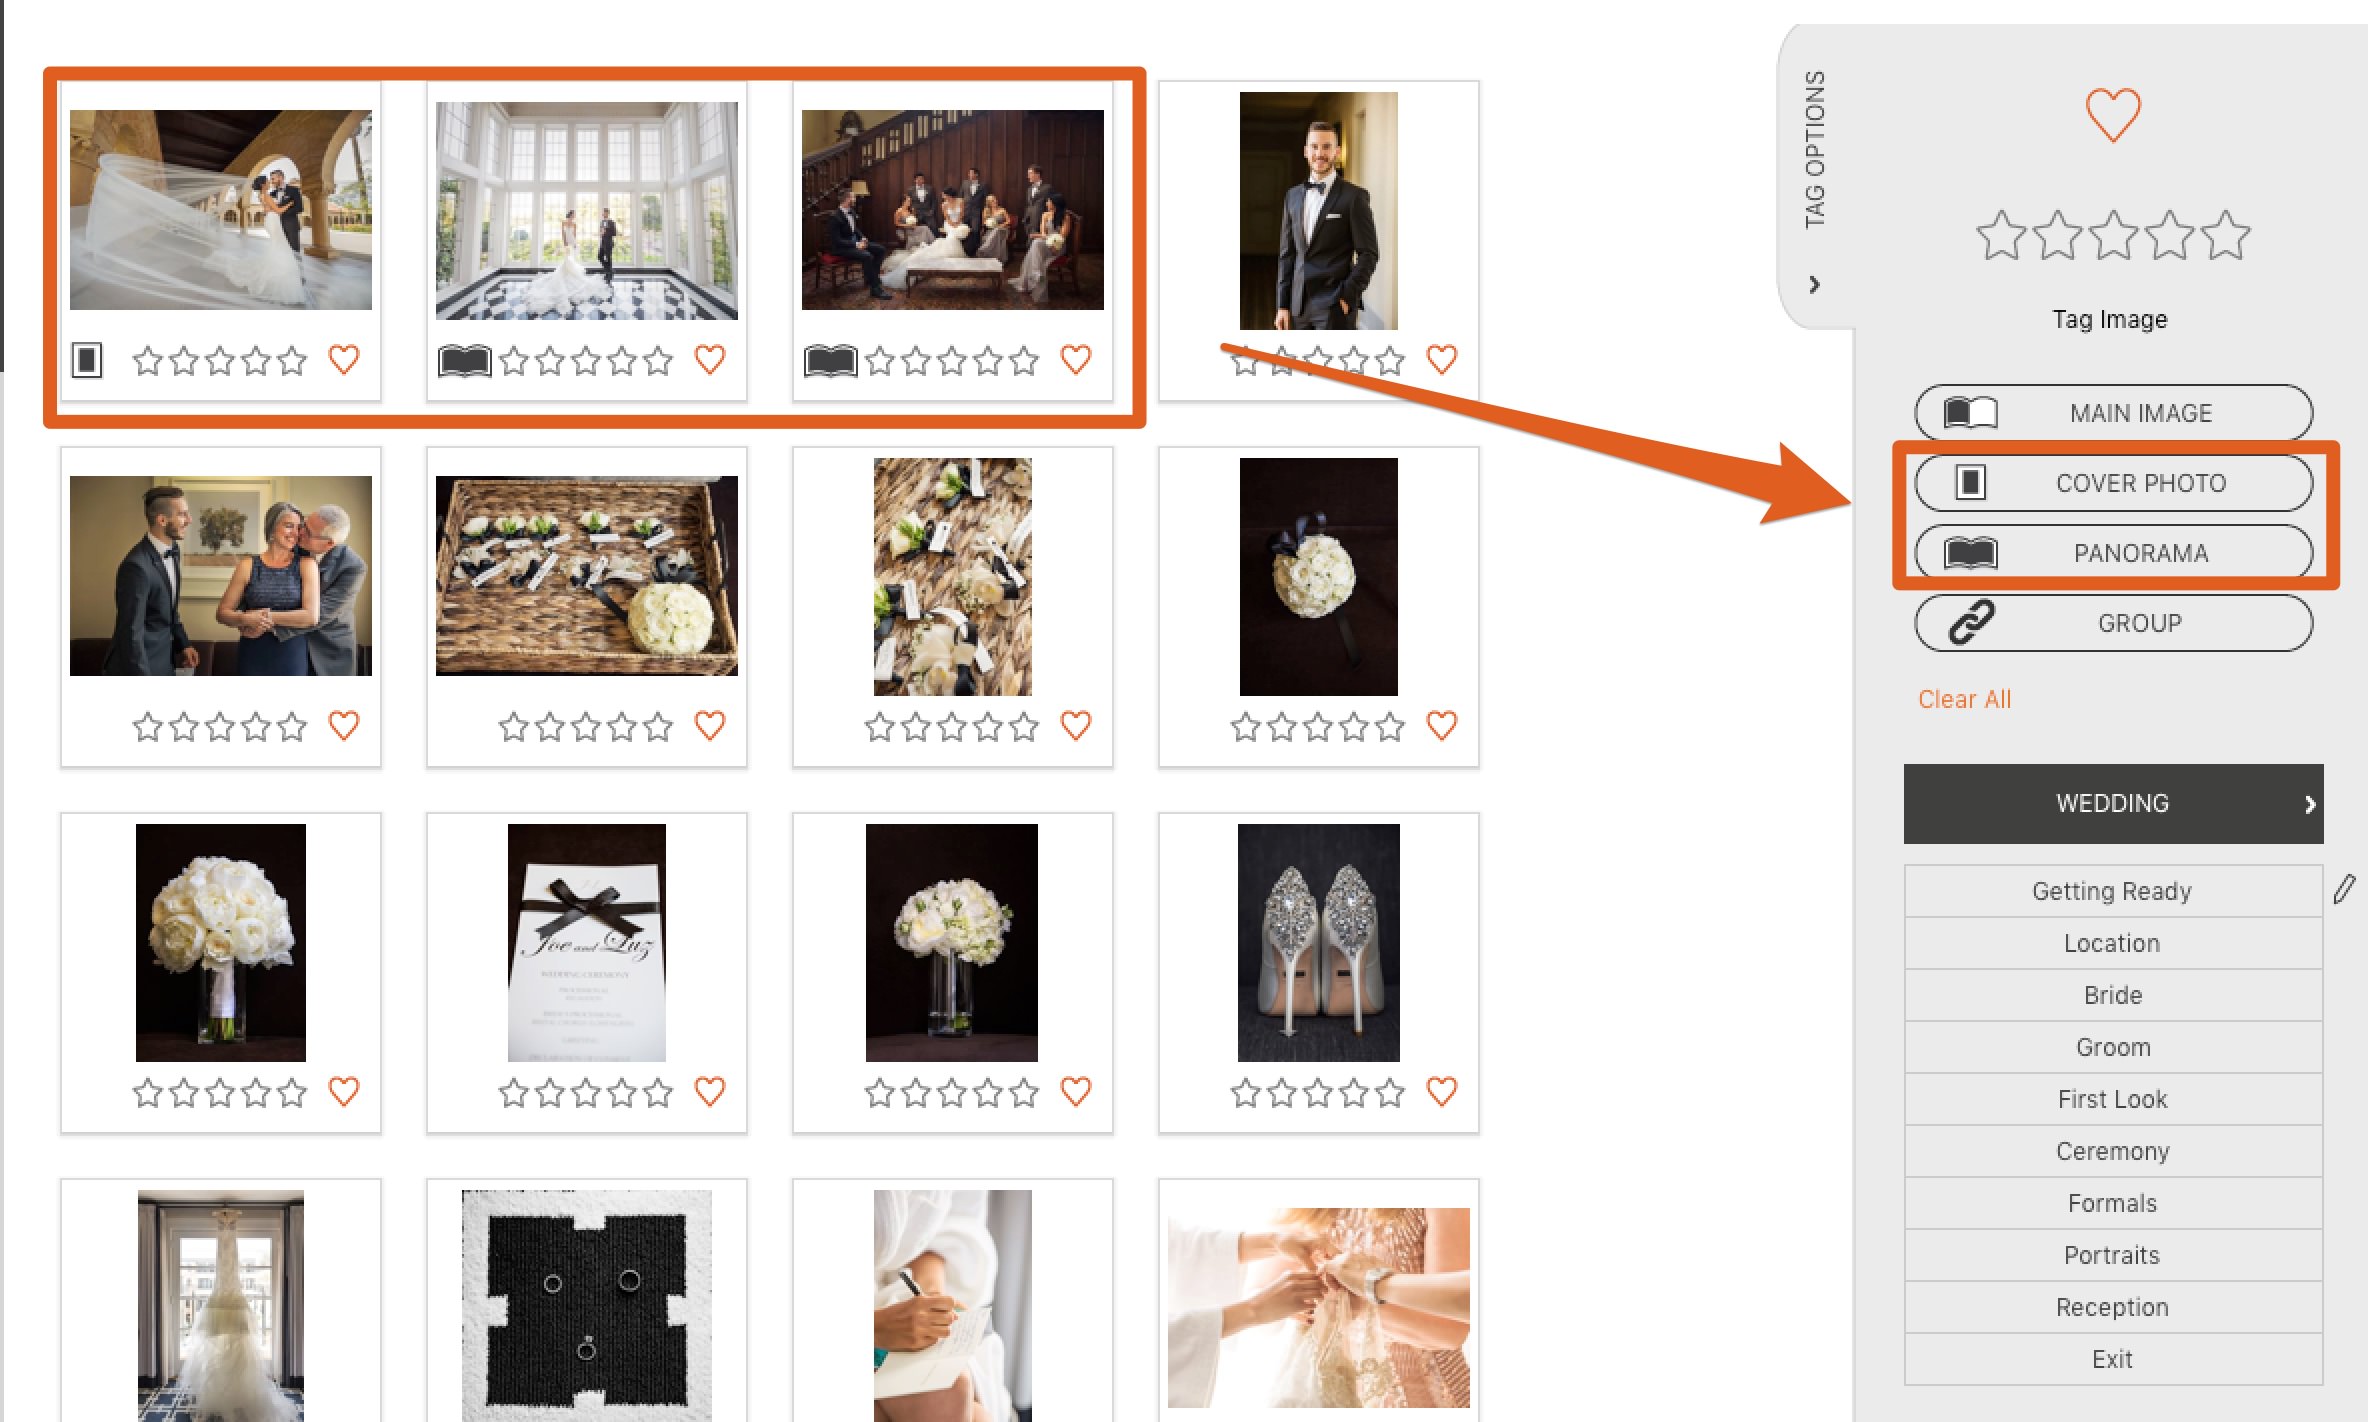
For a hero shot, this is one photo covering both pages. If you tag a photo “panorama” then the Auto Design will make it a panorama.
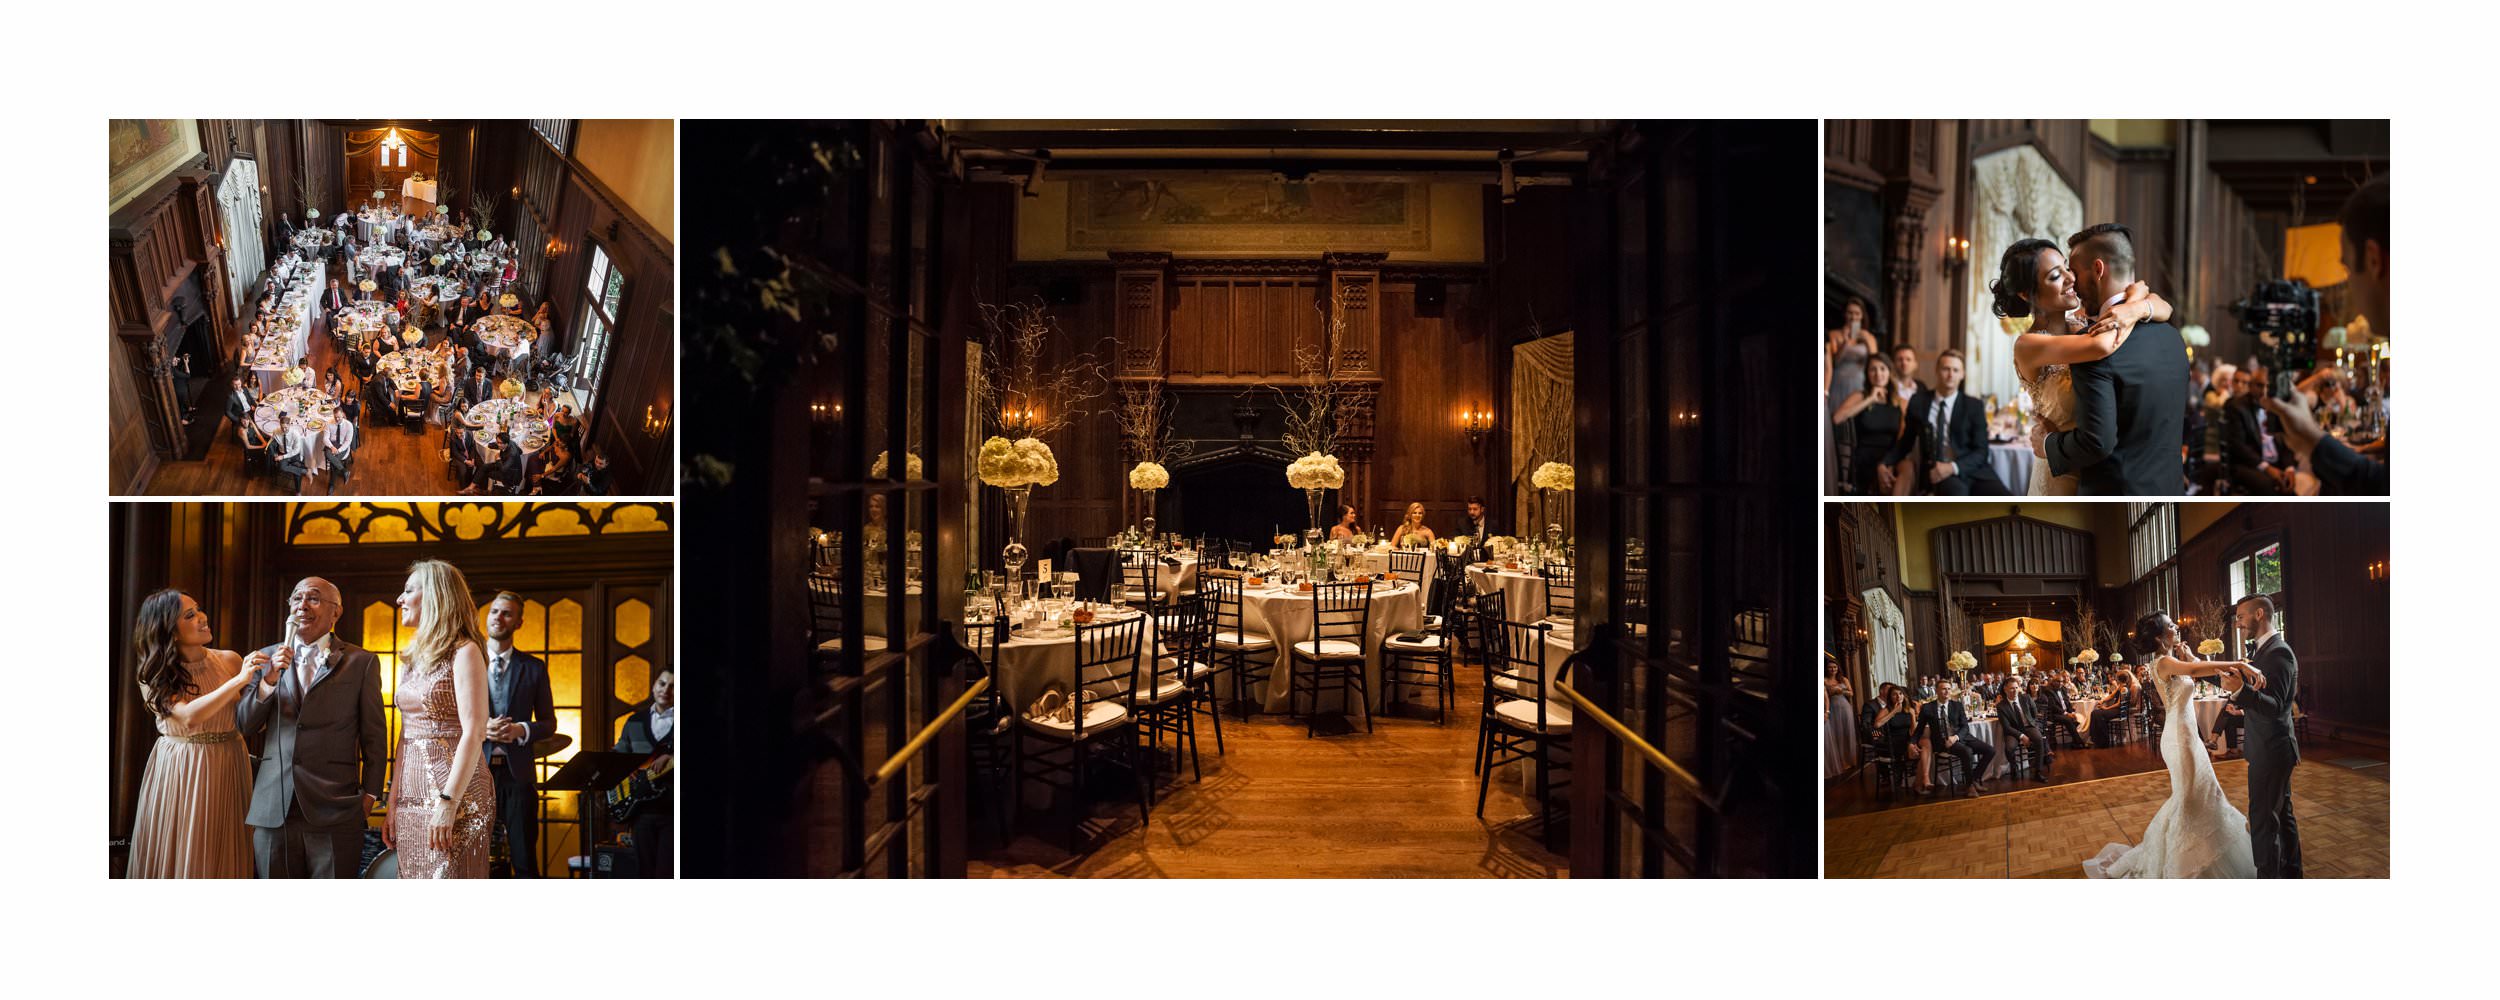
Main and Supporting


Main and Supporting spreads are designs that include one main image and one or more supporting images.
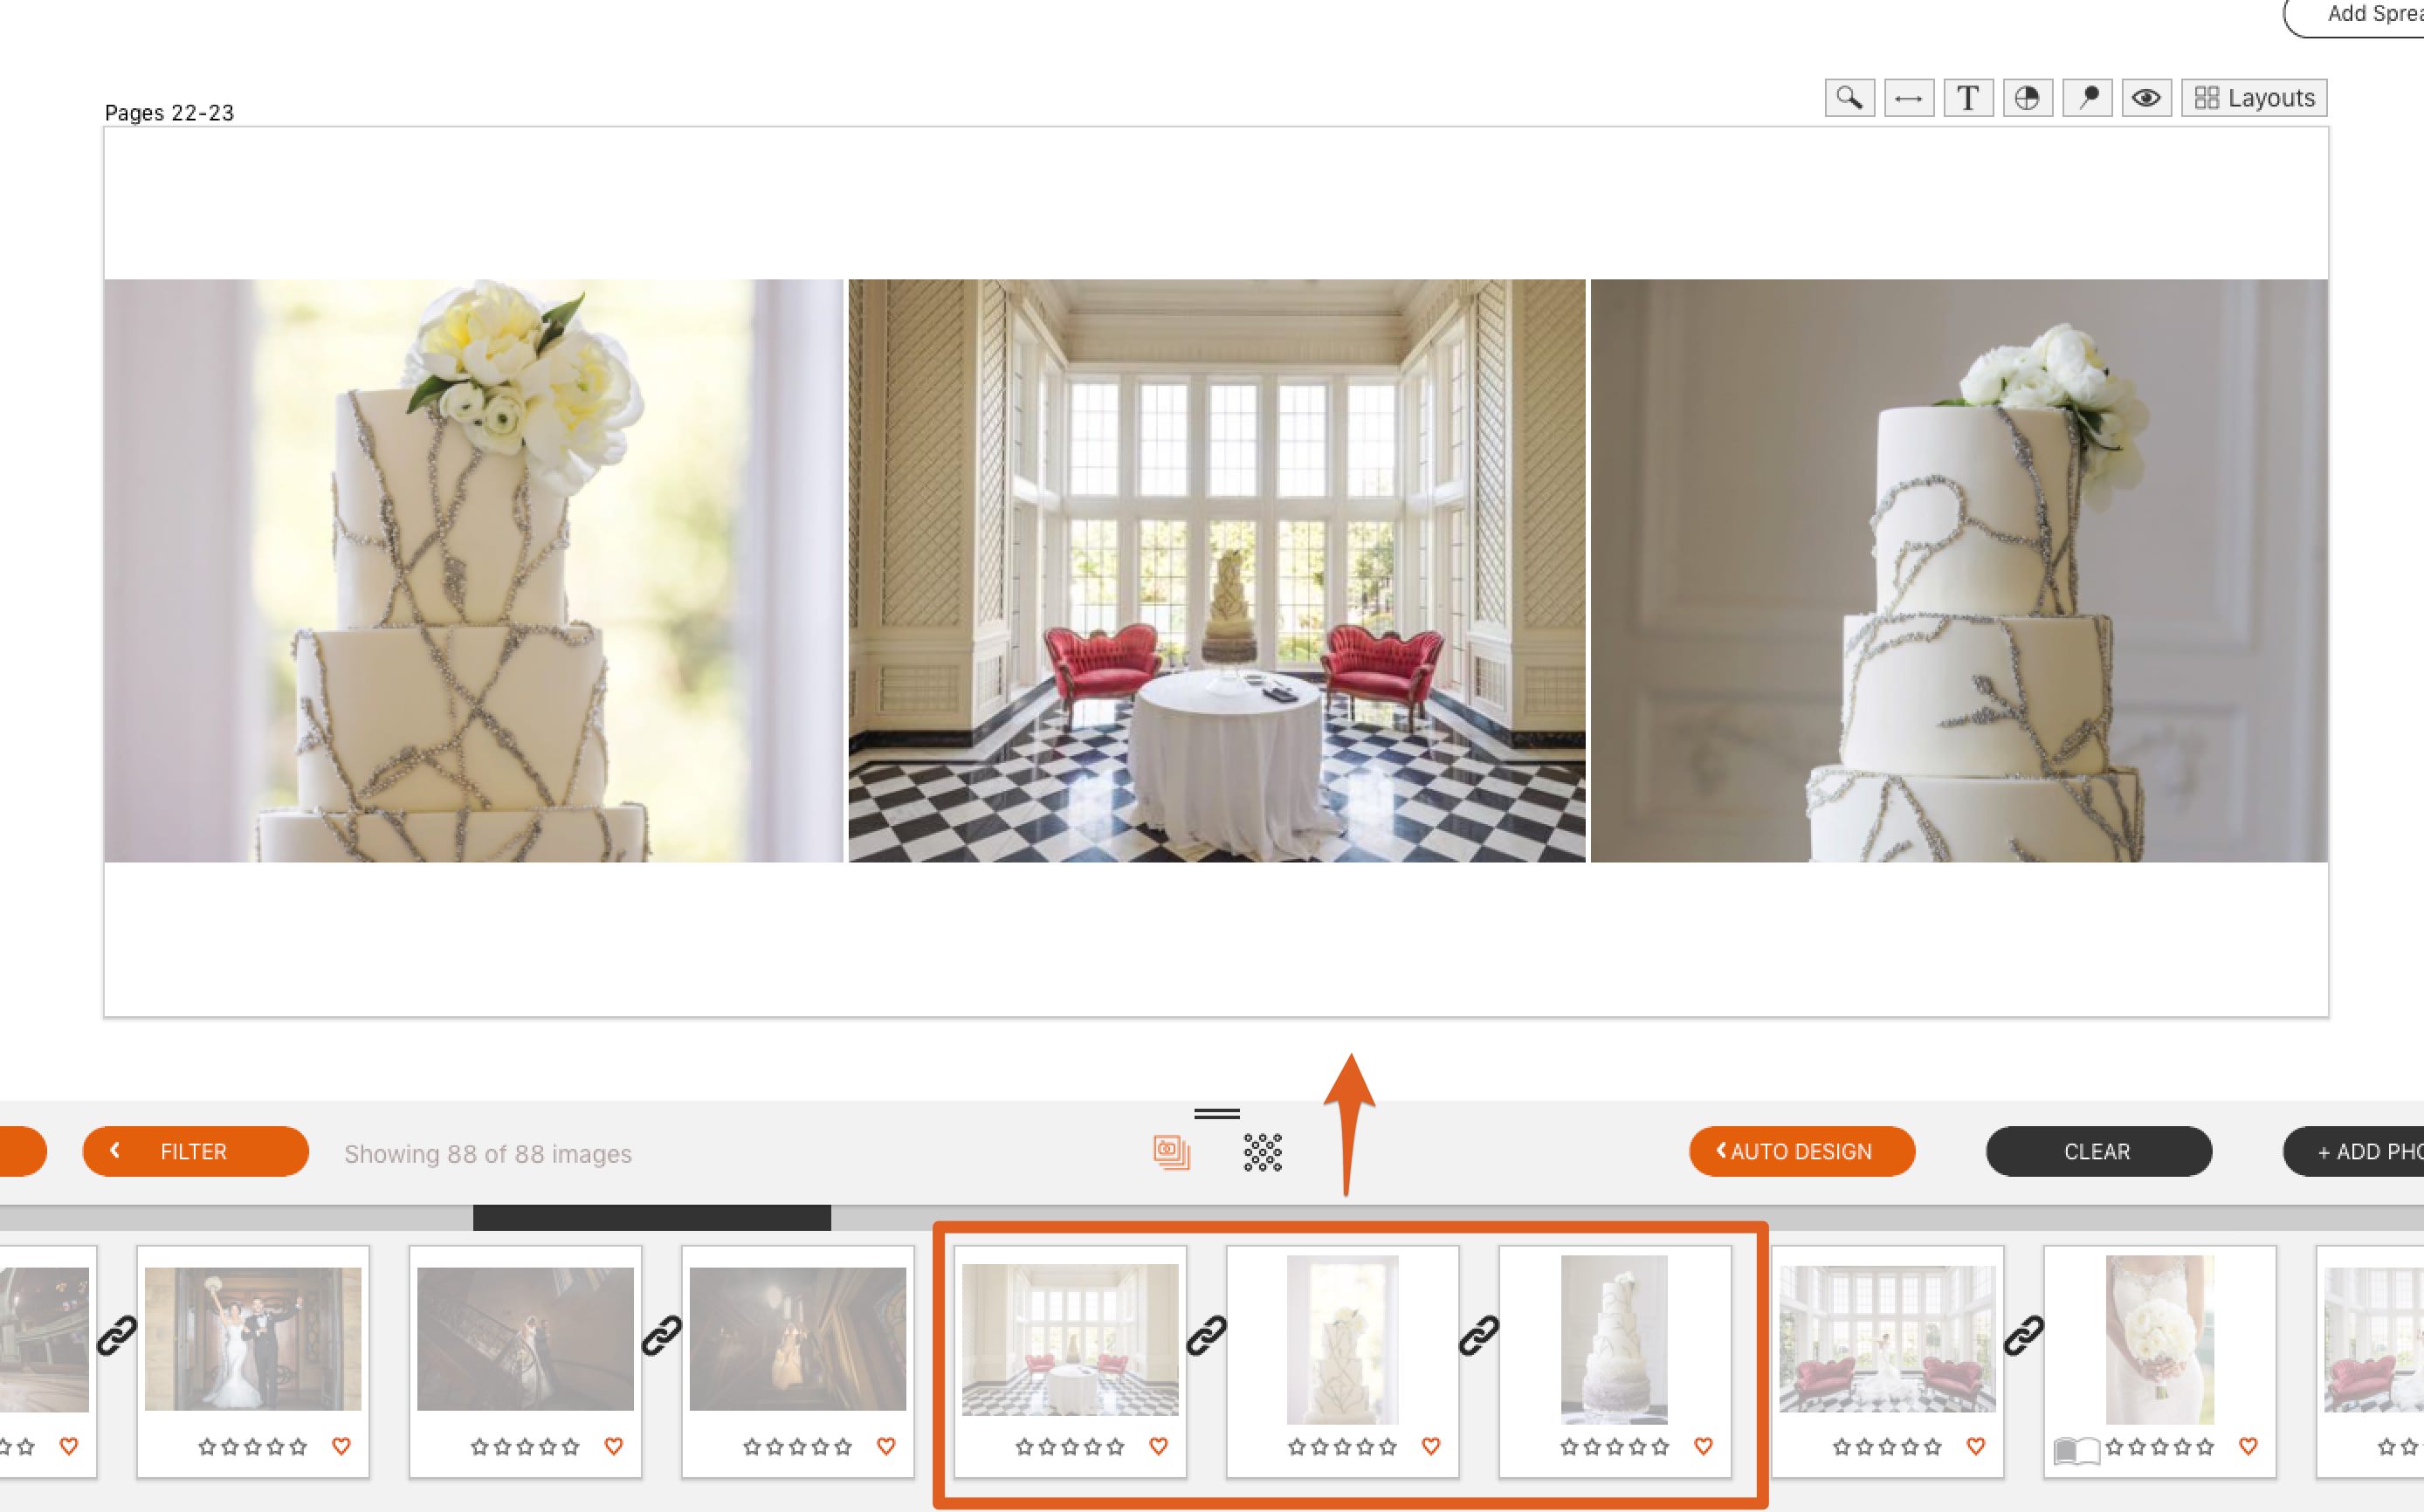
Collection of Equals
Finally we have the “collection of equals,” which simply means that all photos on the spread are roughly the same size. In “Fundy Designer speak,” they are all in one Drop Zone®. So, we’ve designed the “storyboarding” feature in Fundy Designer v7 to allow you to storyboard the same way. Here we’ll show you how to quickly storyboard.
As you storyboard, remember that we have keyboard shortcuts (because we like fast).
Keyboard Shortcuts
c = cover image
p = panorama
g = group
m = main image
First Comes First
First, I like to tag the cover image and any panoramas first (c and p keys).
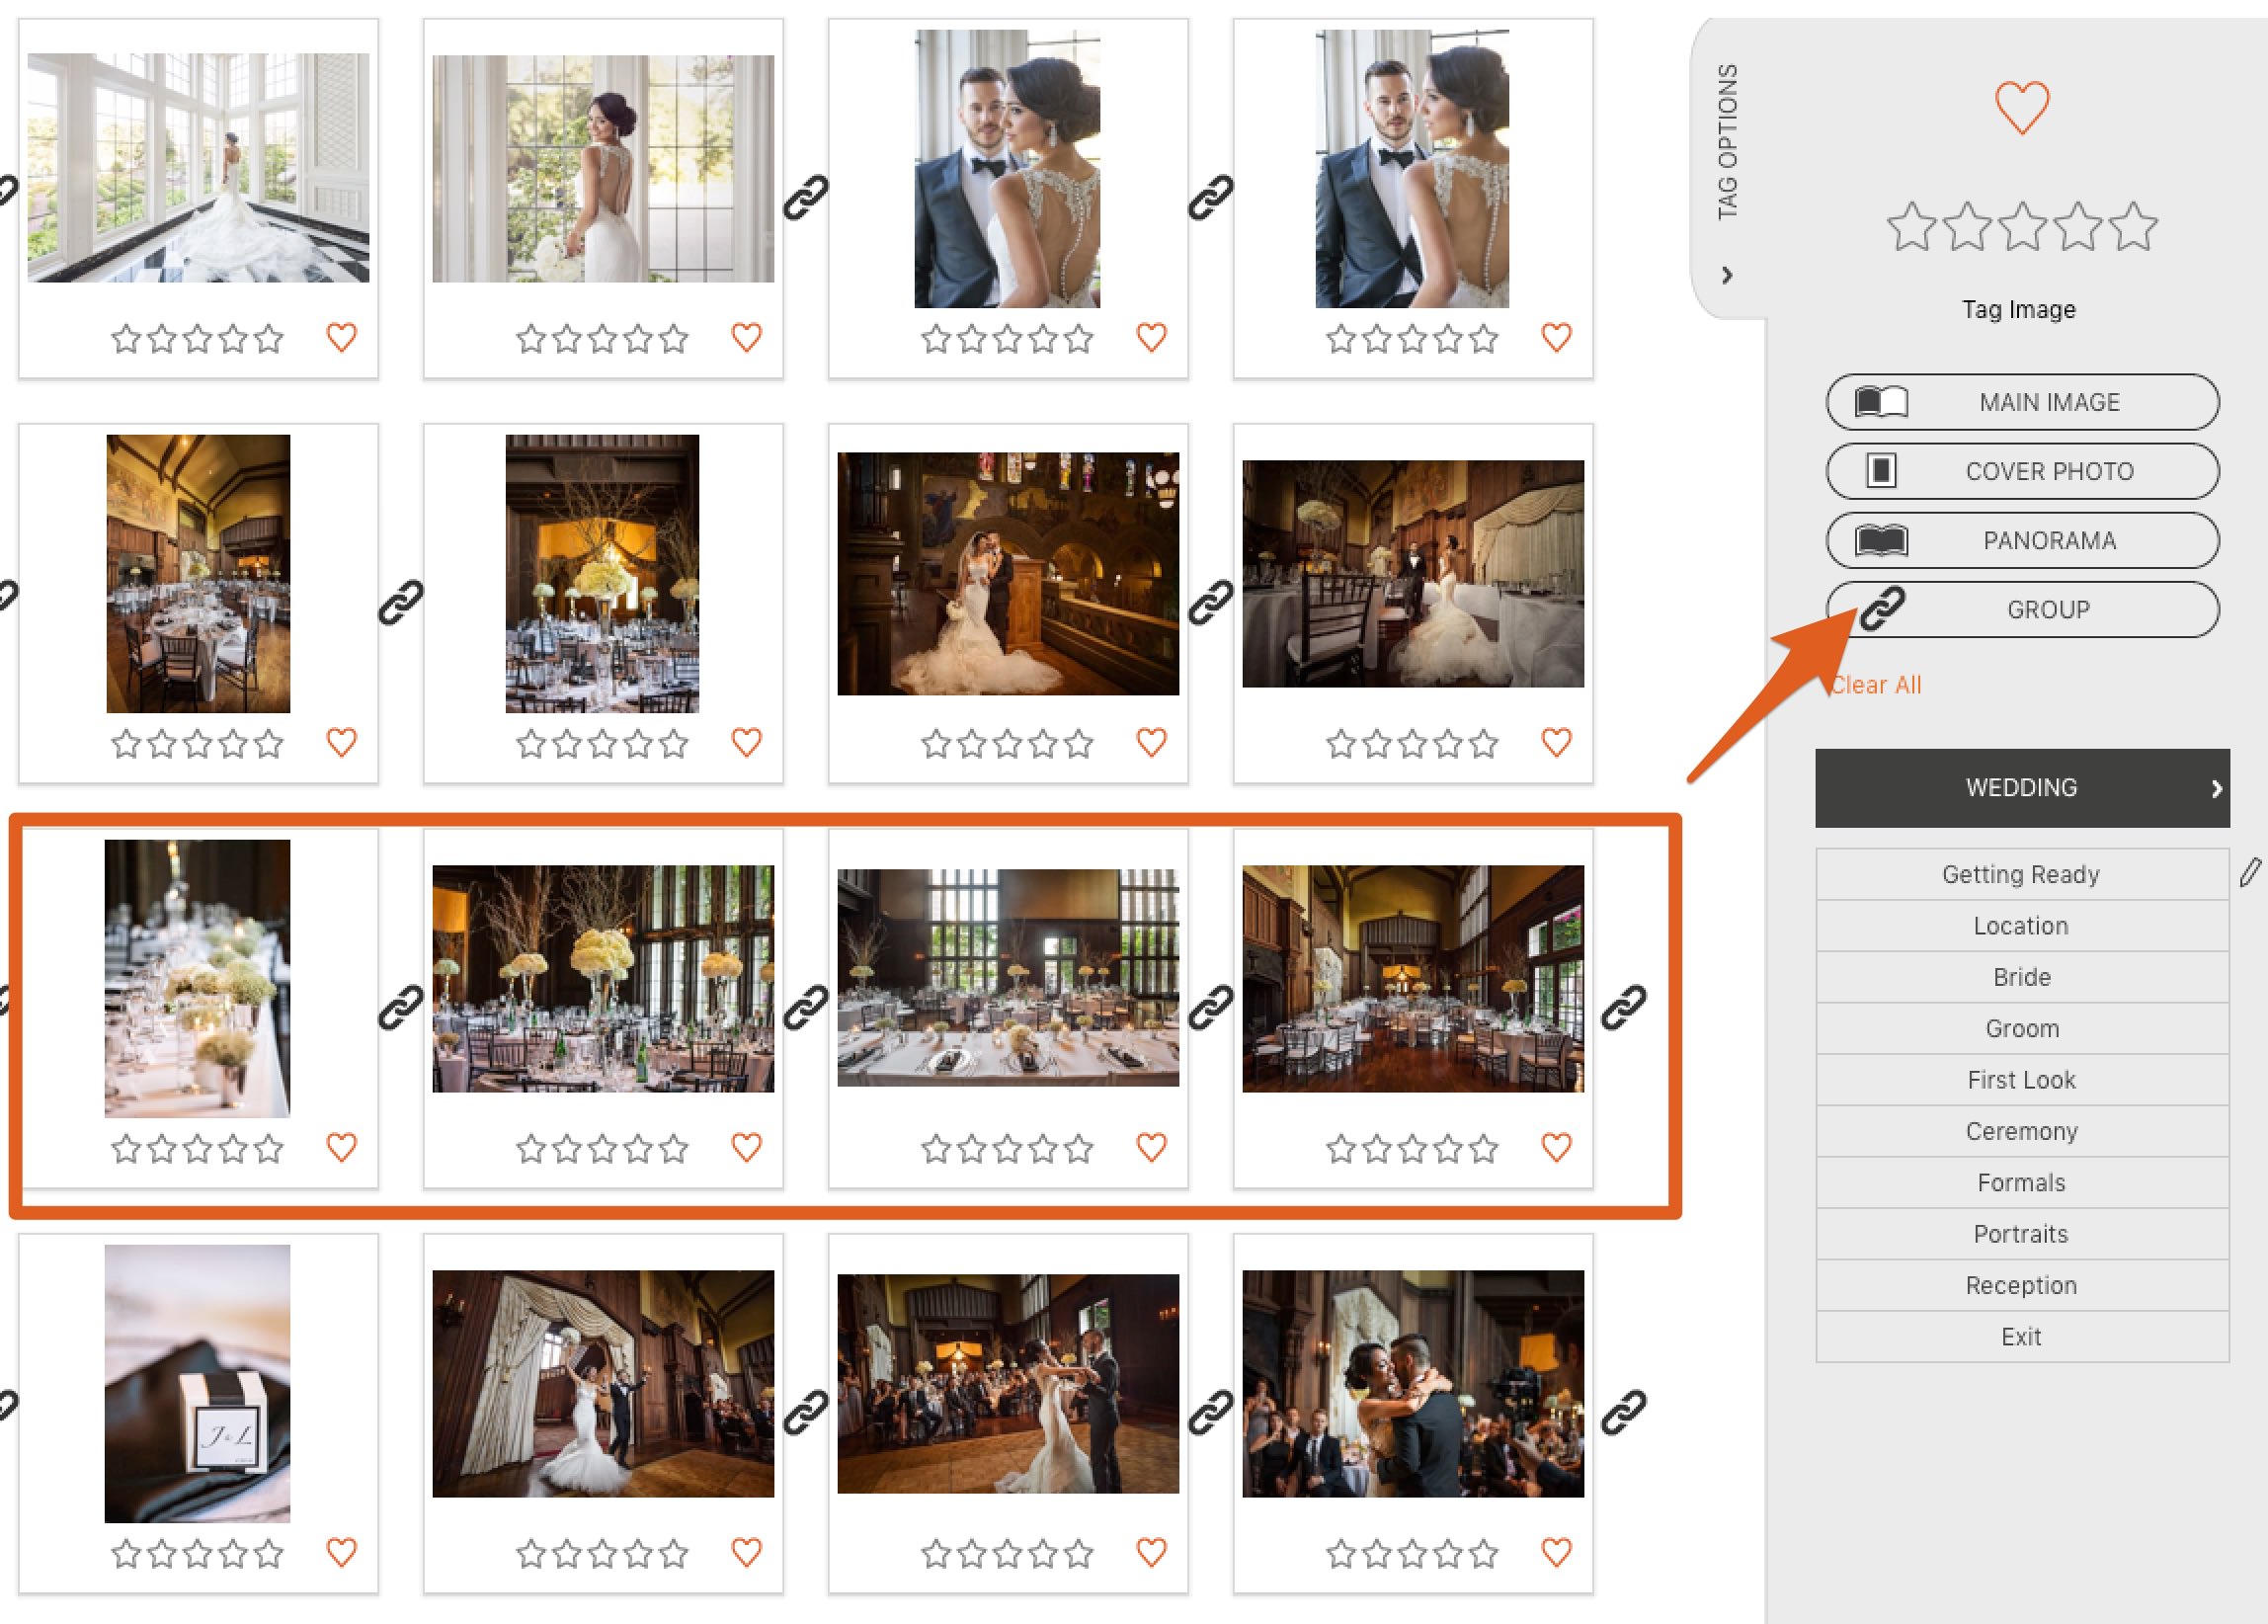
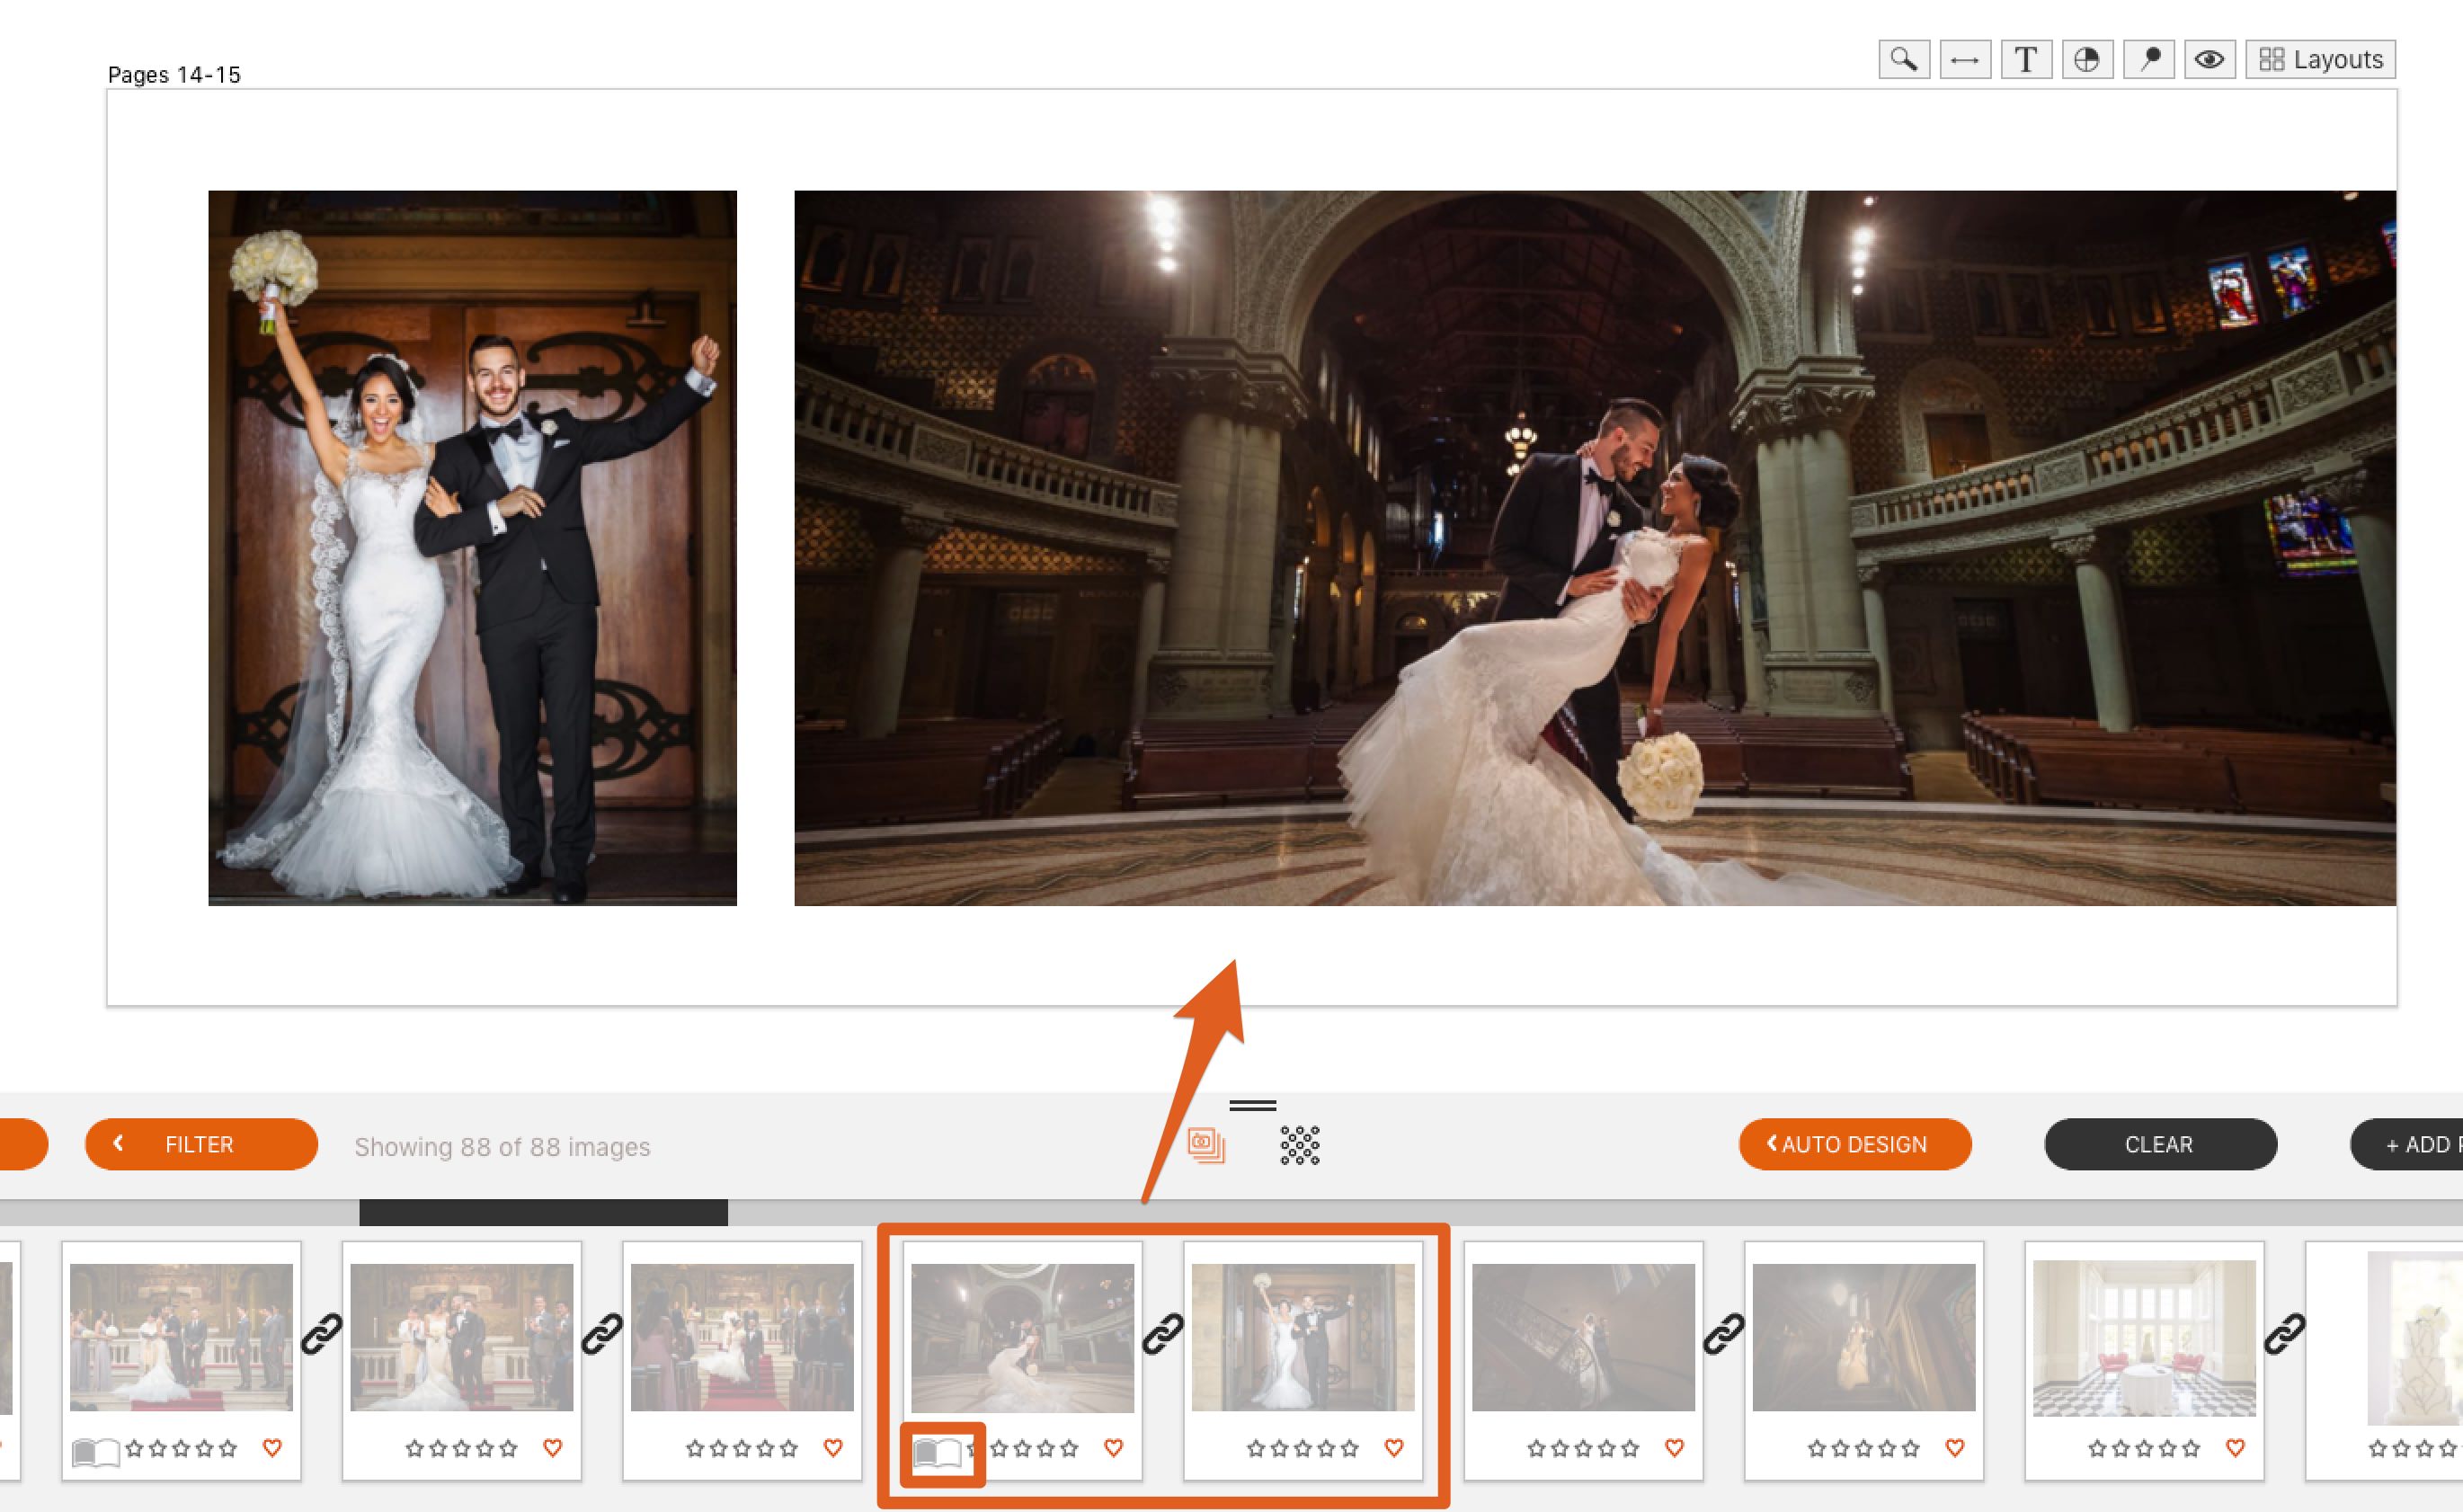
Grouping Comes Next
Next I like to start grouping spreads. Simply select the photos you want on the same spread (remember, a spread is the left and right page) and hit the group button (g key).
Watch the Page Numbers Grow
You’ll notice in the bottom right and corner we start tallying the number of images used and the number of pages in the album you have storyboarded. A panorama will count as two pages, a group will count as two pages, etc.
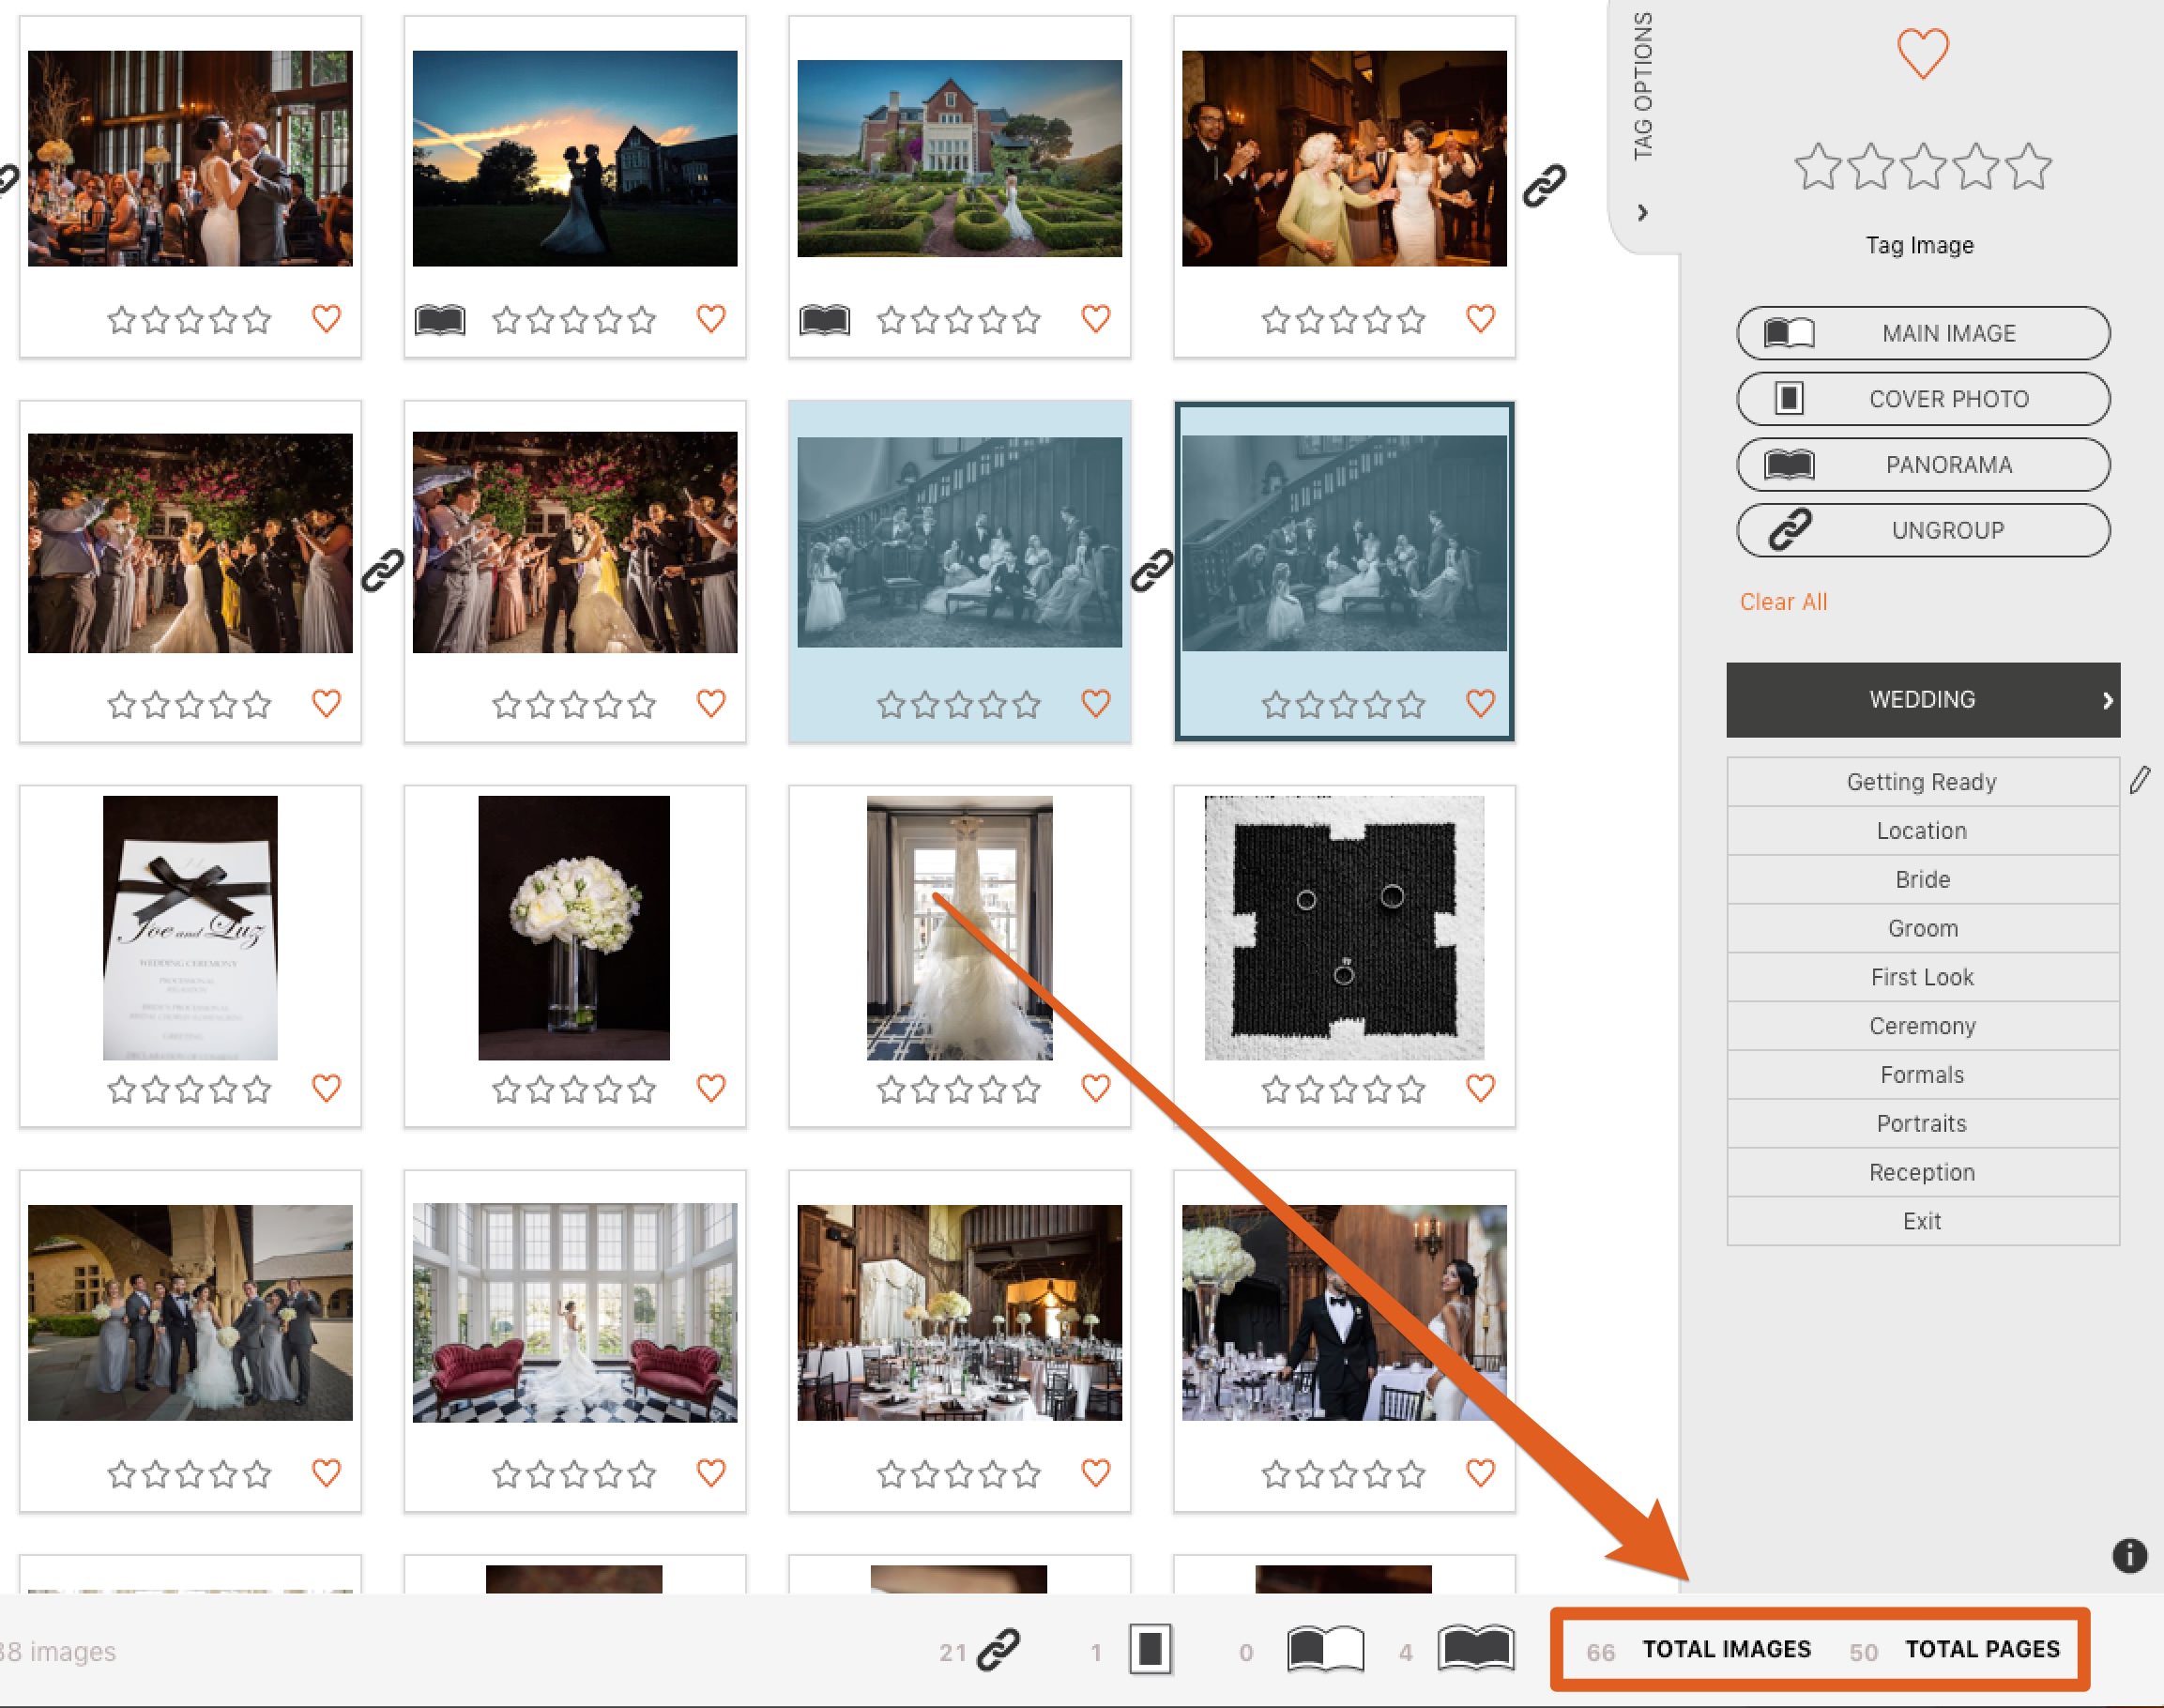
So as you storyboard you know how many photos you are using and also how many pages will be designed.
The Final Touch, Main Images
As a final touch, you can do another pass and mark one photo in each group as the main image. When the auto design is applied any image with the “main image” tag will be placed by itself, large, filling one page.
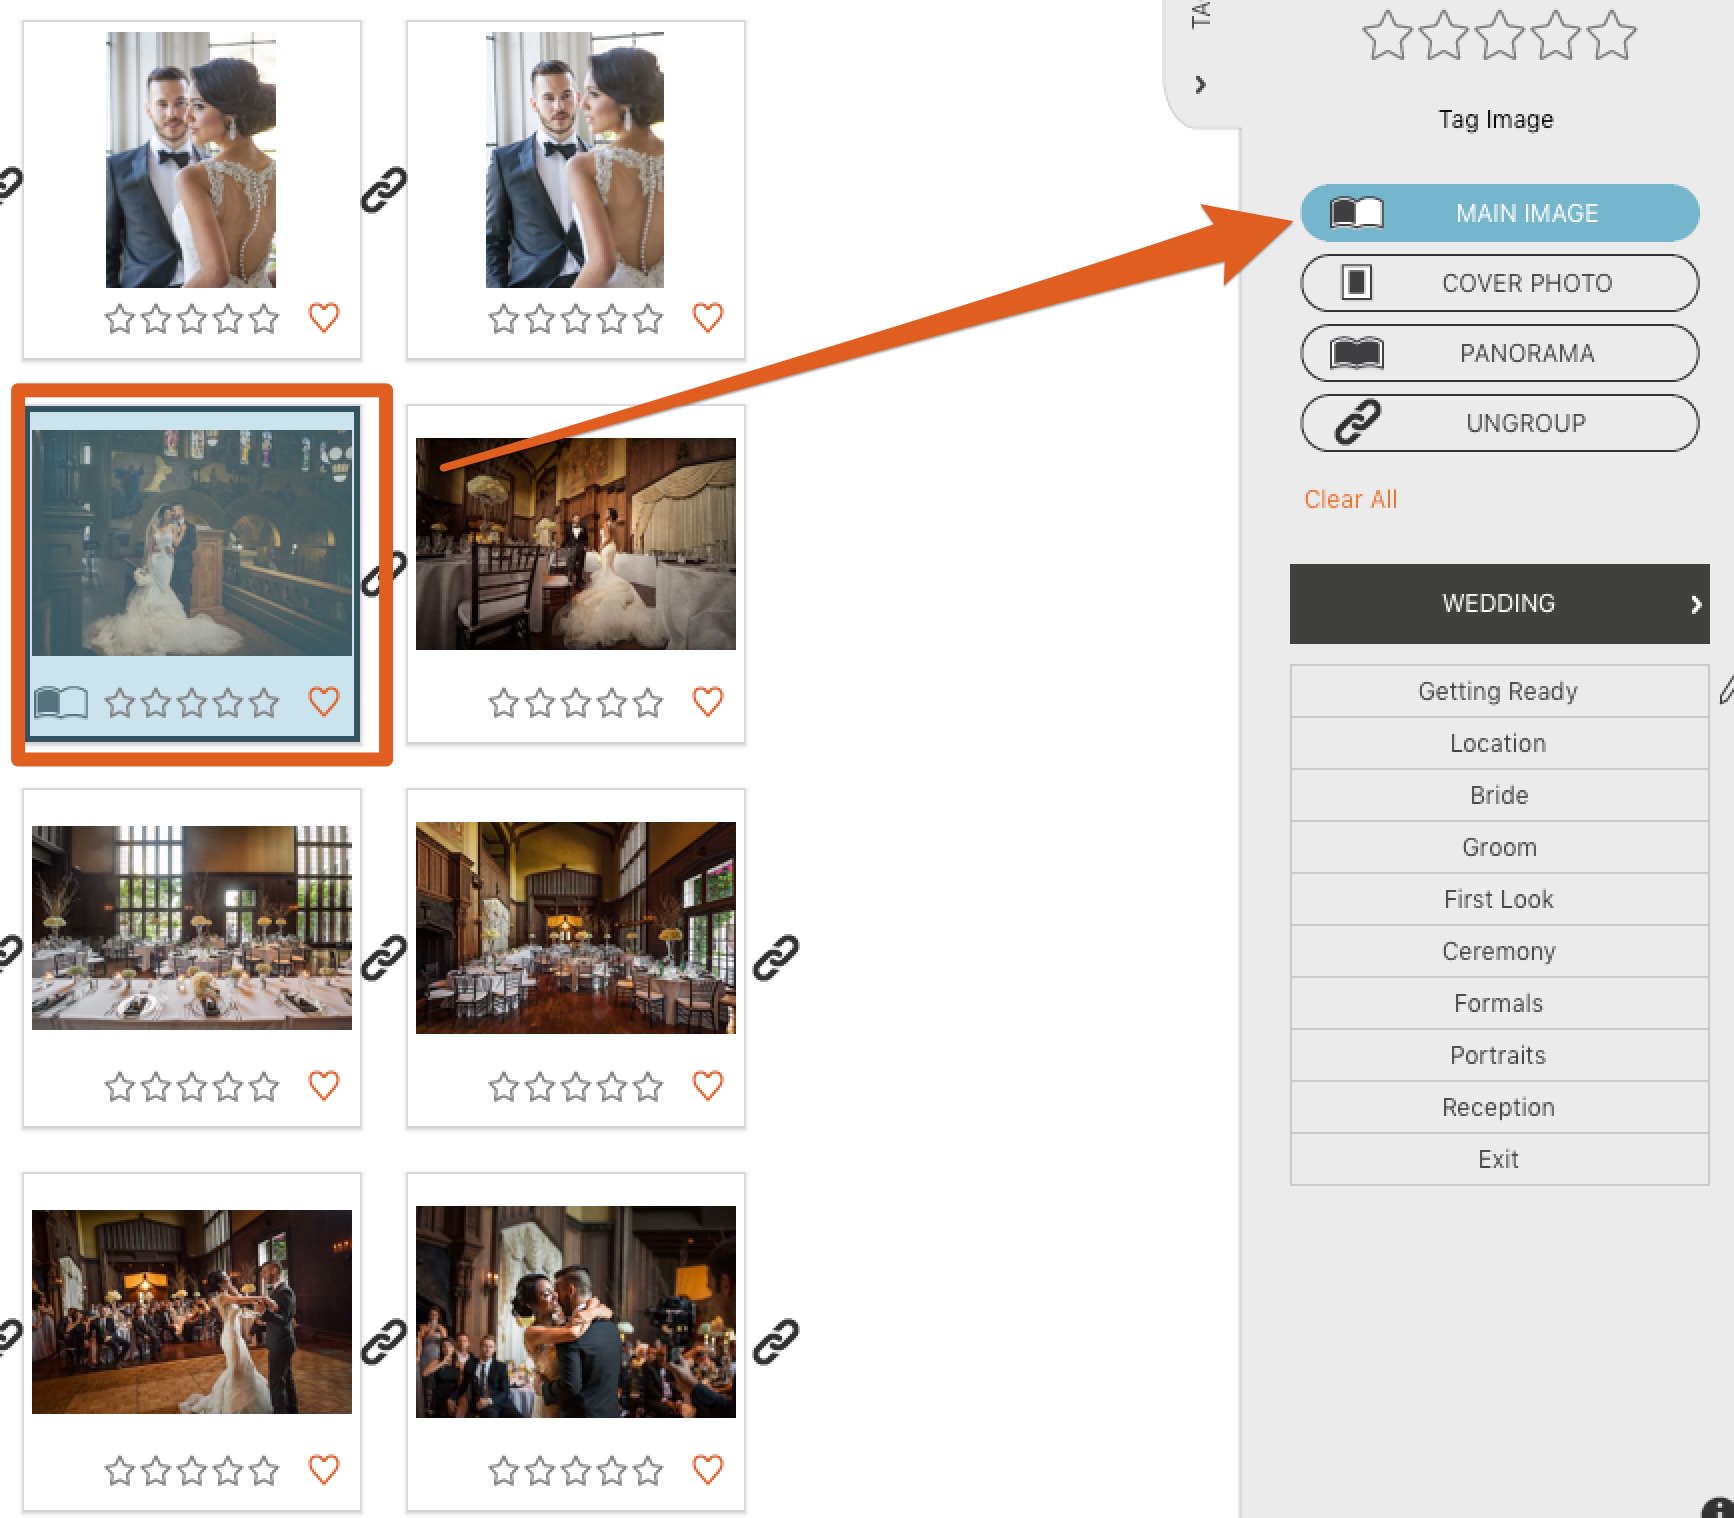
Note: as you tag main images, the page count will not increase, because you are simply telling the Auto Design how to treat an image.
What Happens When You Hit Auto Design
So now with some storyboarding, what happens when you hit the magic Auto Design button? Here are some examples.
Examples of storyboarding in action.
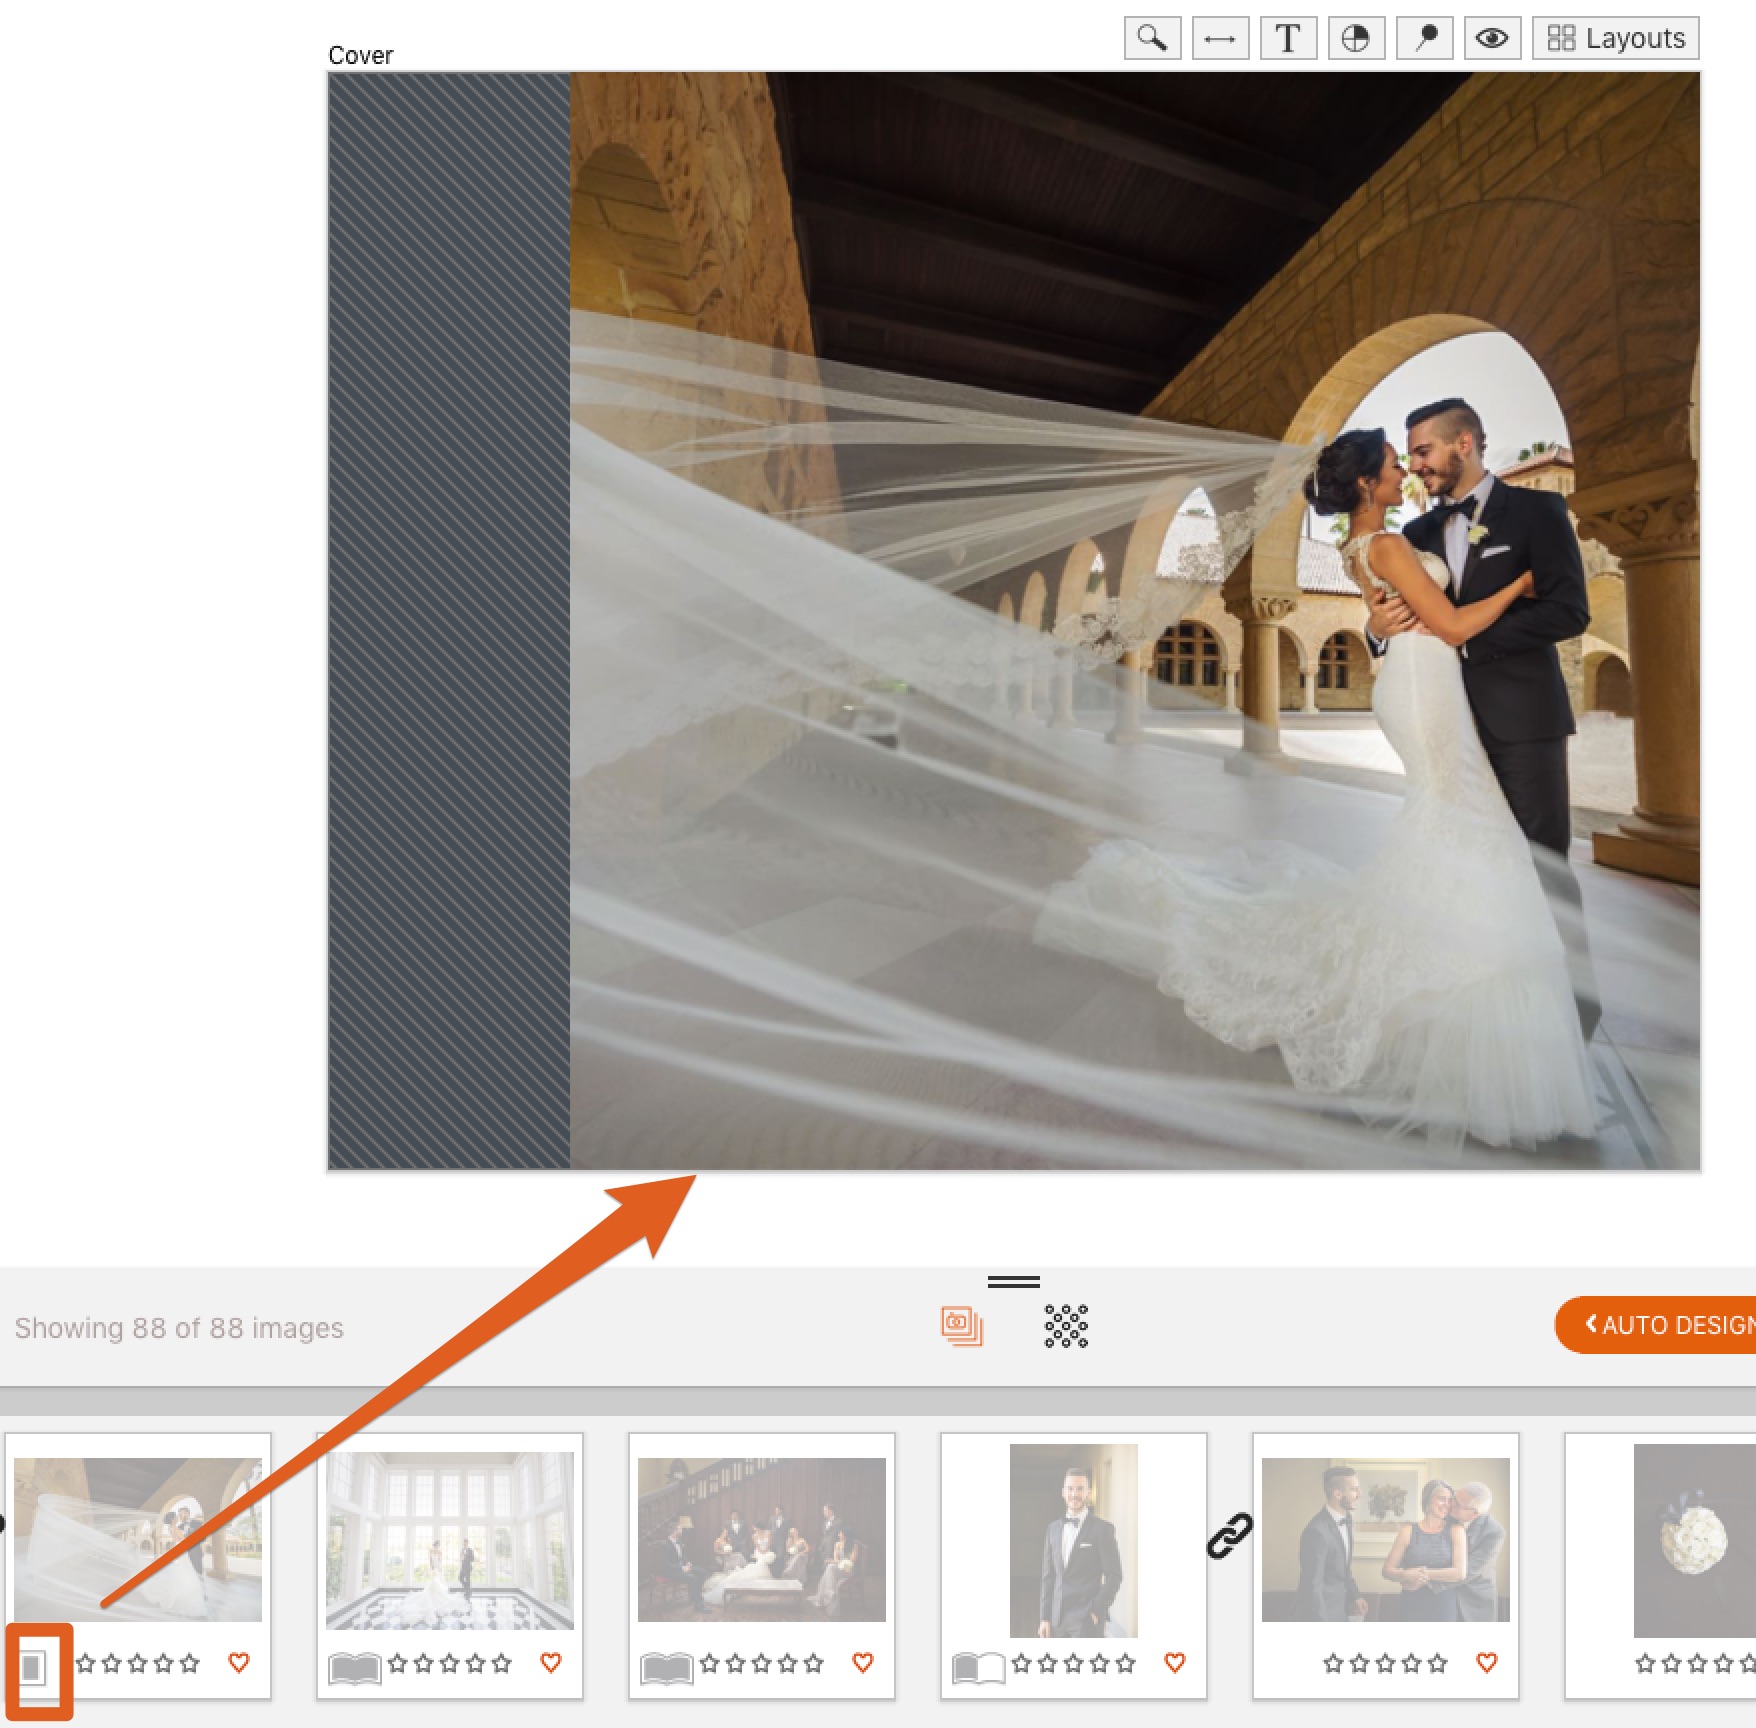
Cover Image Example
Panorama Example

Group Example
Main Image Example
See It In Action
For those of you who learn better through video, here is a walk through.
Conclusion
Tagging is fully optional, you’ll be surprised at how accurate the auto design algorithm is without tagging. But, in order to give more control over the auto design, we’ve included these storyboarding features.
If you haven’t given v7 a run yet, it’s the fastest and easiest album design software out there, coupled with wall art sales and marketing tools.


