Time syncing cameras is one of the most important parts of being a working professional photographer. Whether you are designing an album, showing photos for wall art, or uploading your photos to an online gallery – making sure they are in the correct chronological order is essential.
Today I’m going to share with you two easy ways to time sync. The first is the super lazy, zero fail method way. This can become an easier habit than charging batteries. The second way takes longer but is the easiest way to time sync an old shoot. You’ll learn a shiny new trick and look like a hero to your clients and co-workers.
The Secret Sauce
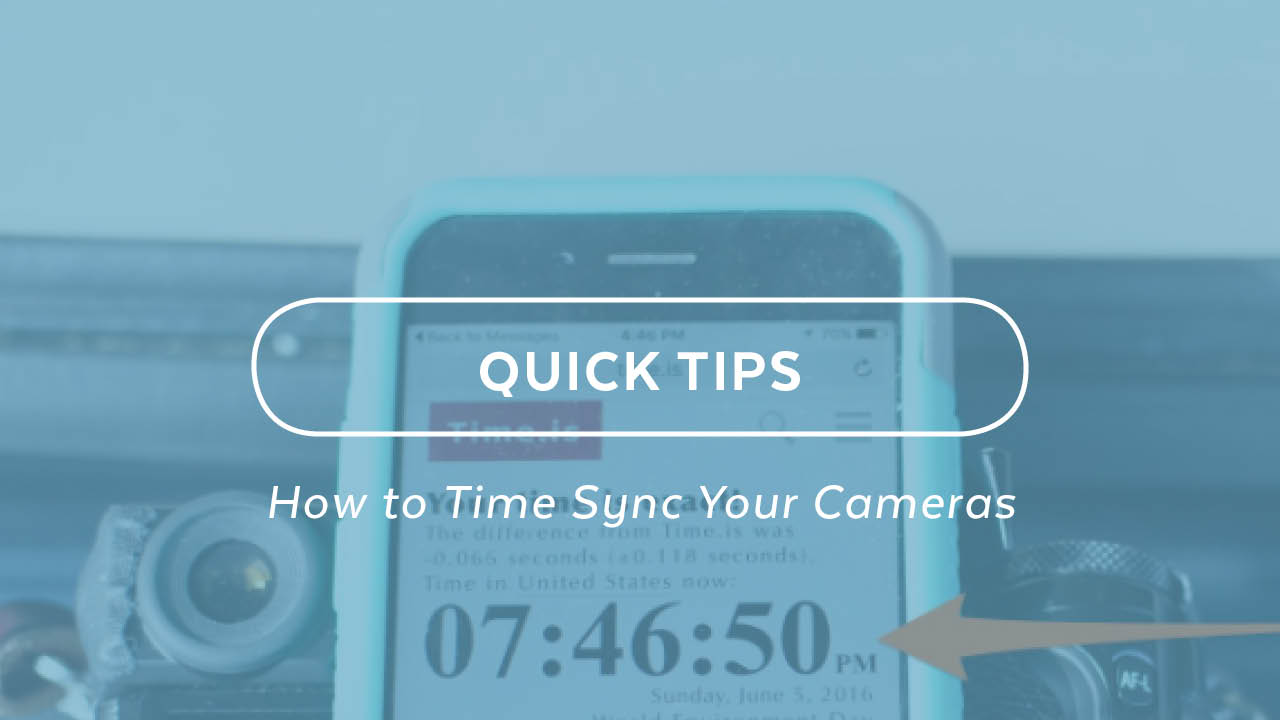
Just before, during or after a shoot, take a photo of your computer screen or phone screen with the URL www.time.is pulled up. This is a worldwide atomic clock with the date and time.
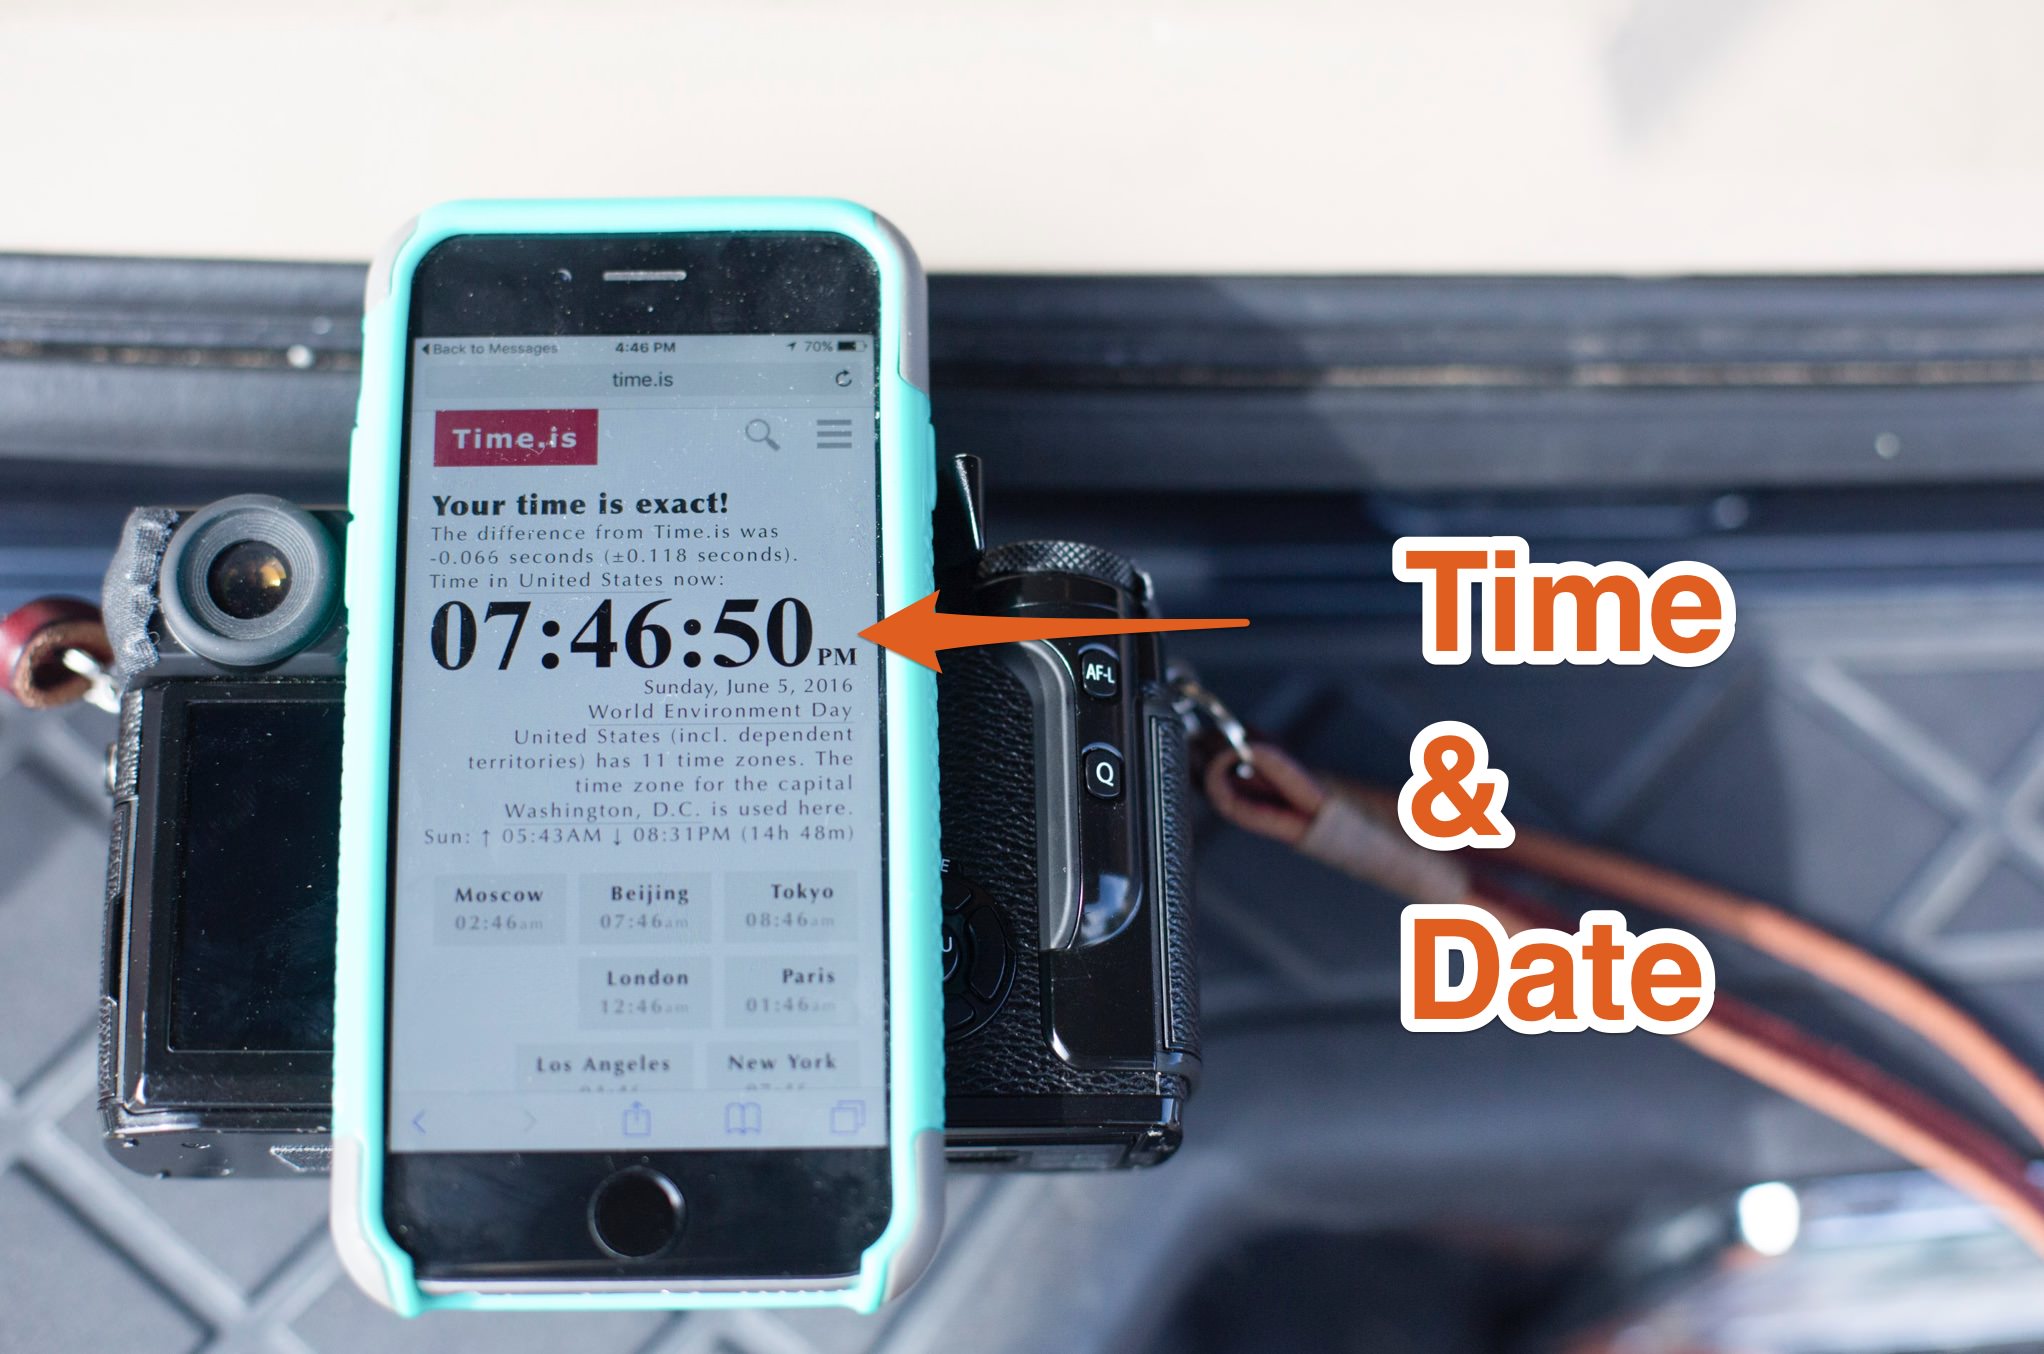
Ideally just before each shoot take a shot with each camera in your studio and/or each associate’s camera. This is the reference photo for each camera. Now, time syncing your shoots takes just seconds, not minutes. It can become a part of your regular workflow.
How To Time Sync
Time sync should be the very first thing you do after you load your photos on the computer. It makes culling easier and makes sure you do not accidentally miss an important part of the story.
Time Sync In Photo Mechanic
In Photo Mechanic, simply sort by Camera Serial Number and select all photos from one camera.
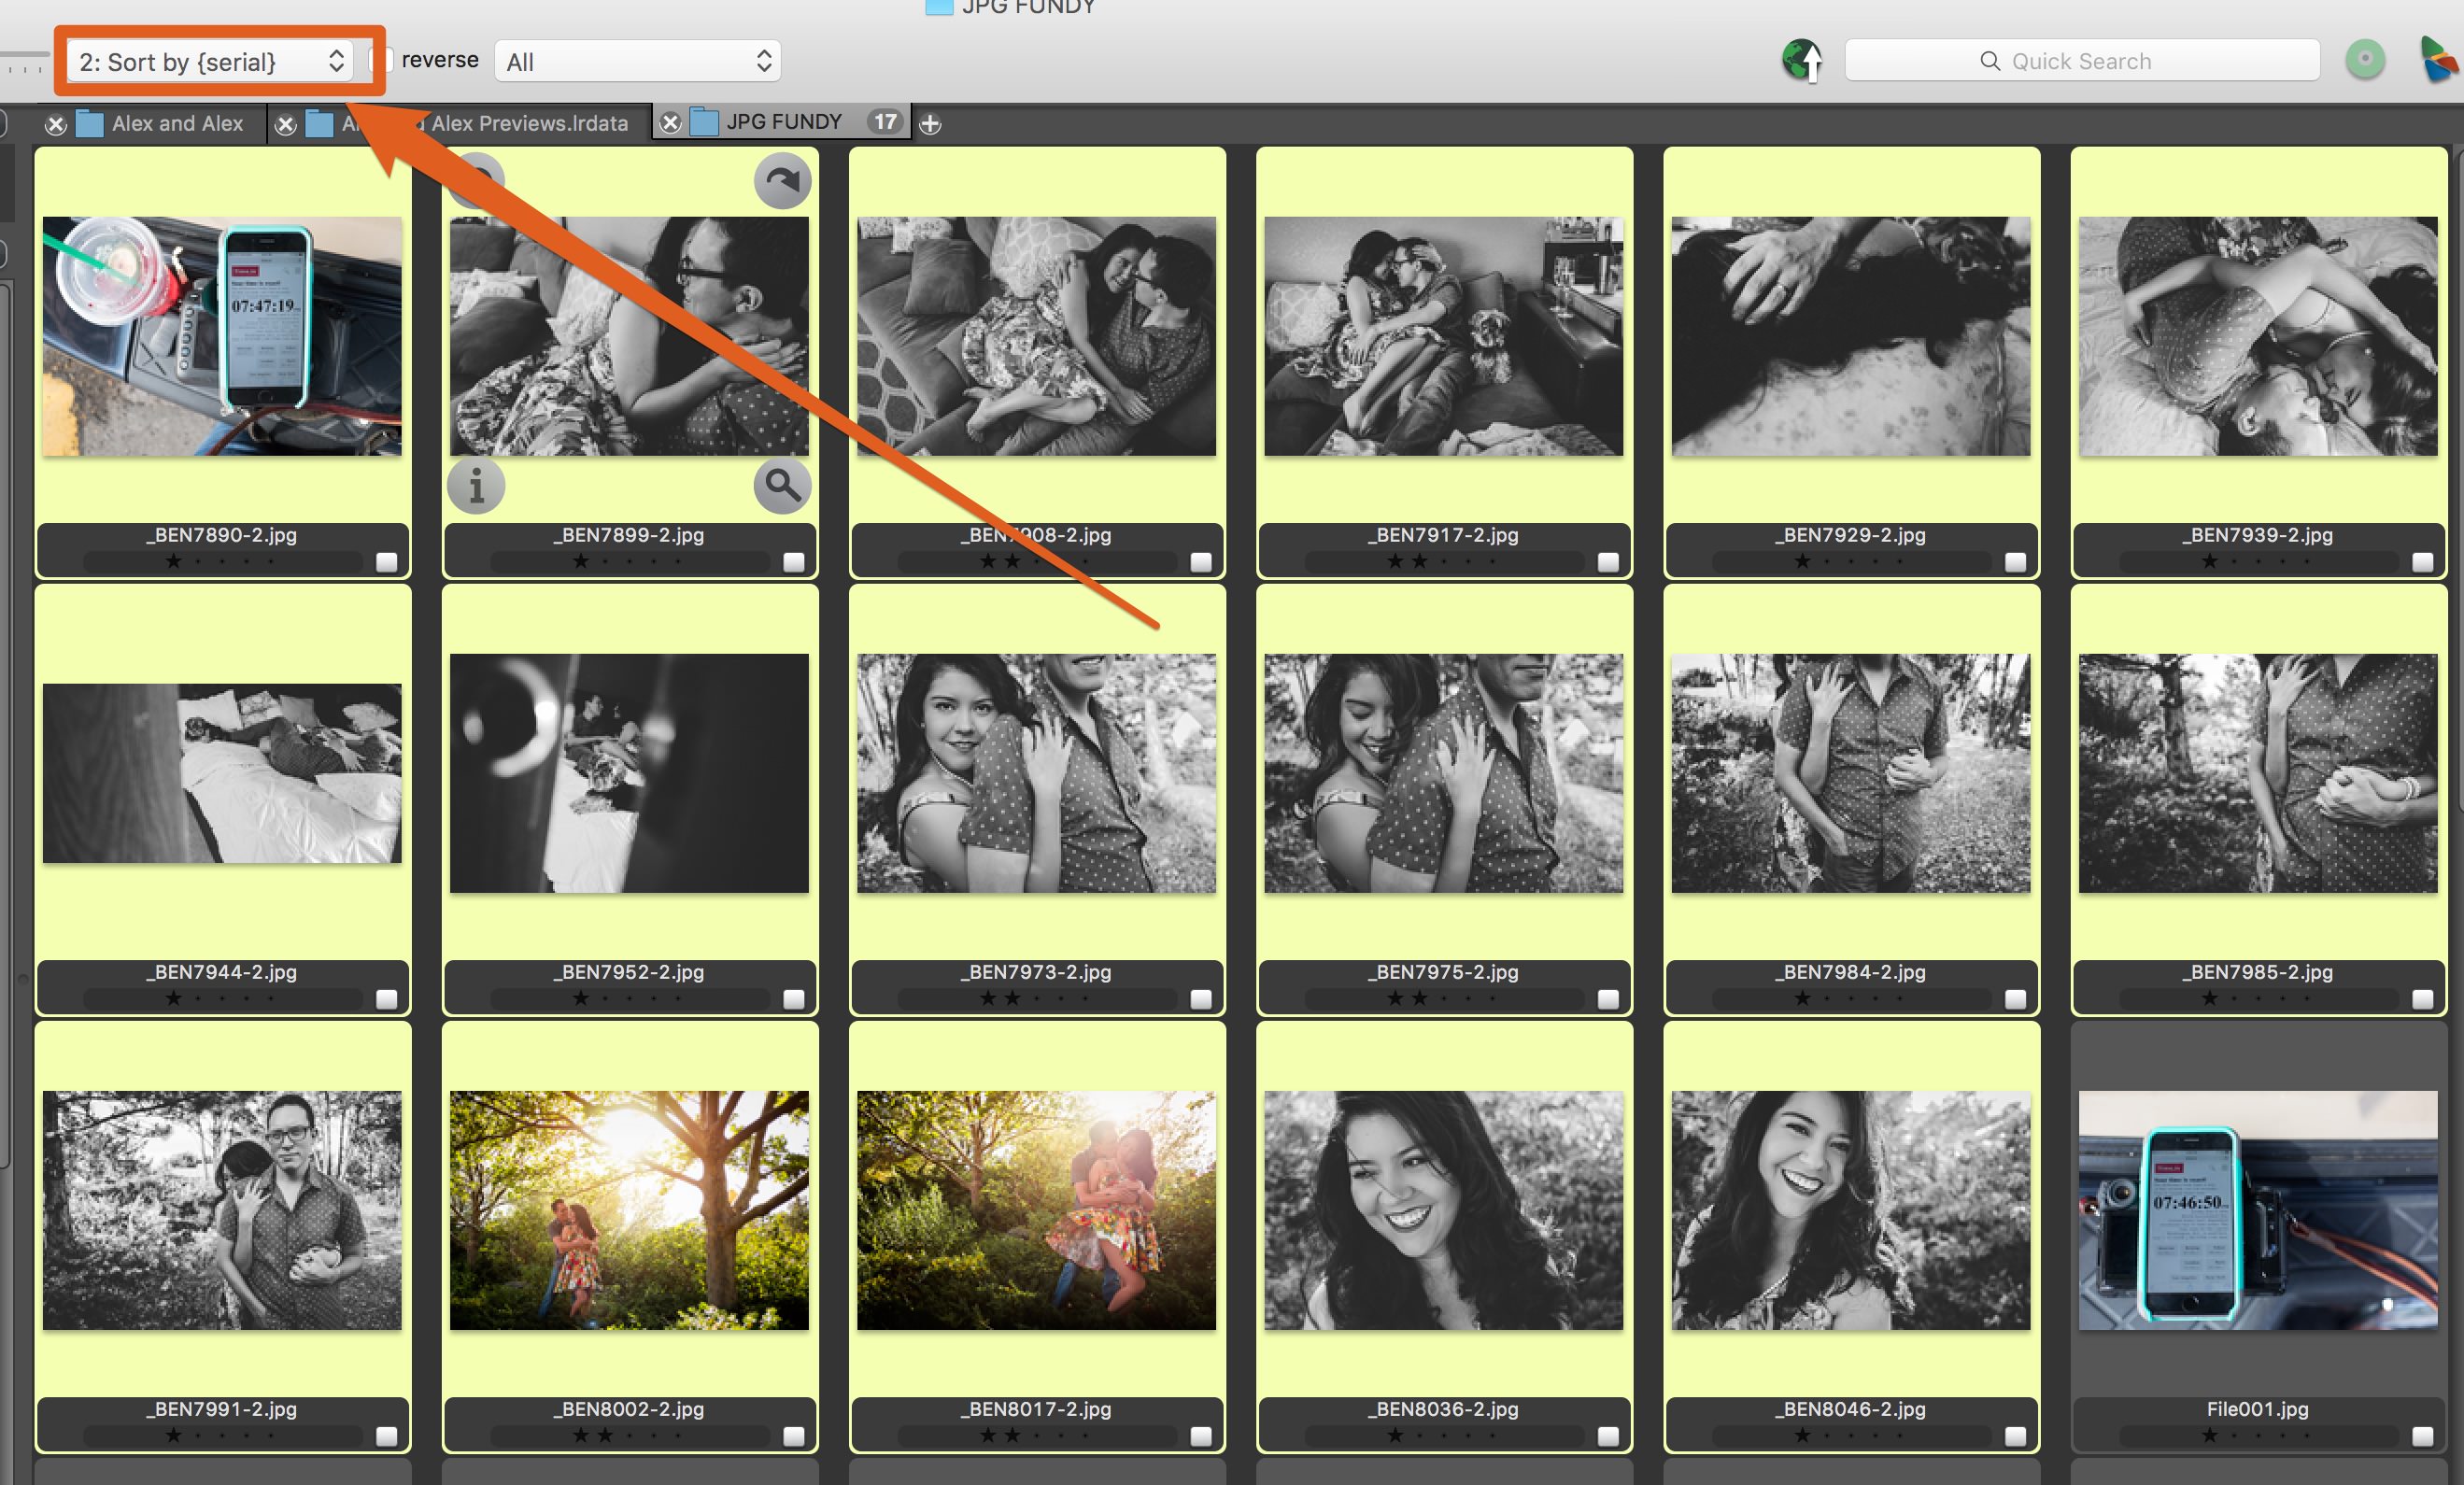
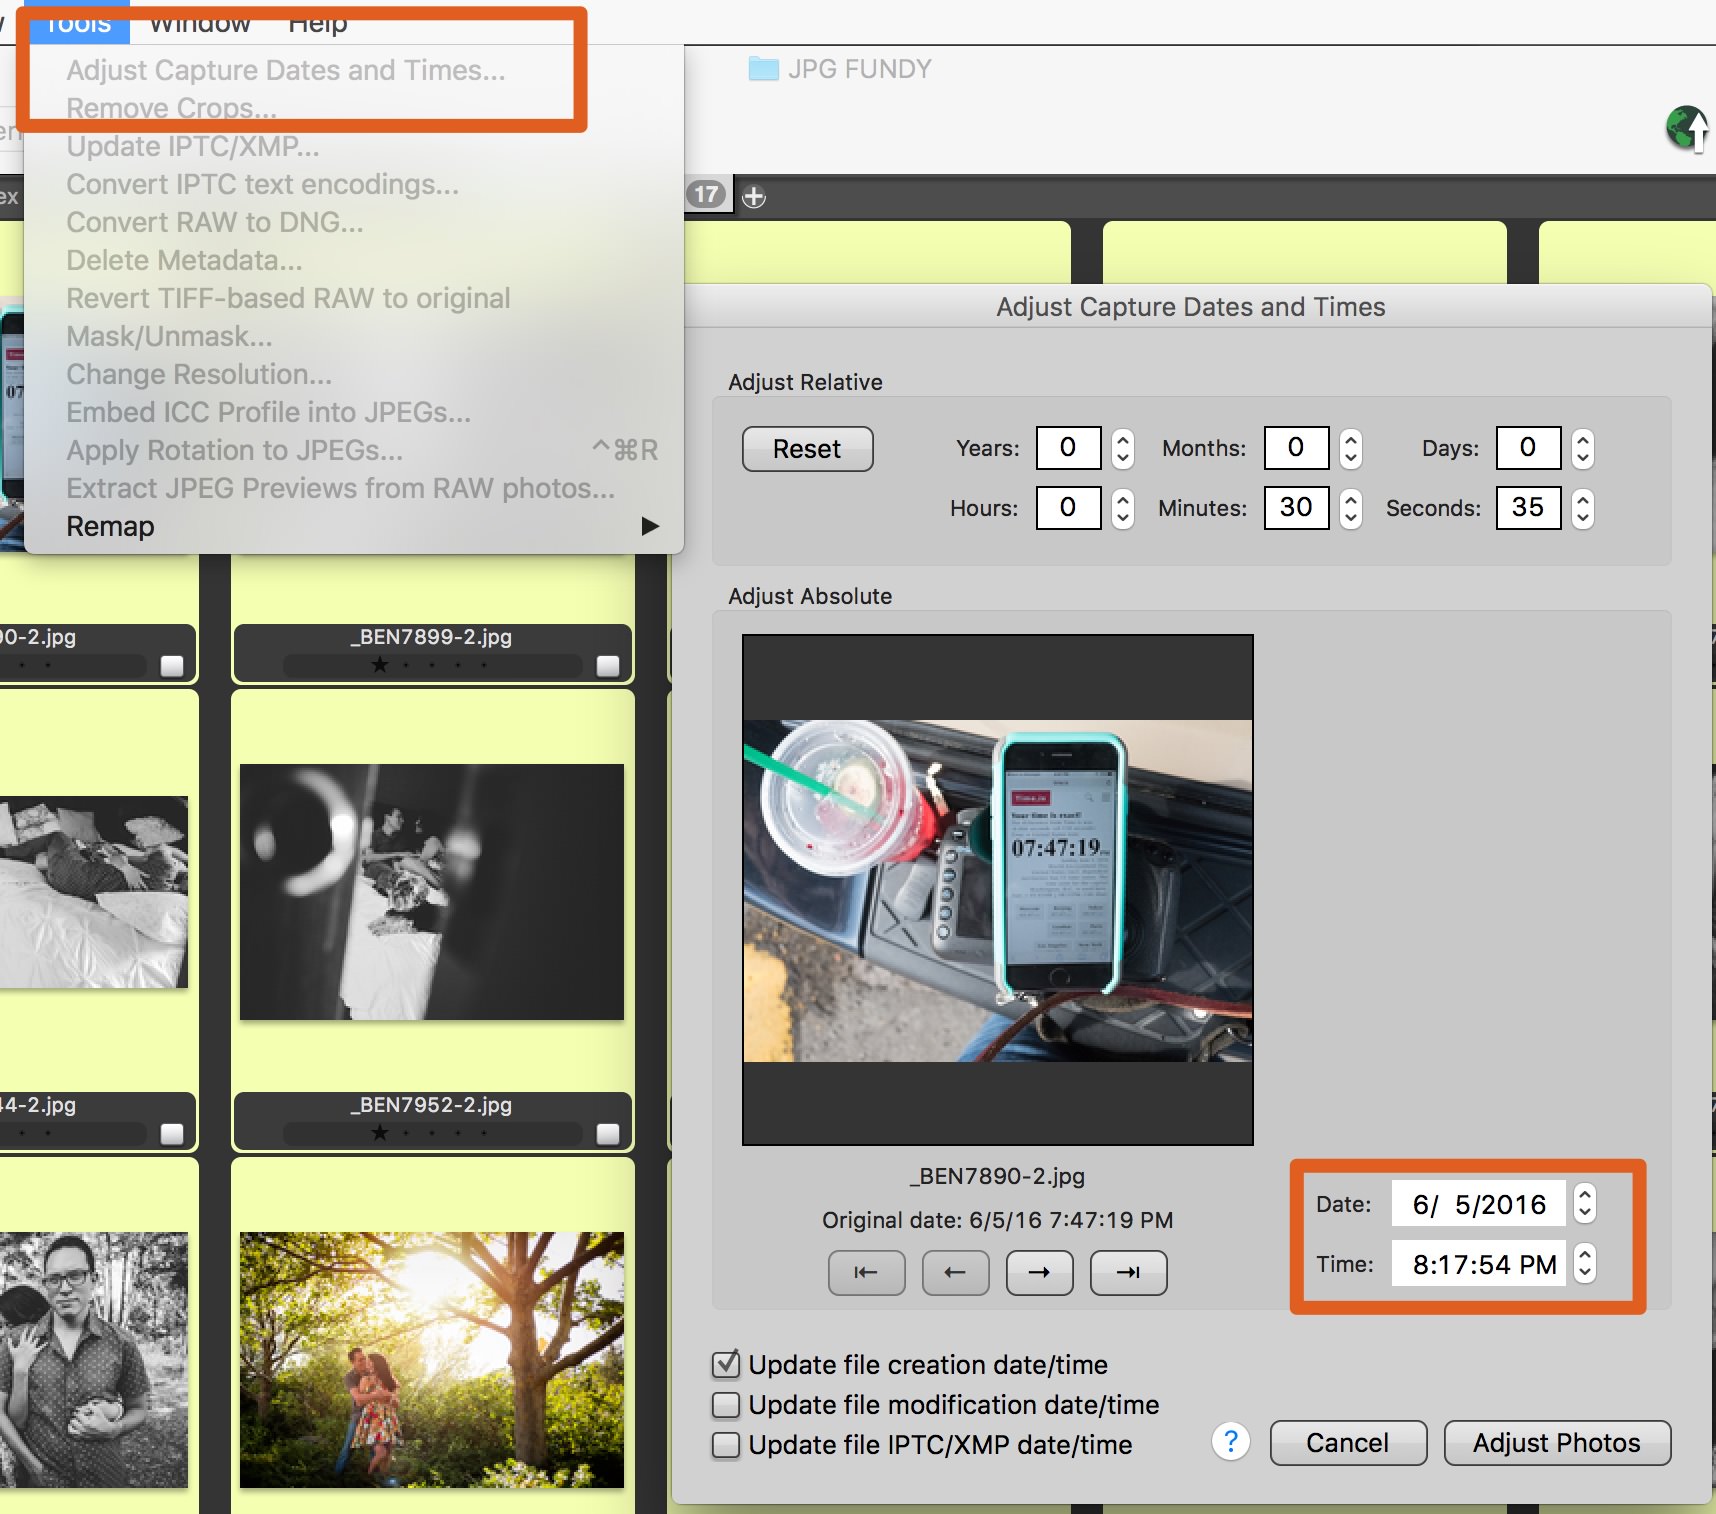
Next, under the Tools section, choose Adjust Capture Date and Time.
Time sync is easy in both Photo Mechanic and Lightroom
www.time.is photo as the reference photo and put in the correct date and time.
Repeat this process for each camera and all photos are time synced.
Time Sync In Lightroom
The process is quite similar to that in Photo Mechanic. Under the metadata area at the top of the Library Module, change one of the panels to Camera Serial Number.
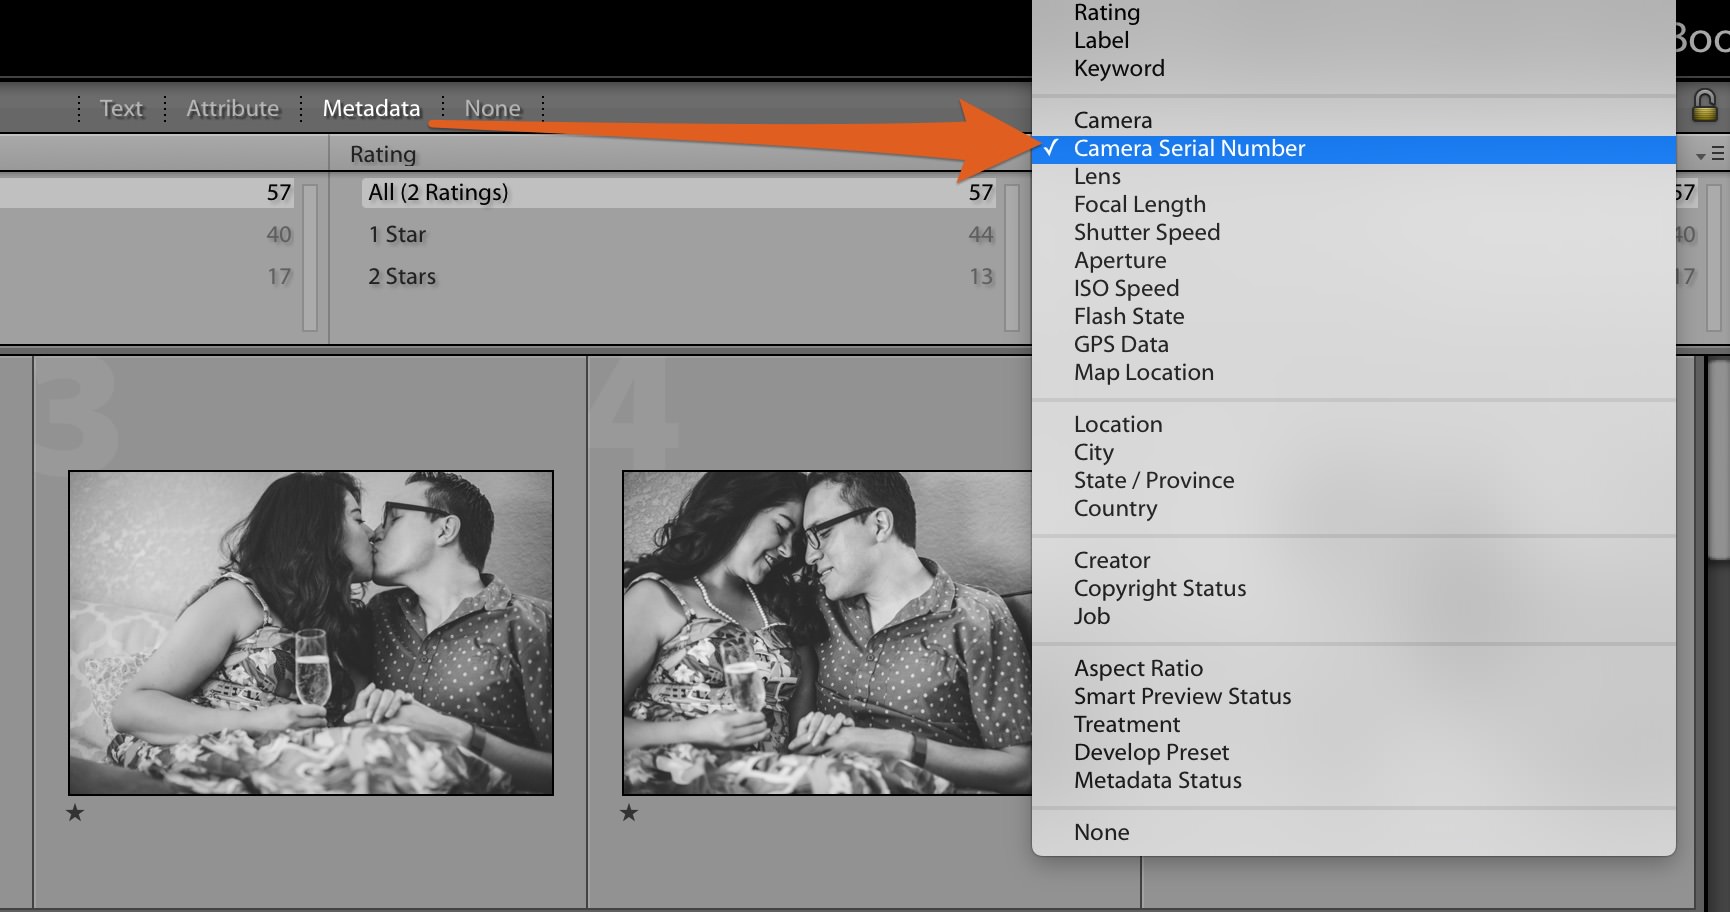
You’ll see each camera that was used in the shoot. Click on one camera to sort to all images taken with just that one camera. Select the www.time.is photo and then select all.
Now scroll down the right panel to the time and date area and change the time and date to what you see on the reference photo.
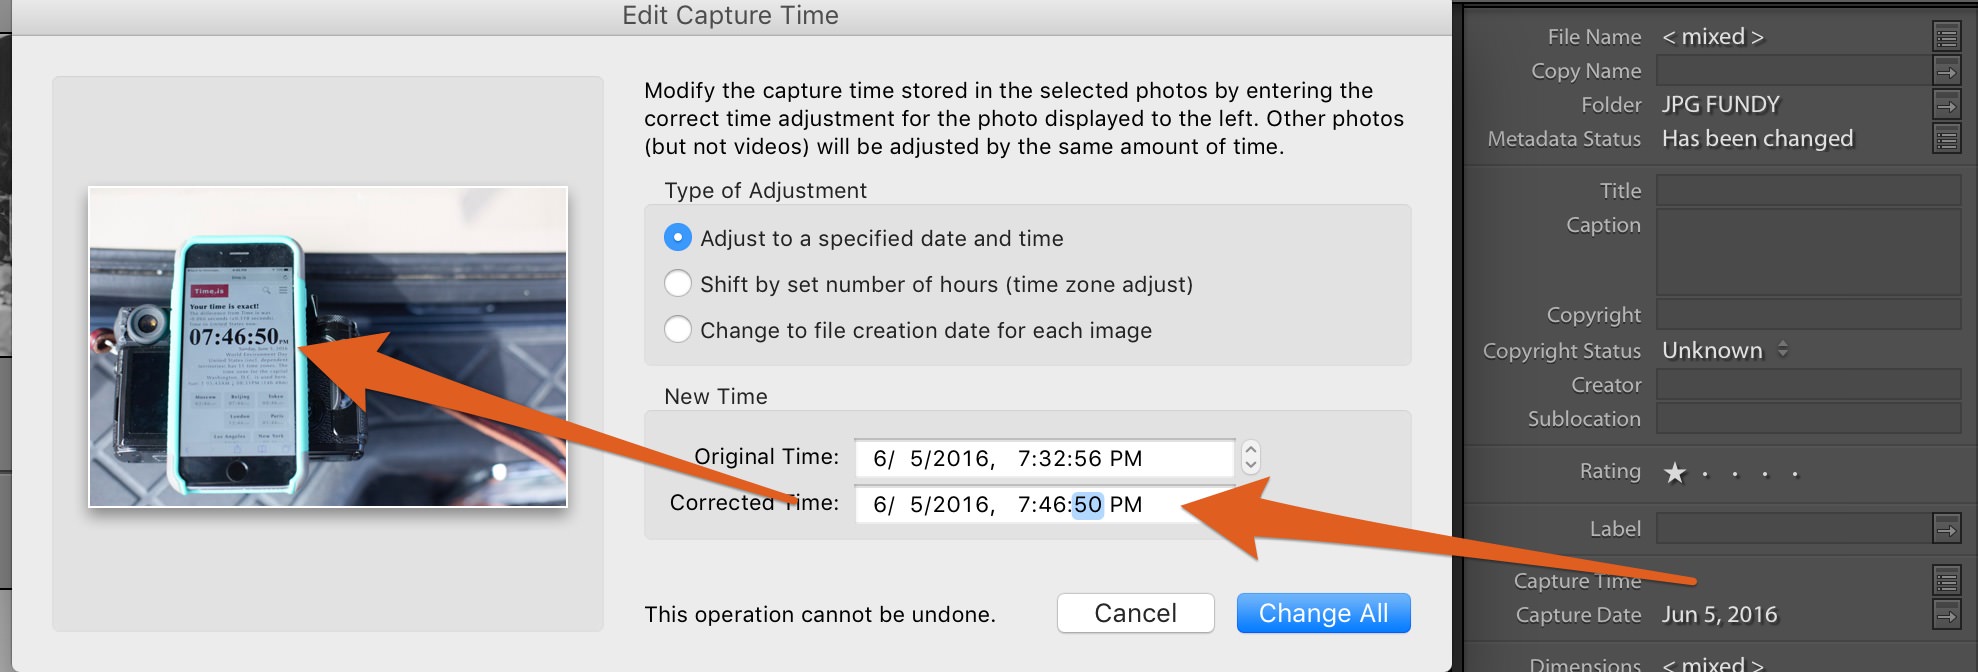
Repeat this process for each photo. Now each photo is Time synced.
Forgot to Take a Reference Photo?
But maybe you forgot to take a reference photo. If no one has changed the clocks in your cameras, you can take the reference photo after the fact. Camera clocks do drift a bit, so if the shoot is more than a couple of months old, the sync will not be quite as accurate. But, even if you take a reference photo twice a month with every camera used in the studio, you’ll have an easy way to time sync.
But I’m Designing An Album From Last Year
But, maybe you are designing and album from a wedding you shot last year. If you had an associate photographer, maybe you don’t have access to the camera that was used in the shoot. Or you upgraded your cameras and the cameras from last year are no longer available. Fear not, you can still time sync.
Find one moment where all cameras were used. It may be the kiss at the ceremony. Choose one photo and make a note of the time and date. Now you can find a photo that was taken at the same time from another camera. Use the same process as above to change the time and date of the photos of this camera to match the other camera.
Now you may need to do this repeatedly with different moments of the day. If there was a camera that wasn’t used during the ceremony, you may have to use a different moment of the day as a reference.
The Payoff for a Great Workflow
Now what do we get out of a great workflow with Time sync? First, every time we open up the shoot, everything is in order.
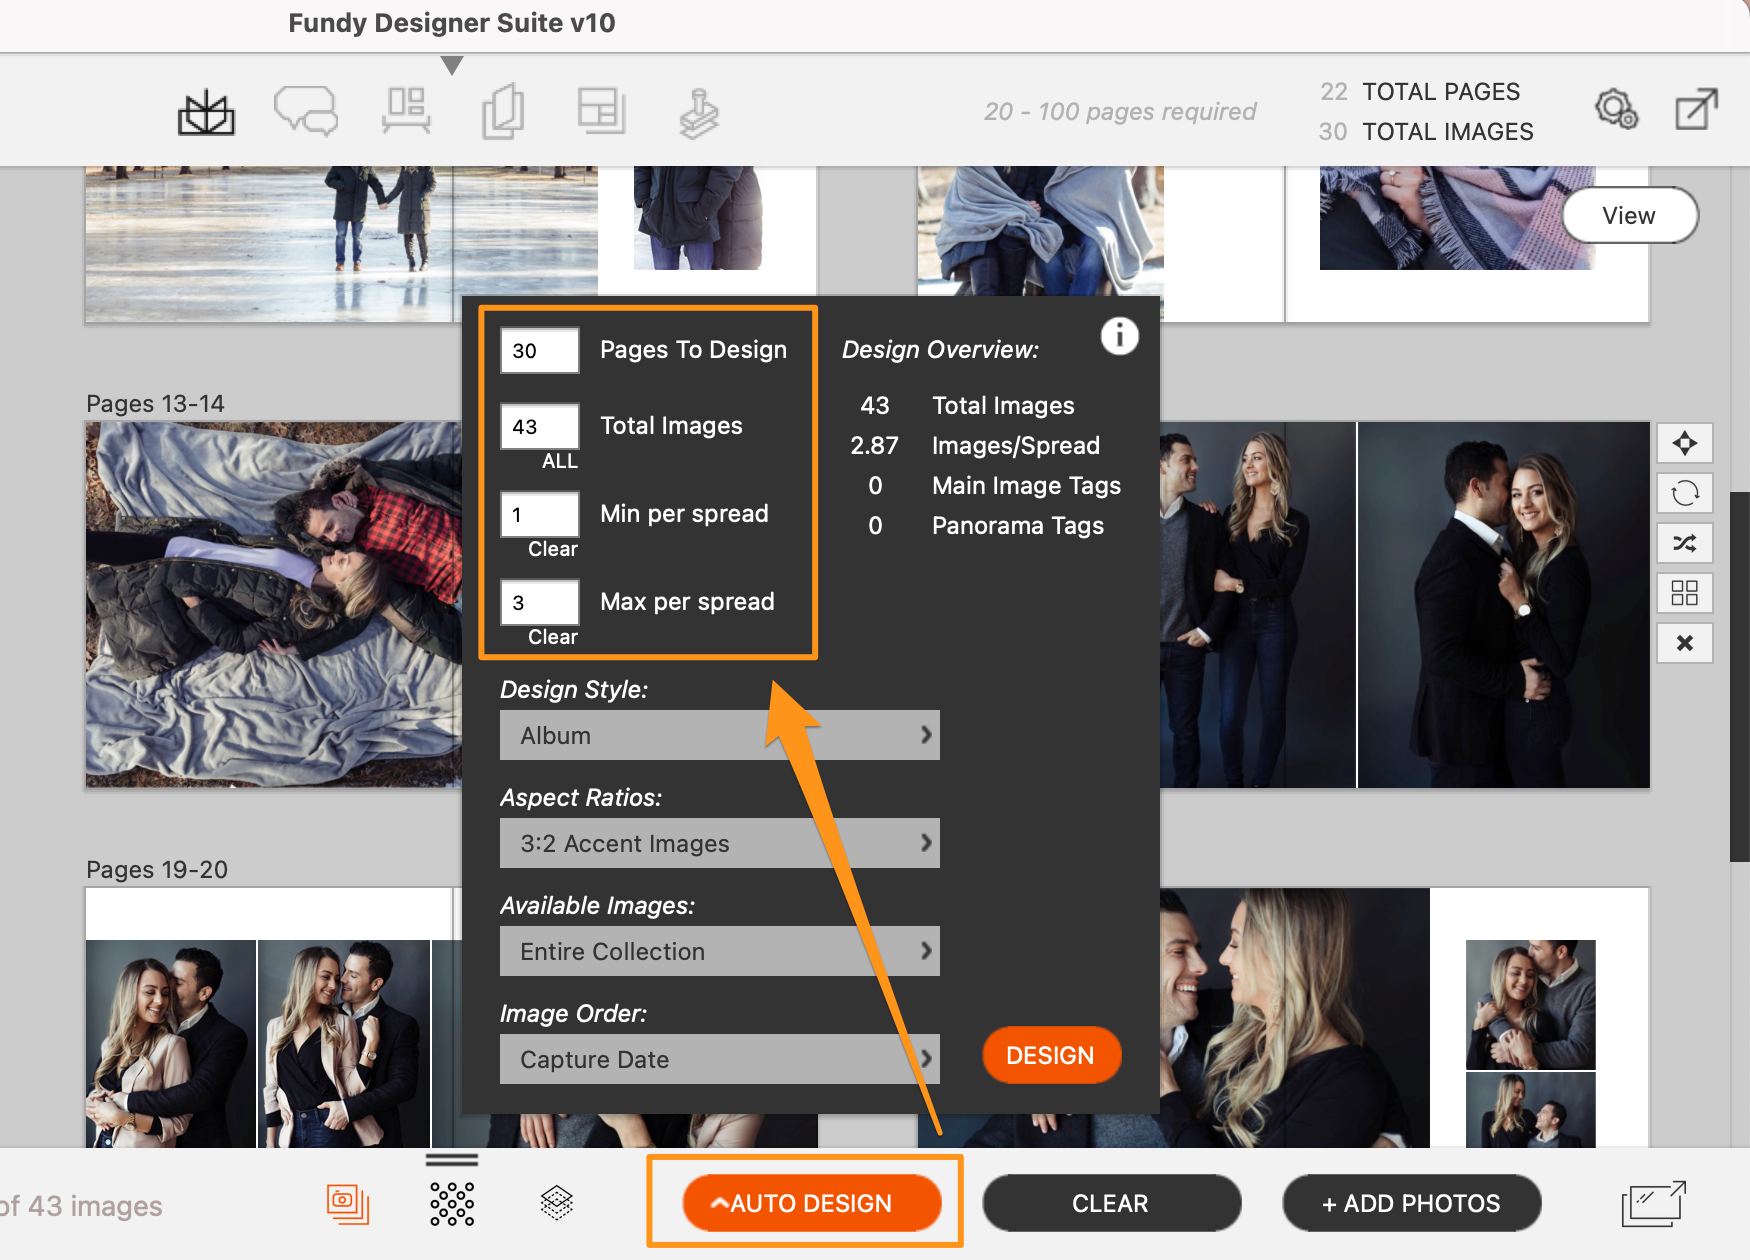
Amaze yourself with a one-click auto design.
Secondly, every time we upload our photos somewhere they will sort correctly by time.
But, what we can really do is cut our album design down to 10-15 minutes. Imagine being able to make one of the most profitable parts of your business just 10-15 minutes.
One click of the auto design, you’ll have a rough draft that is 80-90% finished. Now, simply tweak the design and you’re done.
If you love to use the newest technology or want to really show your clients just how great you are, use the storyboard tagging. When you tag a photo as cover photo, v7 will make that image the cover photo when you hit auto design. You can also group photos together, tag images to be a double page spread or tag images to be the main image on a spread.
See it Step-by-Step
Surprise Yourself With Auto Design
I cannot count the number of photographers who have been surprised at the storytelling algorithm in the Auto Design (patent pending). It’s amazing how accurate the auto design is as separating photos automatically onto the pages. The bride getting ready on one spread and groom getting ready on another. This is because we analyze not only when photos were shot but how, grouping photos that were taken close together.
I was having dinner with our friends Dee and Tracey of the fabulous 37 Frames and they designed six albums in a morning last week, and the auto design gave them a near finished product.
Our job, at Fundy Software, is to make you look good. The faster and easier you can design an album, the sooner your clients will be able to share it with their friends and family.
If you haven’t had a chance to give v10 a run yet, here’s your chance, download it today and give it a try.