
The auto algorithms in Photoshop are just getting smarter and smarter. Also they are giving the user more and more choice on how that automation is applied.
In this Tip of the Week, we’ll show you how to use the Auto Tone and Auto Contrast functions effectively in Photoshop. These can be applied with quick keys or with actions that we’ll include here.
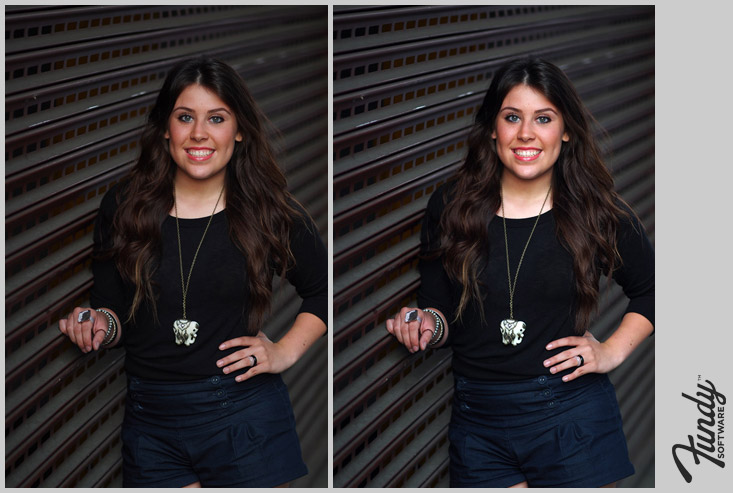
Auto Tone
Auto Tone does some tricky, fun under-the-hood magic. It expands the levels of each color channel individually. So, basically, it changes the contrast of the image on each color channel separately, giving more natural results.
Here is a before image out of Lightroom.

And here is the after with the Auto Tone.

Personally, I really like the results on this image.
To apply Auto Tone, use the quick keys Command+Shift+L (Mac) or Control+Shift+L (PC)
Auto Contrast
With auto contrast, the auto levels are applied to all color channels equally. Personally, I find the results on this image to be less appealing than the Auto Tone. But, this is a function that is there and you can play around with it. To apply Auto Contrast, use Command+Option+Shift+L (Mac) or Control+Alt+Shift+L (PC)

Free Action
We’ve created an action that will do this with one click for you.
[button url=”https://www.e-junkie.com/ecom/gb.php?c=cart&i=1193528&cl=20890&ejc=2″ target=”_self” size=”small” style=”coolblue” ]Click To Download Free Action[/button]
How To
Watch this video how to use Auto Tone and Auto Contrast. Additionally, learn how to use the Auto Tone action with Batch Editor.


