
By the time you finish reading this week’s tip, you’ll have learned five ways to work more efficiently, productively and creatively in Lightroom. If you already know these tips, then they’re not so secret. But chances are, you’ve forgotten about them and you’ll slap your forehead and say, “Oh yeah, I totally forgot about that!”
Since its humble beginnings in 2006, Lightroom has quickly become the definitive photo editing app for photographers. Lightroom is similar and completely different from Photoshop. Mainly in its non-destructive workflow, affordability (over Photoshop) and discoverable interface, which makes it easy to get up and running.
If you’re familiar with Photoshop, then you know there are a million ways to do the same thing. It’s overwhelming for many photographers and because of this, no two photographers work the same in Photoshop. While Lightroom has similar features and tools, it’s designed from the ground up to be a production tool.
There’s still a lot crammed in there and it’s easy to use the tools you’re familiar with and not explore much further. Learning to use these somewhat hidden features will improve your productivity, hone your creative vision and save time to focus (pun intended) on what really matters. Being a creative monster behind the camera! Ready? Here are my top five tips.
Tip Number 1: Toss out those old backups!
In today’s digital world, Rule #1 is back it up.
Rule #2? See rule #1, rinse and repeat. (You are backing up your computer, right?)
Lightroom prompts you to backup your catalogs and some photographers back up manually, every day or once a week. If you’re like me, you have a ton of photos and those backups start gobbling up a lot of hard drive. Do you really need a backup from months ago? Yeah, that’s what I thought, too. Those old backups need to go away.
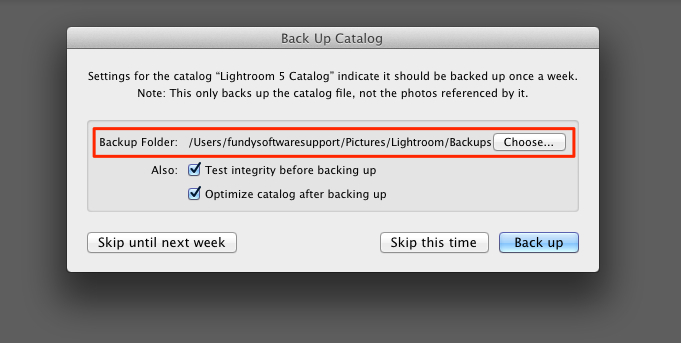
Where are my backups located, you ask? By default, Lightroom places them in a Backups folder next to your catalog. If you chose a different location, then that’s on you to locate. When you do locate the backups folder, you’ll see a series of subfolders, with the date and time the backup was created.
There’s some great information on the Adobe site. Probably the last place you thought to look if you’re anything like me. For more information on backing up in Lightroom, read ‘Back up a catalog‘ in Lightroom Help and watch ‘Backing up your catalog‘ on Adobe TV.
Tip Number 2: Show clipped tonal values
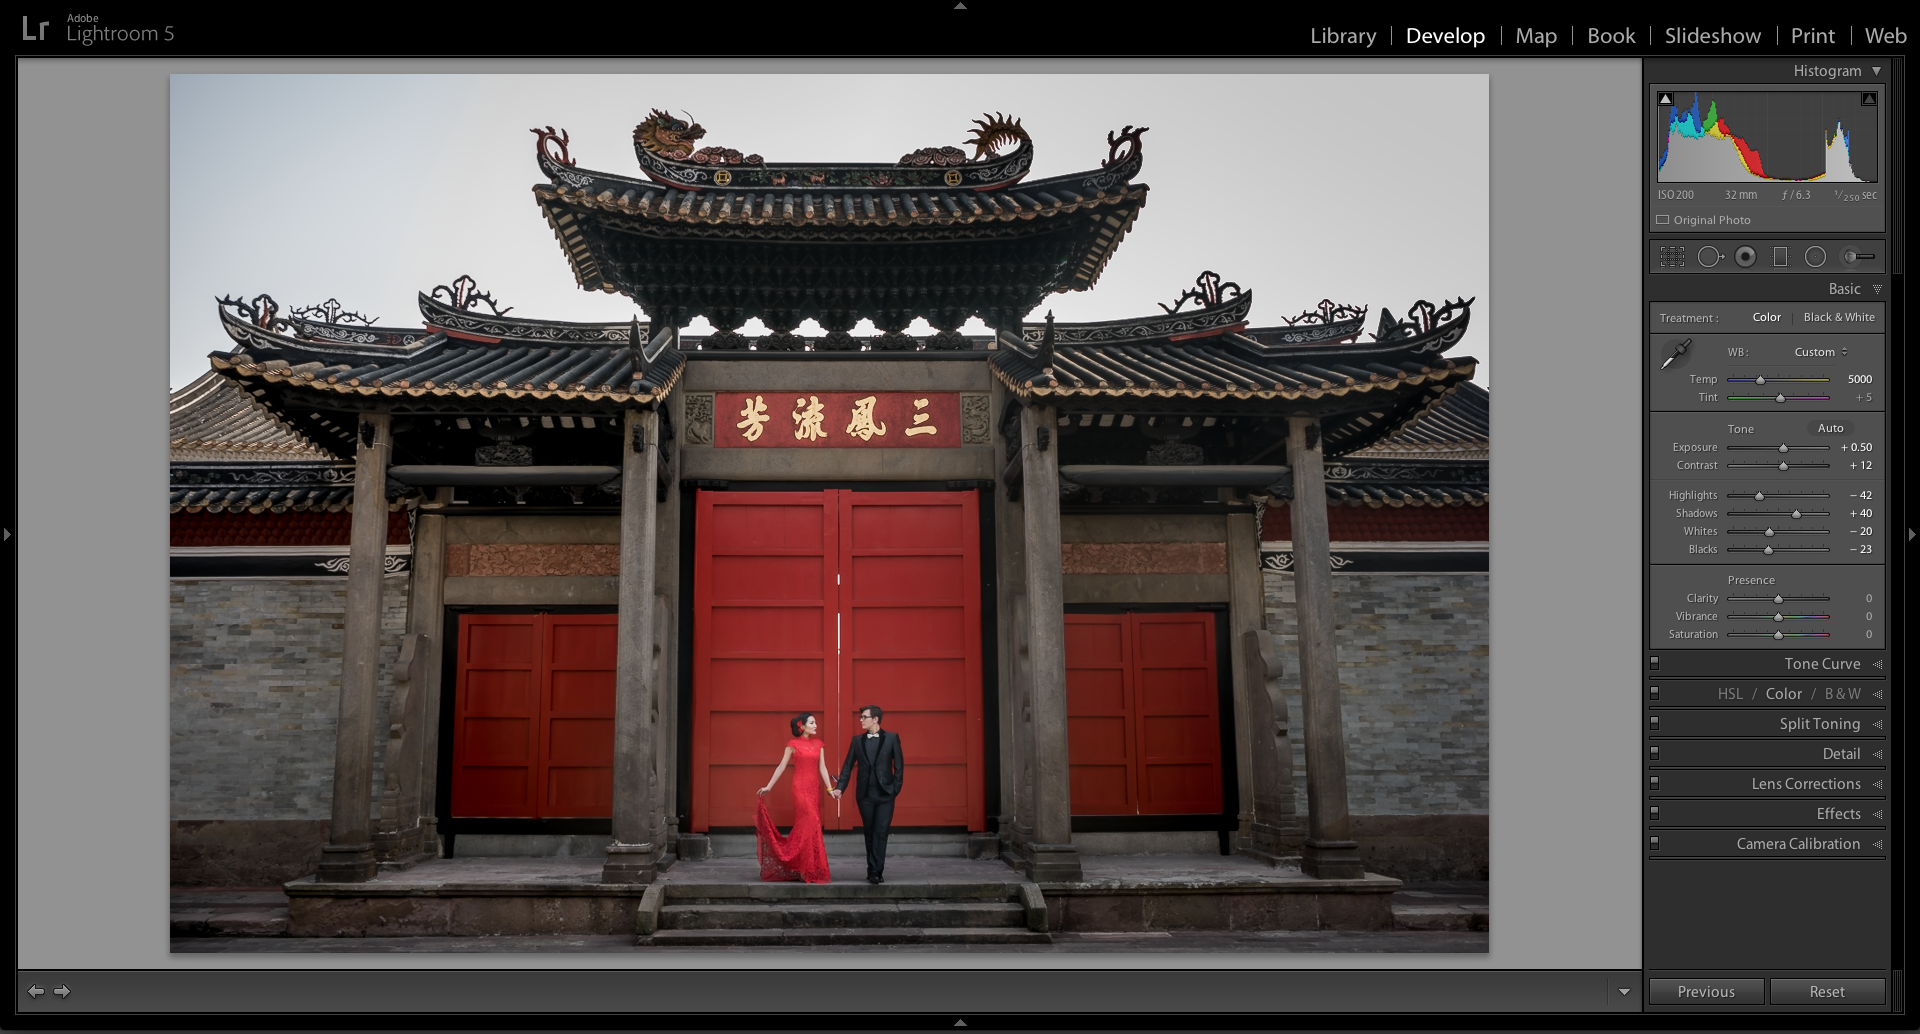
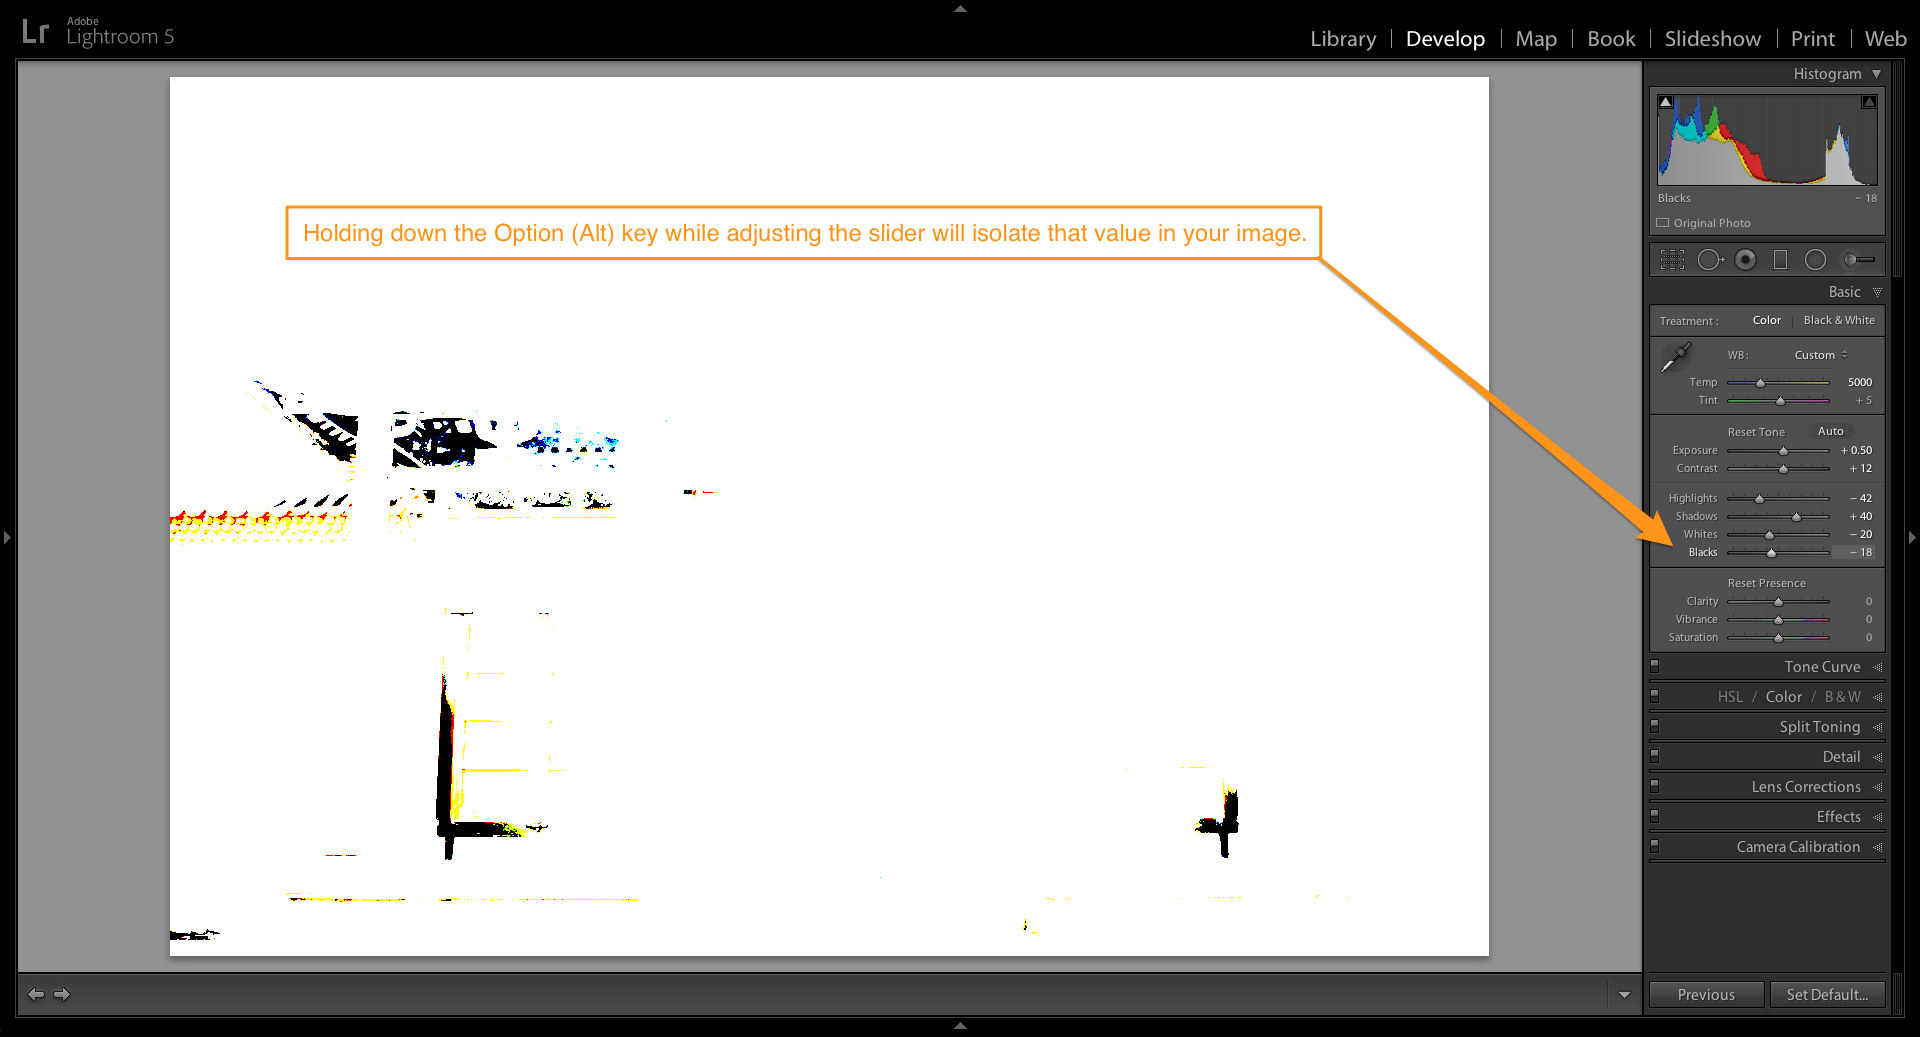
When working on an image in Lightroom, it’s easy to start doubting yourself. How black is that black? Am I losing detail? Fortunately, you don’t have to rely on your subjective point of view. Lightroom has some great tools to help show clipped values for blacks and whites in your image.
As you move a slider for Exposure/Highlights/Shadows/Whites/Blacks, hold down the Option (Alt) key to show clipped (threshold) tonal values. I use this tip all the time and it’s great to quickly figuring out if you’re pushing pixels too far.
Tip Number 3: Toggle masking with the Adjustment Brush
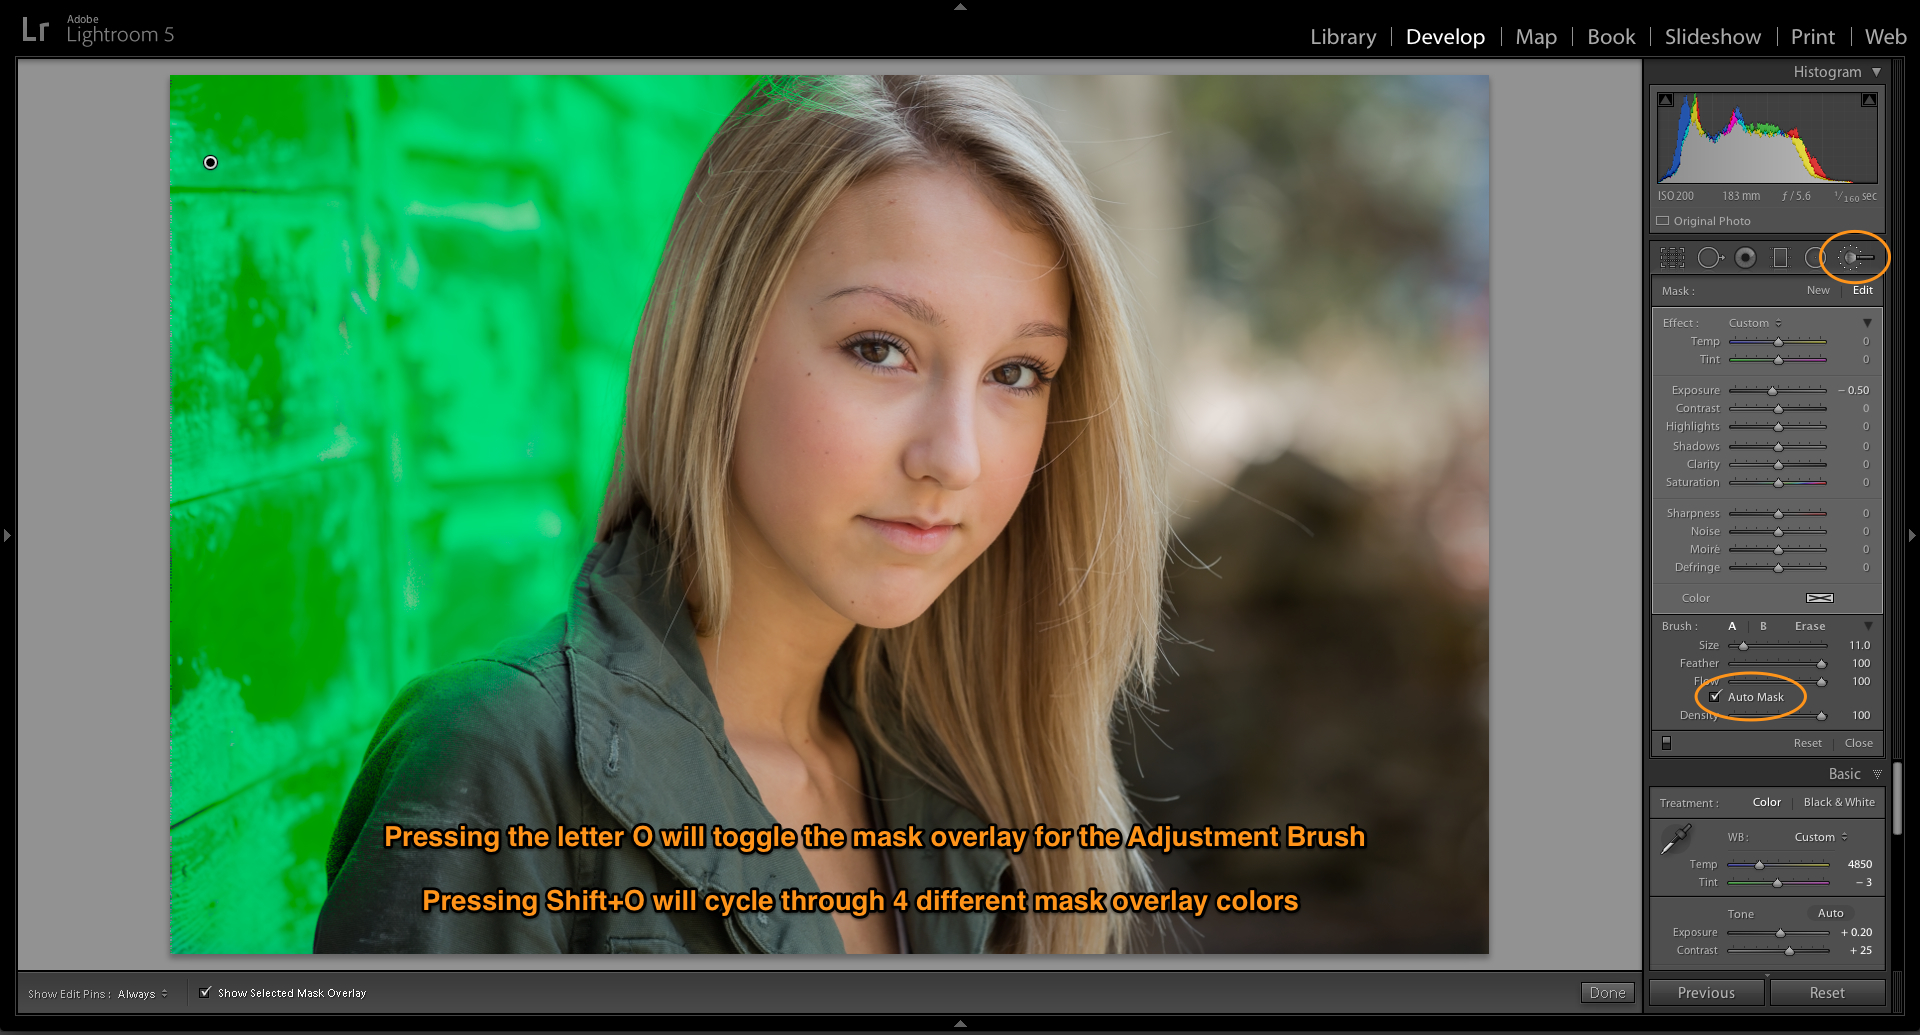
When painting with the Adjustment Brush in the Develp Module, it’s hard to tell exactly what’s being adjusted. Lightroom has the ability to show masking and not only that, you have a choice of colors.
When using the Adjustment Brush, tap the ‘O’ key to Show/Hide Mask Overlay (there’s also a toggle button in the bottom panel options when the brush is active). Add the Shift key (Shift+O) and you can cycle through the overlay mask colors (red, green, gray and white). Once the mask is active, it’s much easier to see the areas that are being affected by the Adjustment Brush and make refinements to the mask.
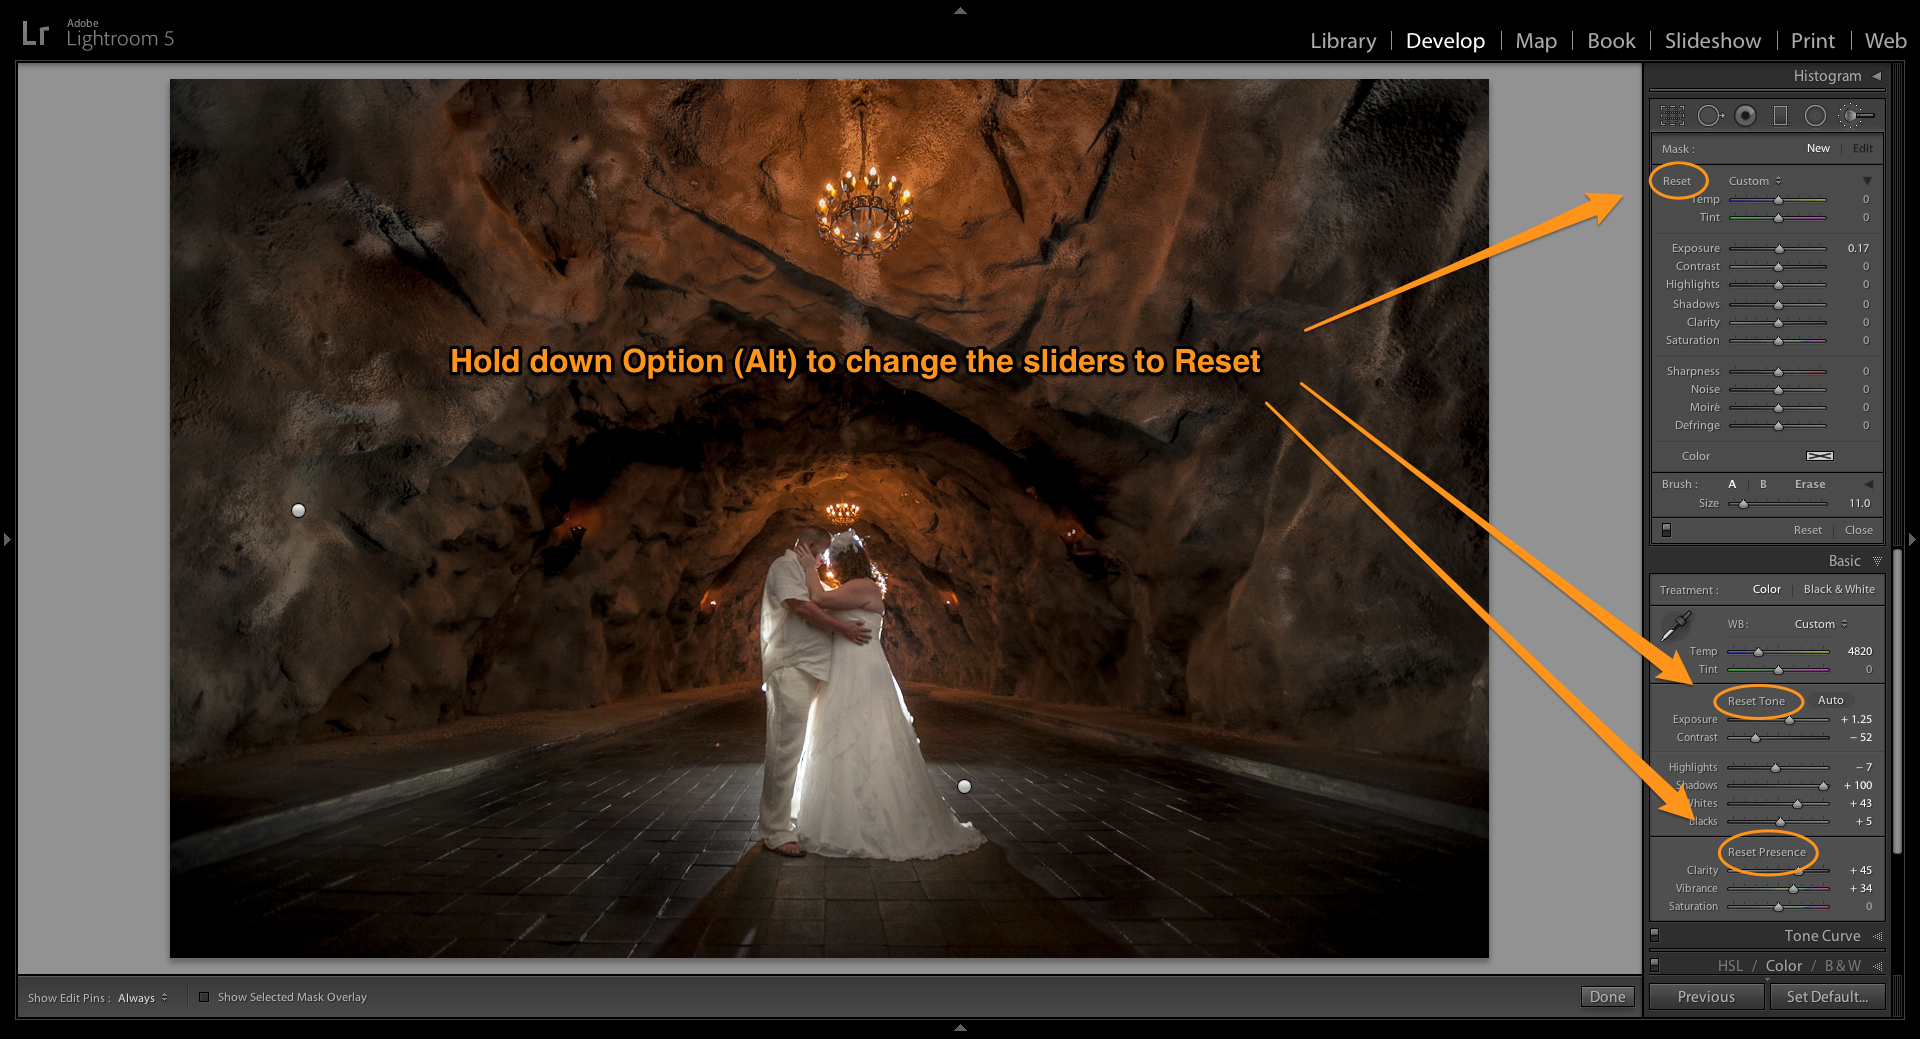
Tip Number 4: Quickly resetting the sliders
One of my biggest pet peeves when I first started using Lightroom was how cramped my hand would get after long hours of moving sliders. Trying to move them back to zero when I didn’t like what I was seeing. Wishing there were an easier way. Guess what? There is.
Double-Click any slider or slider name to reset to its default value. You’re welcome. Bonus tip – holding down Option (Alt) in the Develop Module turns the control titles into reset links.
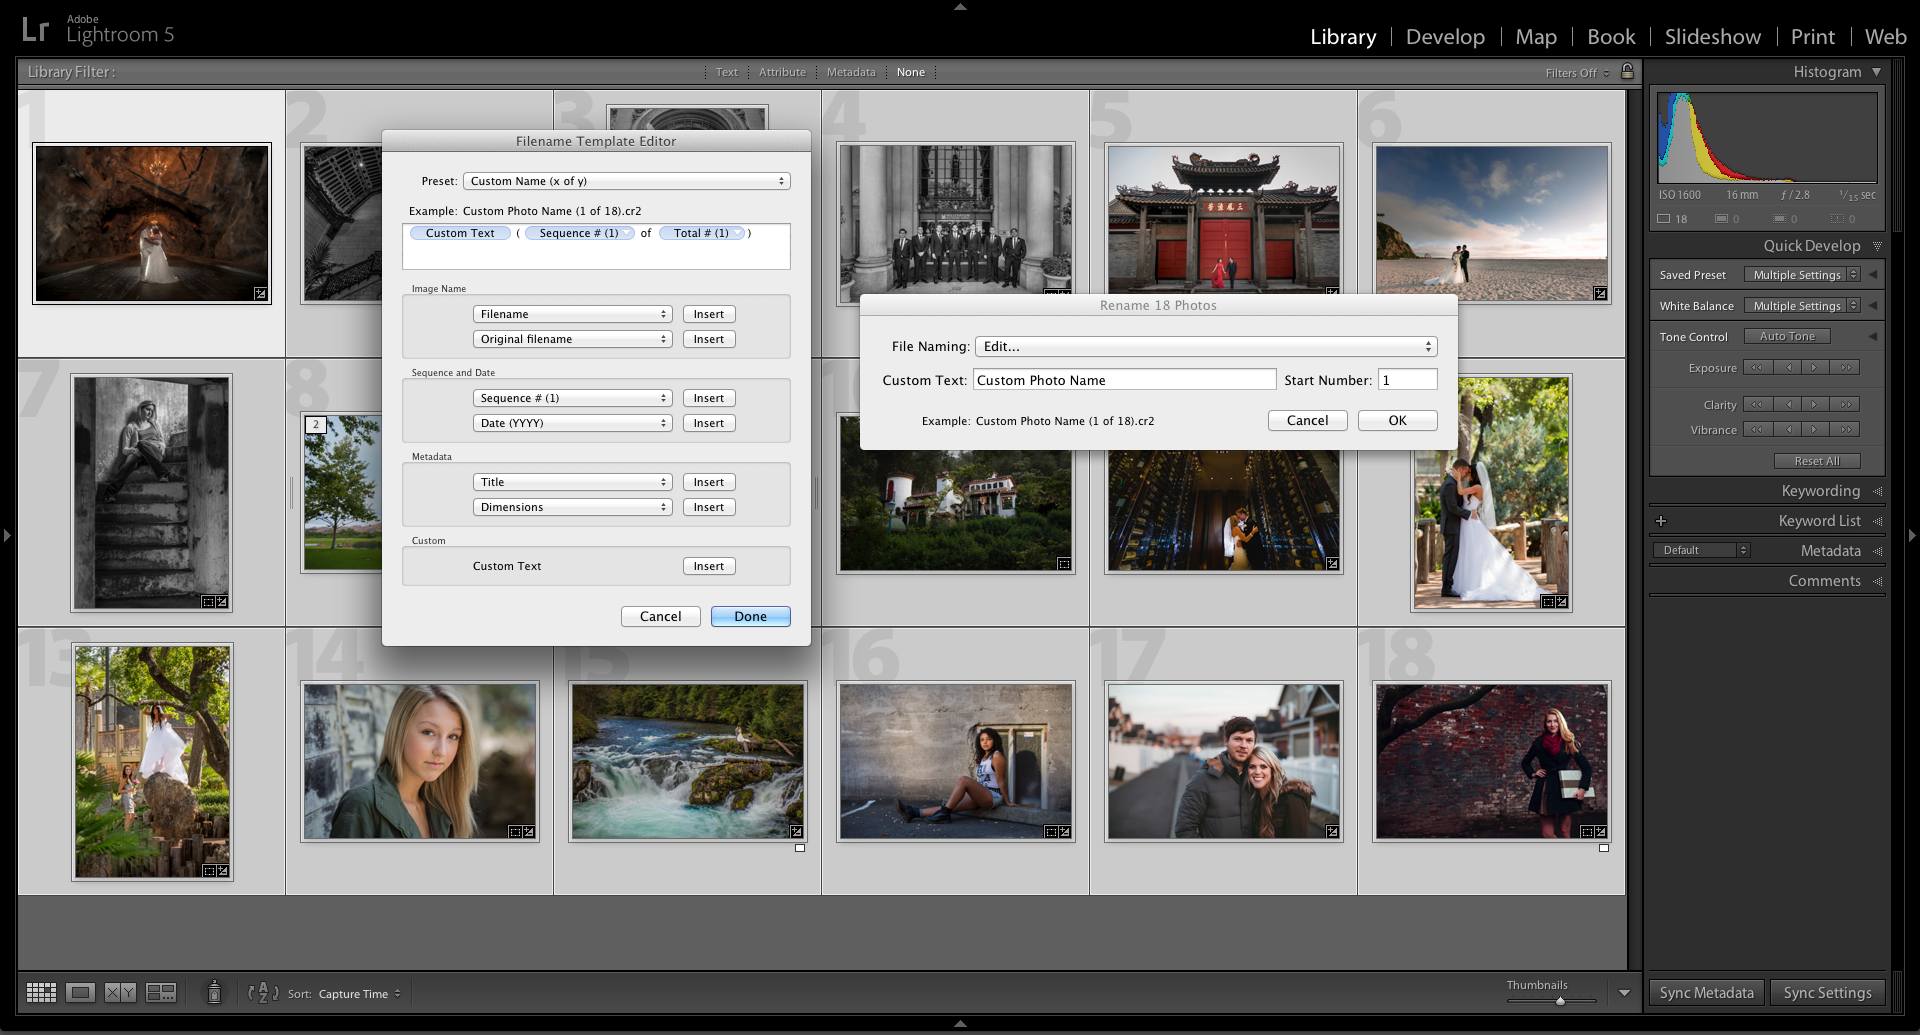
Tip Number 5: Play in the Lightroom playground
No matter how you use Lightroom, there will come a time when you want to rename or move photos. If you do this outside of Lightroom, it has no way of knowing what happened to your photos. Learning to use the tools inside of Lightroom to rename and move your photos will keep your catalog in sync with your source images.
Doing this outside of Lightroom means you have to reconnect your images to your Lightroom catalog after the fact and trust me, that’s not as fun as it sounds. But if you like learning the hard way, go for it. You can also rename folders and filenames by right-clicking the filenames in the Folders Panel.
By the way, if you need to relink missing files and folders, here’s the missing link. Yes, once again our friends at Adobe (Julianne Kost) have some great information available to help you learn how to use Lightroom.
Those are my top five tips to help you work more efficiently, productively and creatively in Lightroom 5. Stay tuned in a few weeks for Part Deux! Yes, that’s right, another five tips from the personal archive. I hope this helps you spend less time in Lightroom and more time following your dreams.


