You’ll be a professional retoucher in no time.
How to Access Skin Retouching
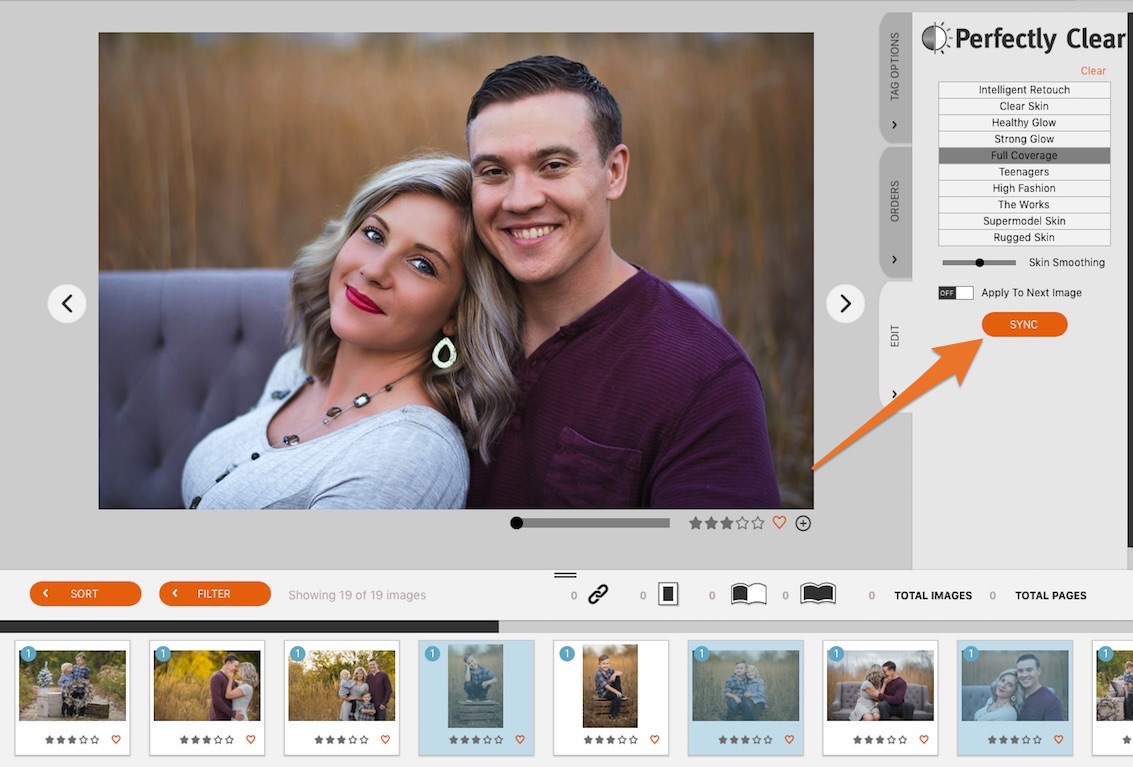
To access the retouching, open the client view/image browser into the filmstrip view (shift+x) and click on the edit tab.


All About Presets
There are a number of presets to start off with. Simply click through the presets and find the one that you love. My personal favorite is the Full Coverage.

Using the Slider
Once you get your favorite one-click dialed in, now it’s time to play with the slider. The slider controls the skin softening.

Retouch Only The Photos Used
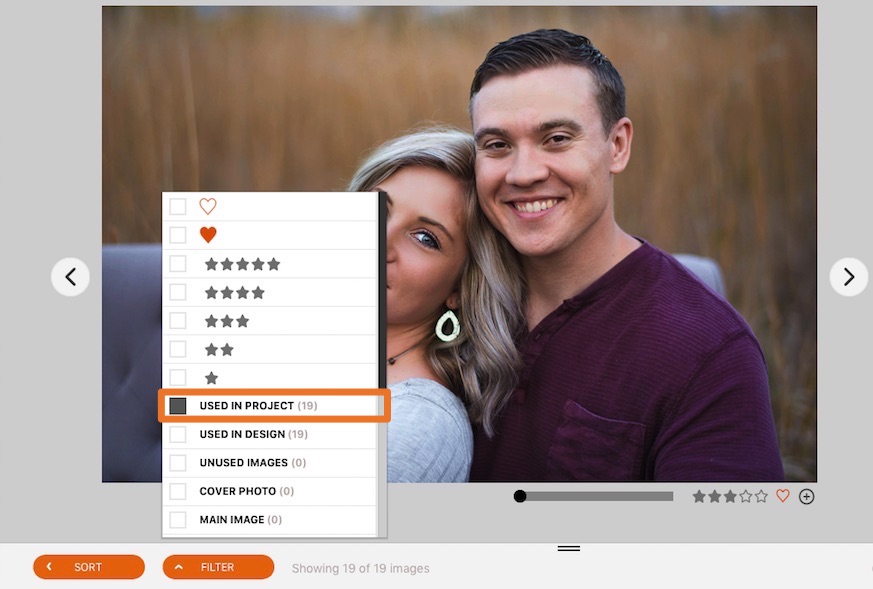
You’ve probably brought in more photos than you’ve ended up using for your client. We’ve added a new filter for you.
You can now filter to just the photographs used ‘somewhere’ in your project. Whether it was used in an album or a wall gallery or even a print order. Filter down to just those.
Now you know JUST what you need to retouch.

Auto Apply to Next Image
This is where you can speed up your workflow. As you add your retouching, you can toggle this on to auto apply your last setting to the next photo you move to. So you just have to double check and then move on.

Batch Sync
Or use the fastest way to work, batch sync. Select one photo and retouch to your liking, then select multiple other photos and use the Sync button to sync settings across photos.

What About BIG Blemishes?
This is where having the Suite connected to Photoshop is a big help. Right-click and choose Edit in External Editor, use the healing brush to remove the blemish and save.
Watch The Video


