Digital film effects are what I like to call the “Pursuit of Imperfection.” What is this fascination with film? Seems that everyone is pushing out vintage film presets, filters and apps. Aside from the nostalgia of creating an image that looks like it was taken by your grandparents, most of these tools leave you wanting more.
Exposure 6 from Alien Skin Software changes all of this. If you’re serious about bridging the gap between digital and the timeless subtleties of film, you’d be hard pressed to find a more realistic solution without actually shooting film. More than a decade of research and feedback from industry-leading photographers from around the world has gone into Exposure 6.
You may know Alien Skin for their Eye Candy software aimed at graphic designers (did you know they developed the first drop shadow for Photoshop?), but they quickly became the darlings of the photo community when they released Exposure in 2005. One of the first solutions for digital photographers seeking to emulate the analog warmth, softness and grain of film. That heritage and attention to the smallest detail has been carried forward with the release of Exposure 6.
Romancing the Film
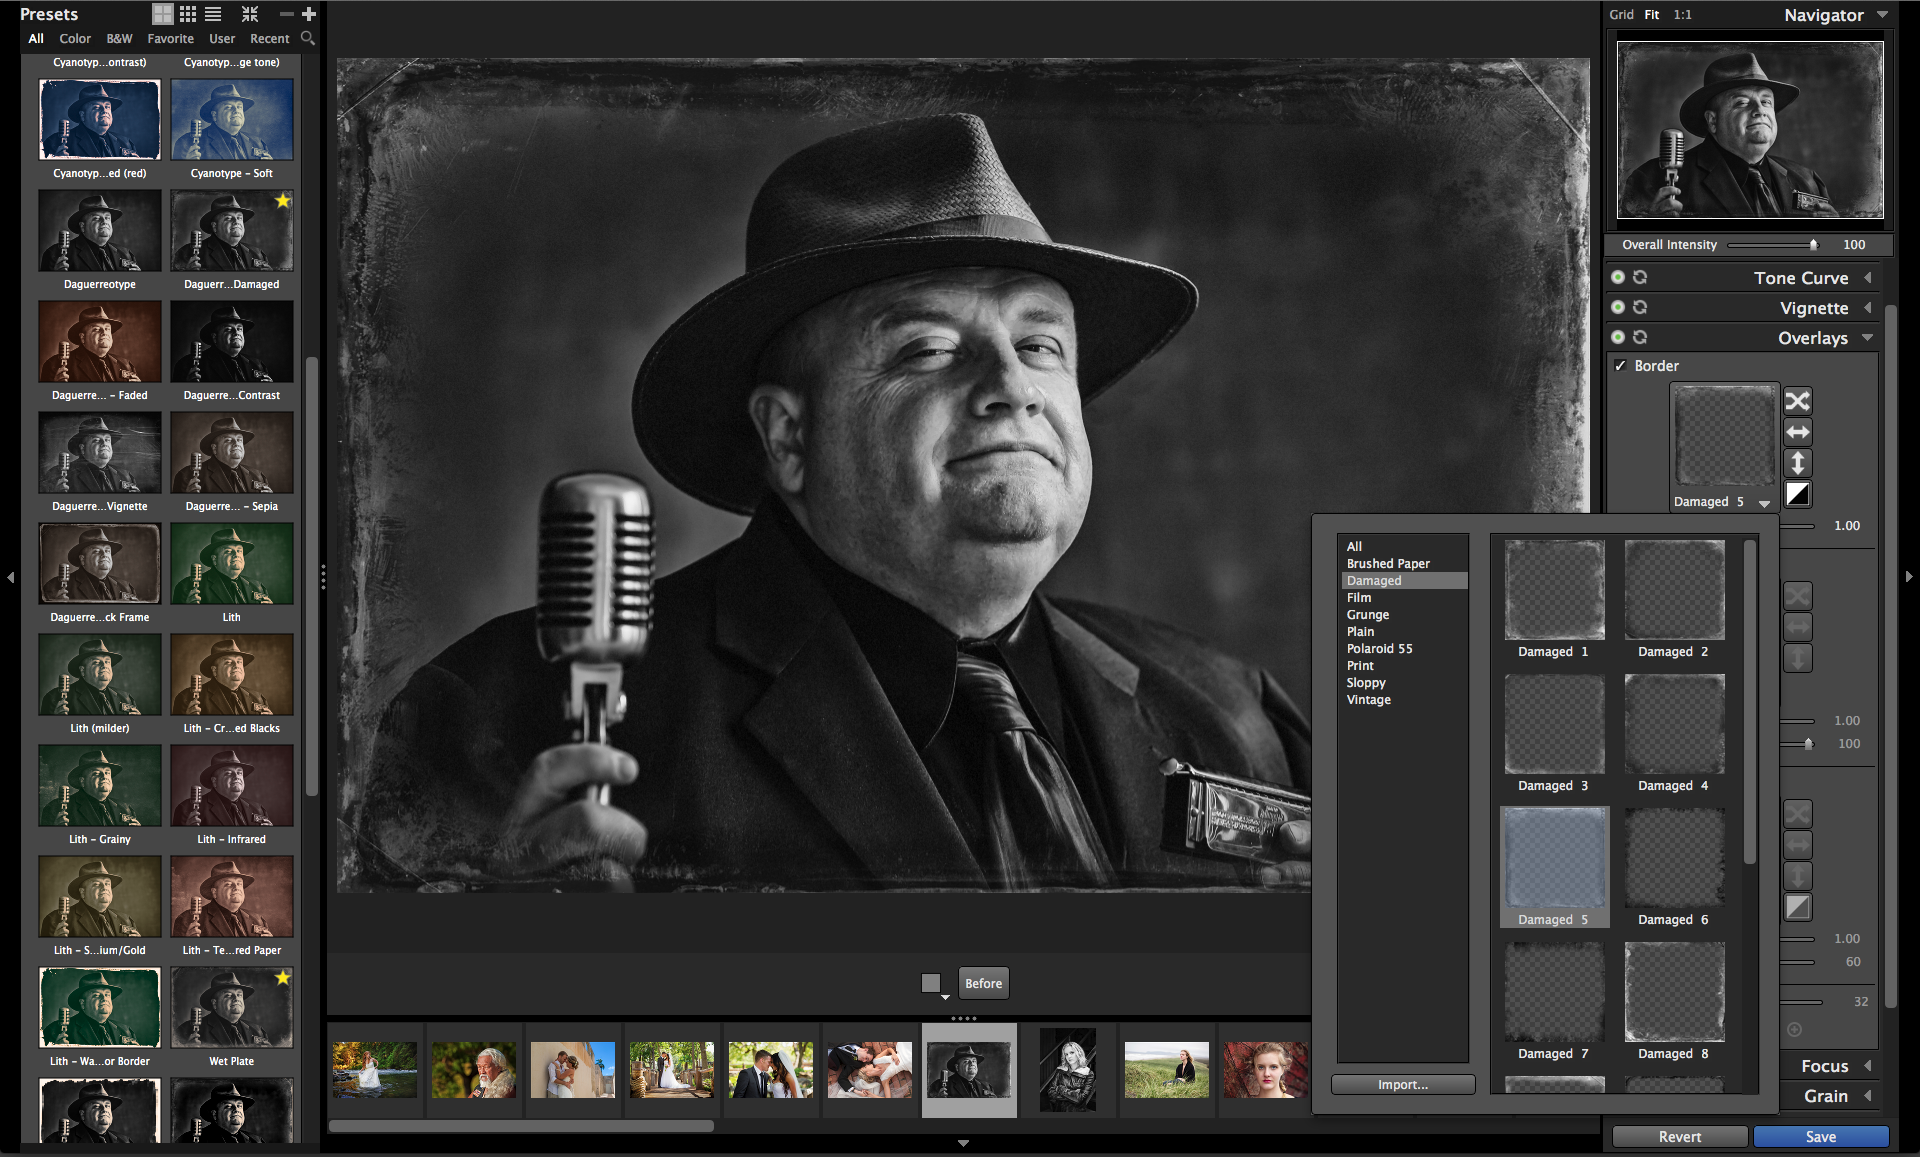
Like scientists from a ’50s B movie armed with electron microscopes, they’ve analyzed actual film emulsions for grain characteristics. Then added in subjective characteristics with feedback from film purists such as Jeff Ascough and Parker Pfister. The film edges and vintage effects are authentic, vintage prints and negatives scanned by Parker Pfister.

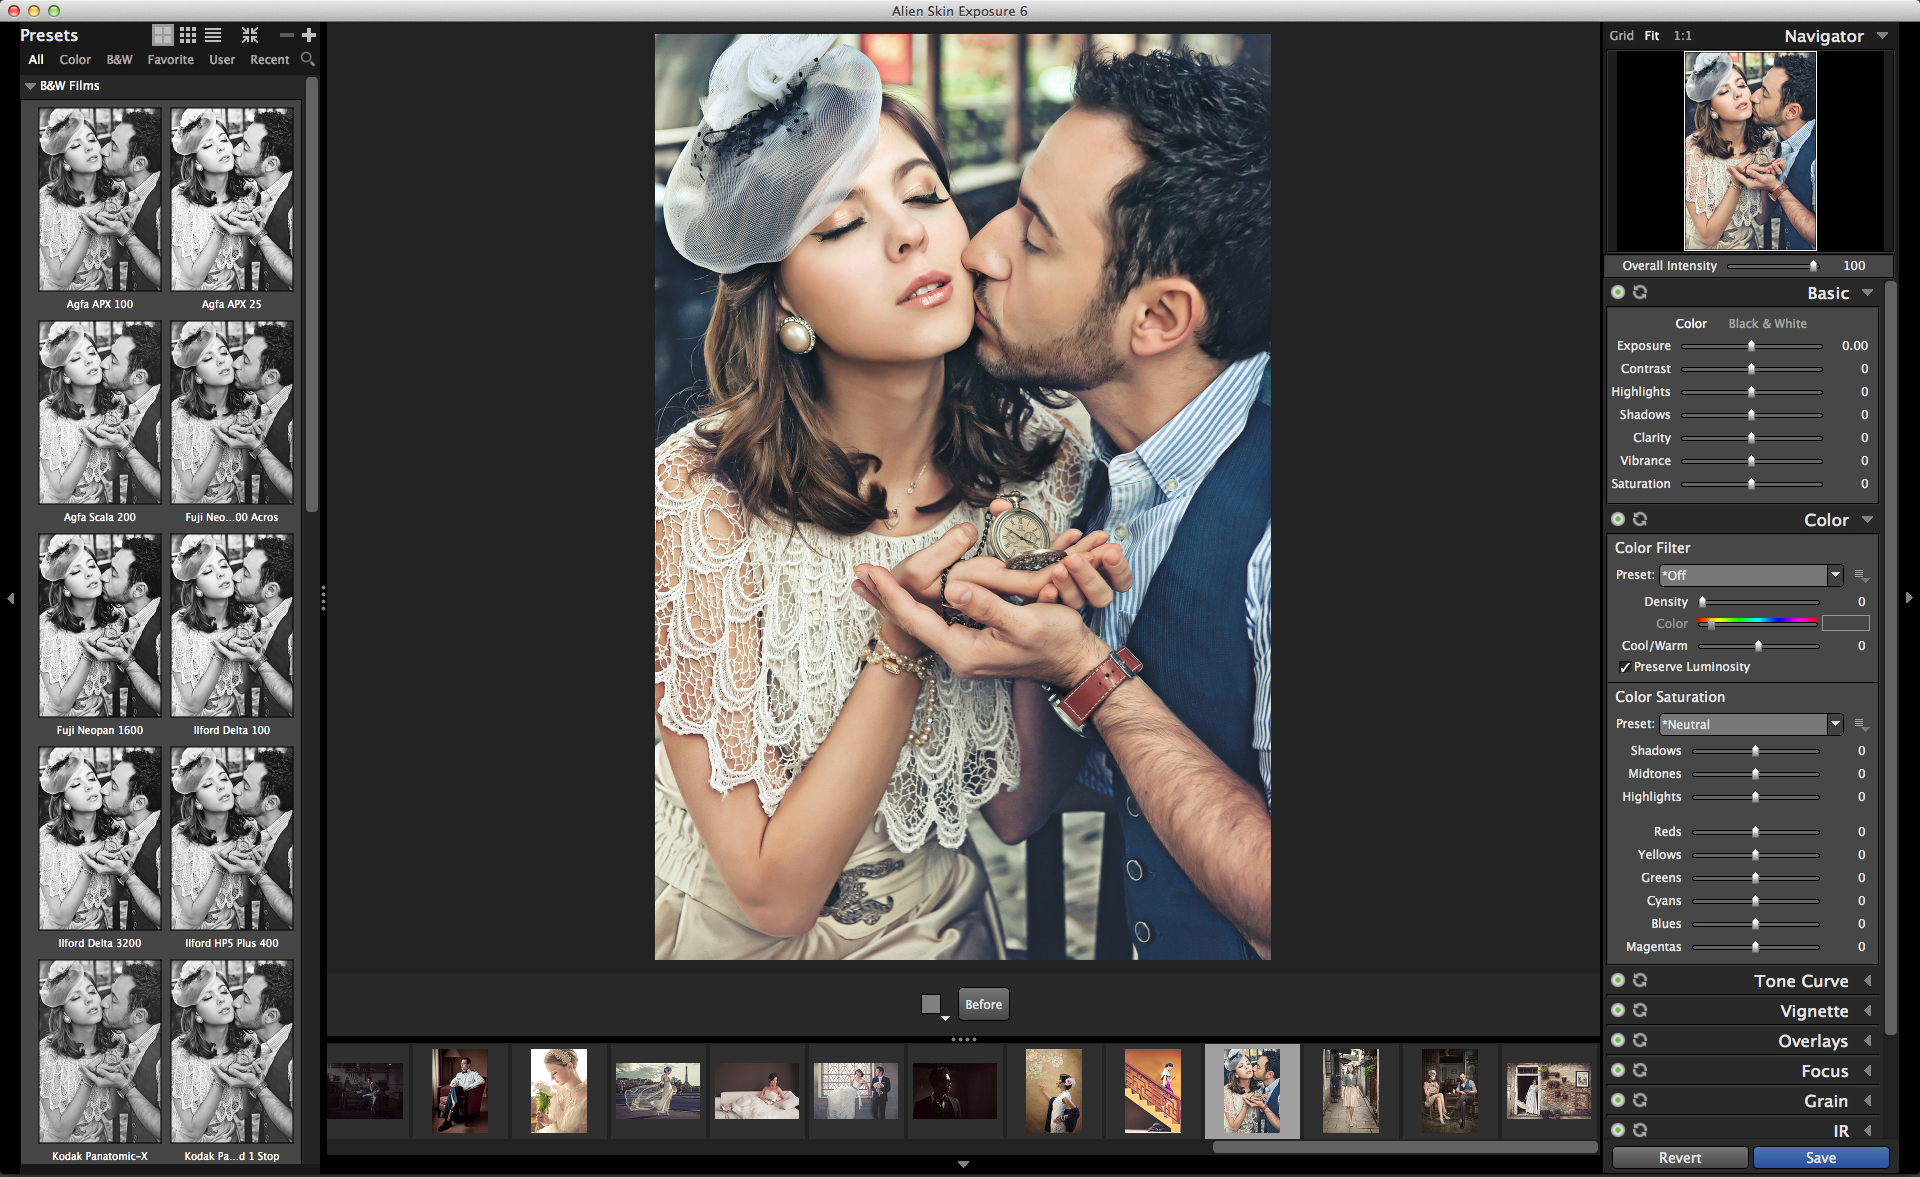
Like a vinyl record, there’s an organic warmth to film grain that’s different than the sterile noise of digital software. Exposure 6 offers an authentic, analog warmth that’s true to the heritage of film wrapped in a digital interface that’s easy to implement into your workflow. These presets capture the natural warmth of film with glowing skin tones and pastel color palettes.
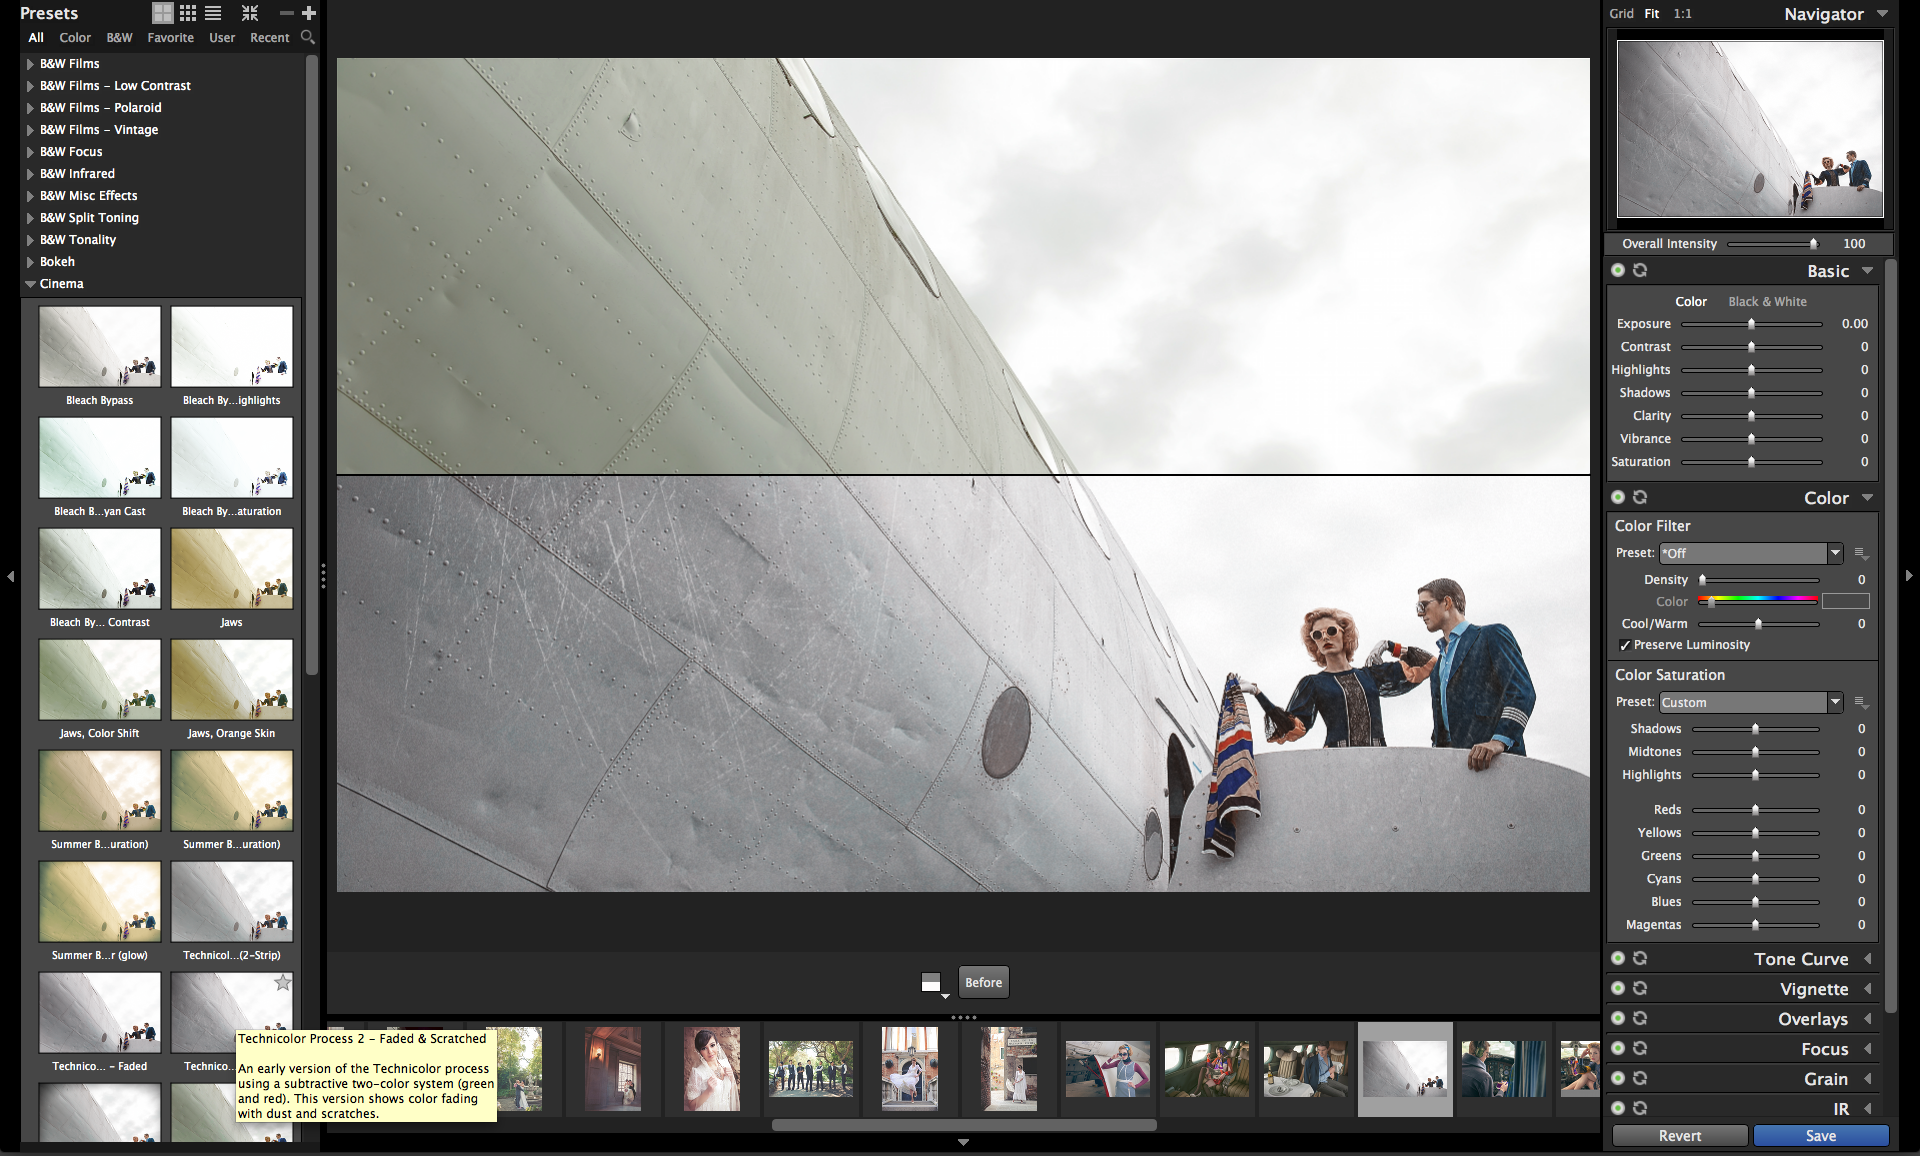
The grain is what truly sets this software apart from the rest. As you resize a filter, the grain “breathes” and you can see this happen in real time. Go ahead and pixel peep. No digital pebble bashing like you’ll find in Lightroom- or Photoshop-based effects. Everything is customizable, including the grain, which you can actually turn off. Every panel has the option to toggle on/off or dial in with amazing subtlety.
As Alien Skin says on its website, nuances matter. As a black and white purist at heart, I’ve always been very critical of digital solutions to emulating an analog process. My past is deeply rooted in working with film and that gives me a perspective and cynicism that most photographers will never have: the ability to understand what film is actually supposed to look like.
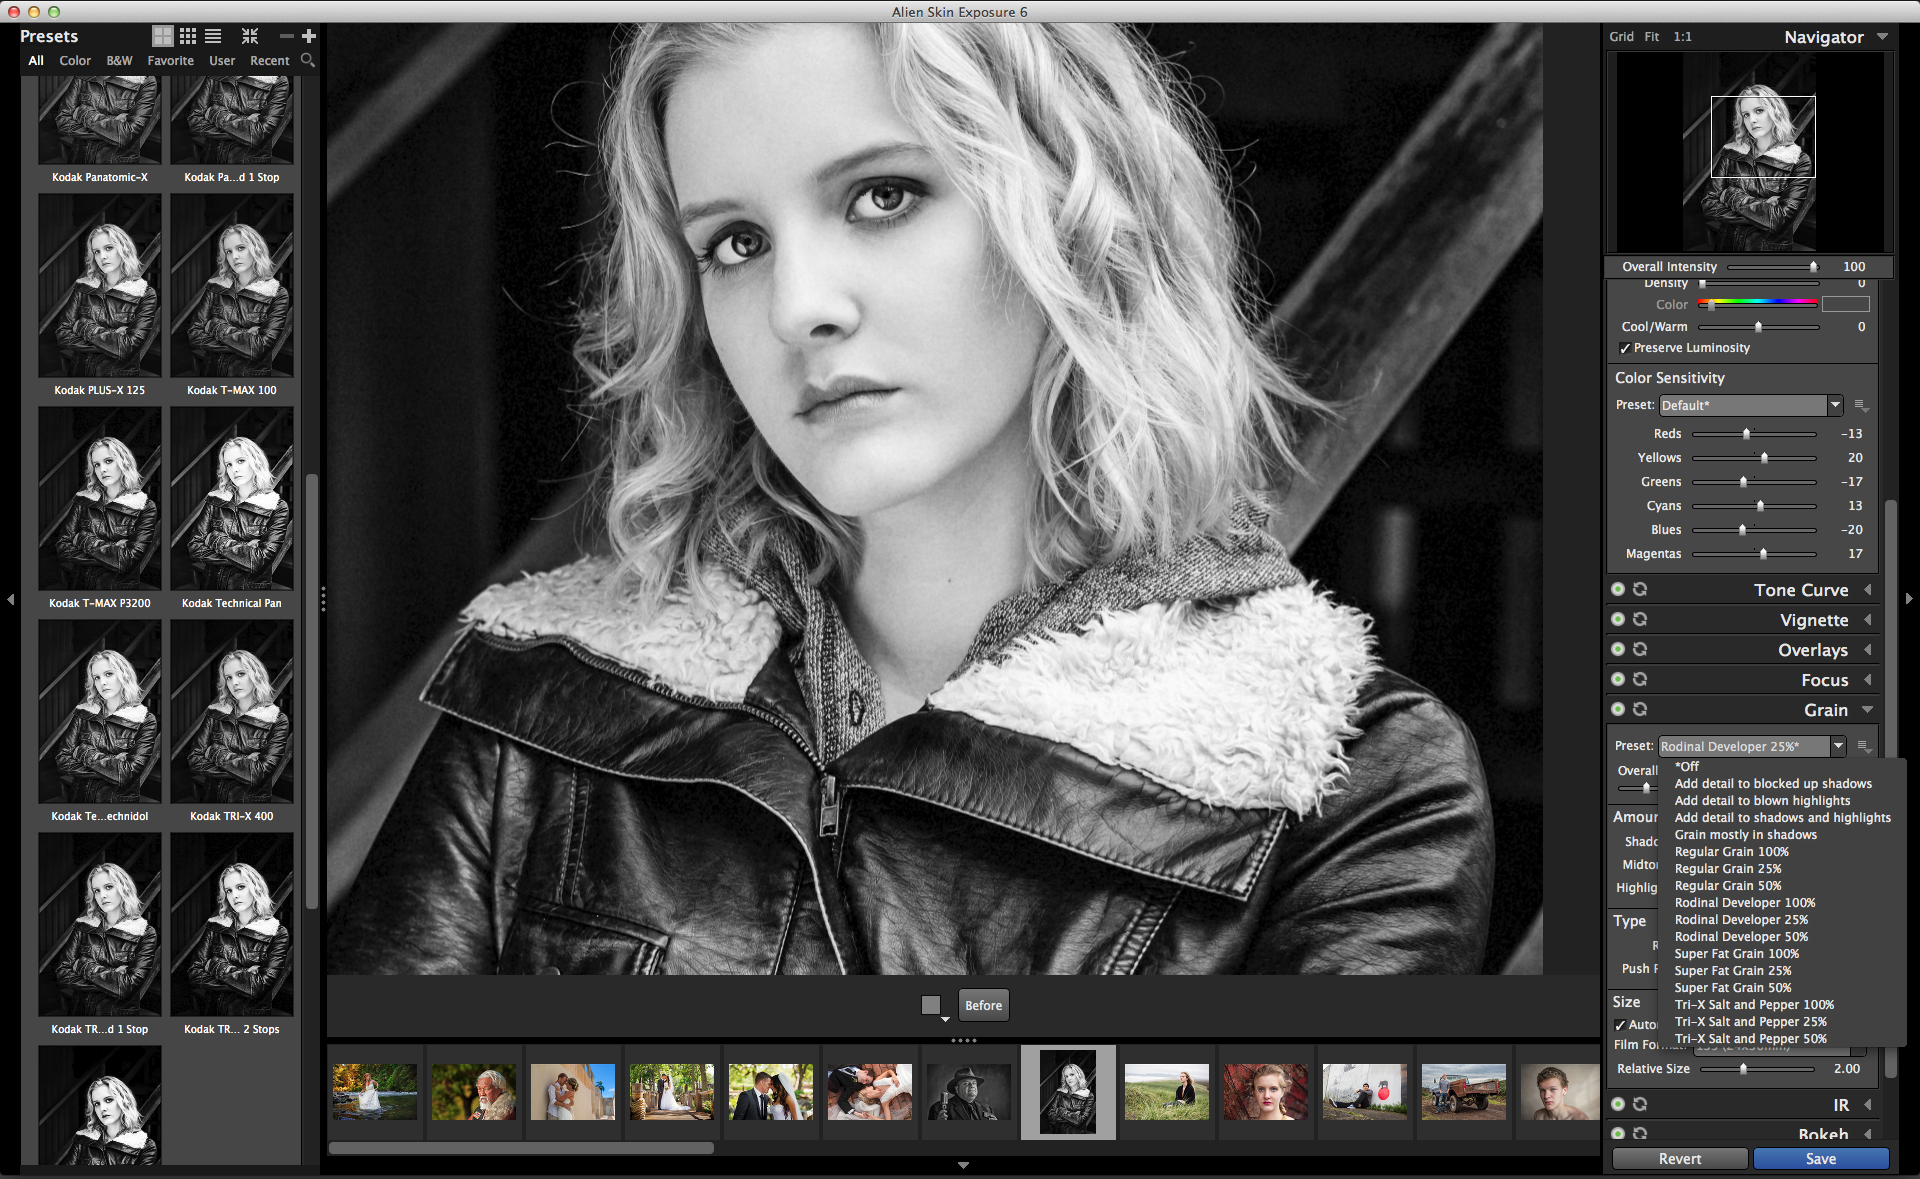
Back in the day, I worked at Moon Photo, a small black and white lab in Seattle. Every roll and sheet of black and white film was developed and printed by hand. I became intimate with film and its nuances and characteristics. My personal favorite was Kodak Tri-X developed in Agfa Rodinal diluted 1:50. Rodinal was patented in 1891 and is the oldest photographic product still available. It’s a high acutance developer (because it does not contain a silver solvent). While the grain is more pronounced due to its increased edge sharpness, it was distinctive and organic. And you thought digital was technical!
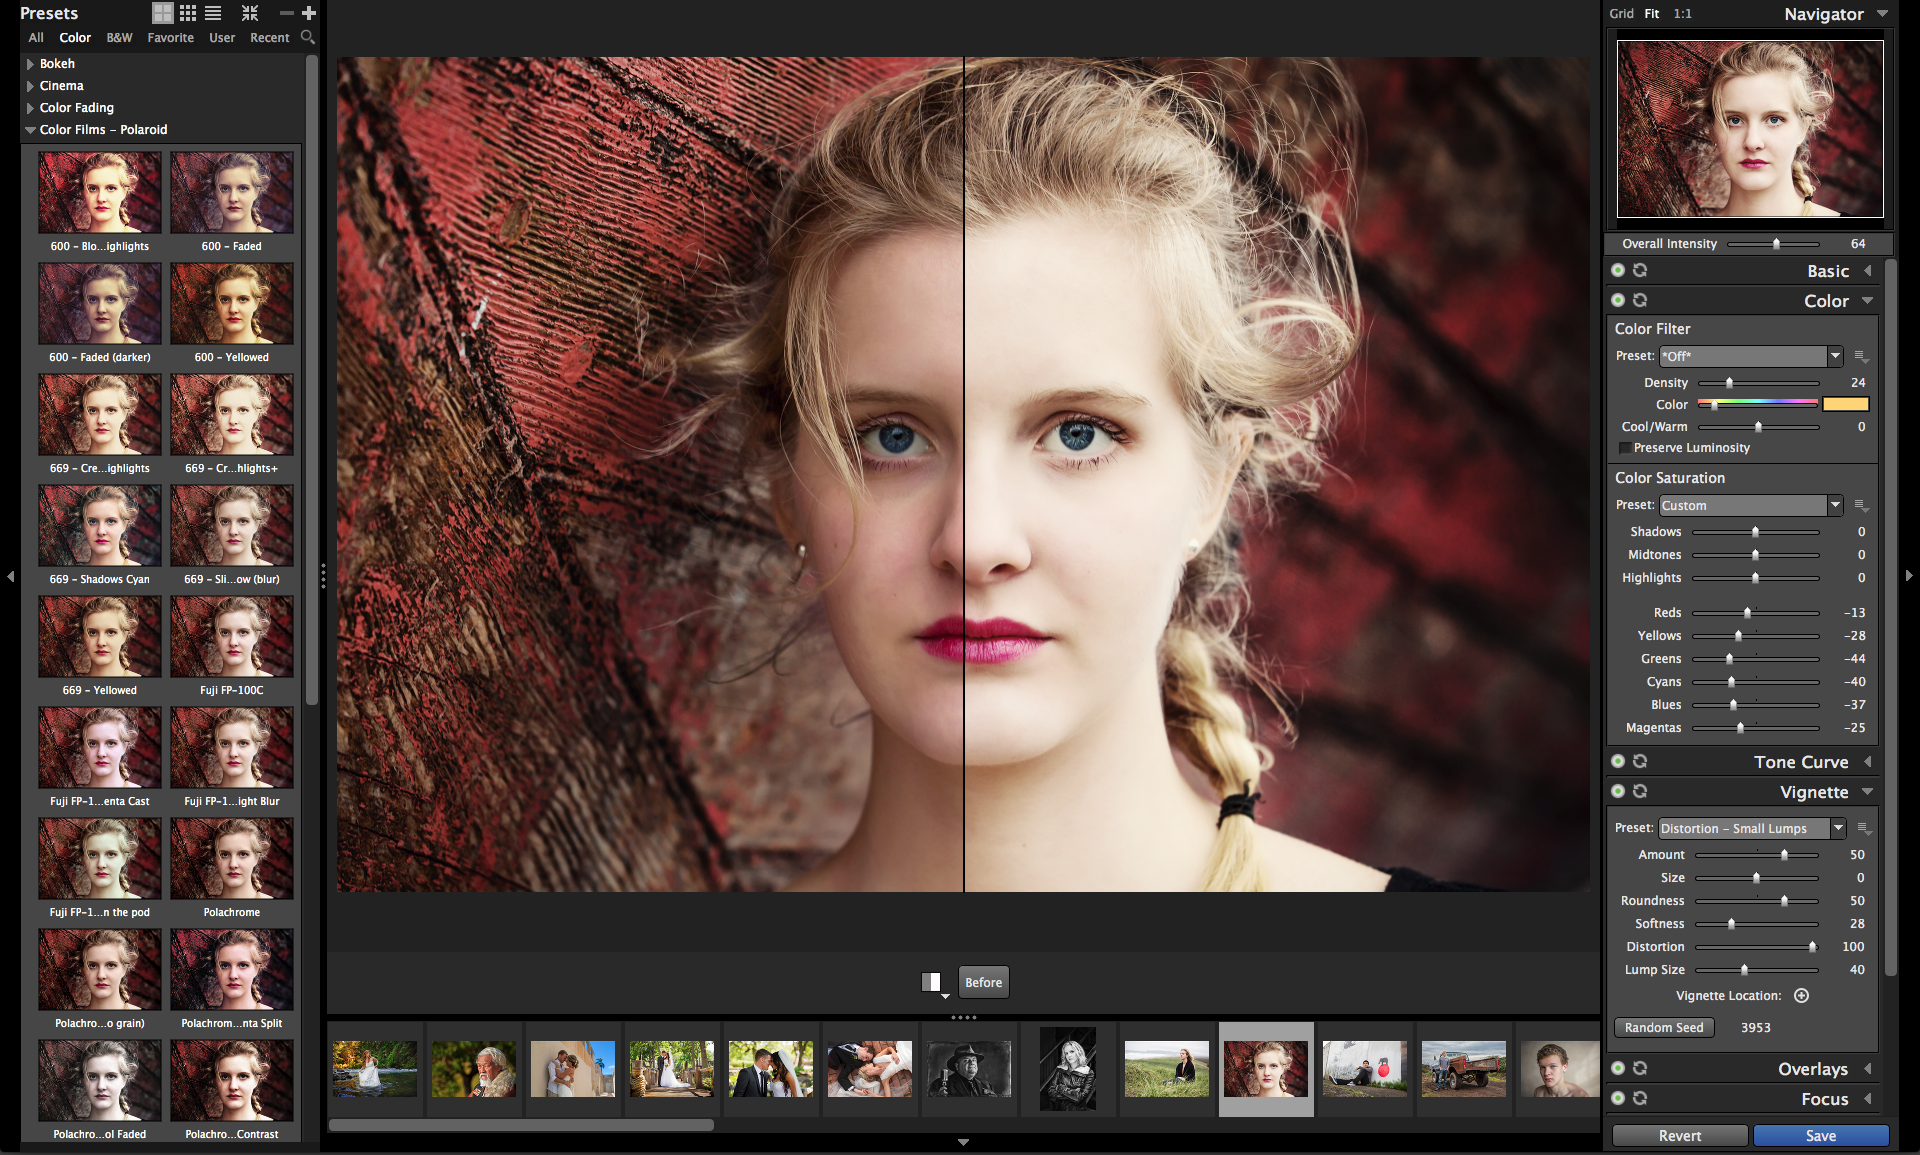
When it comes to emulating the subjective look of color film, most so-called analog film presets flatten the curves and pull up the shadows and flatten the highlights. Most of the time it simply looks like a bad photocopy. I’m not sure who decided this was the digital equivalent to emulating film. That was certainly not my experience shooting film.
A Range of Presets
Working within Photoshop or Lightroom, you’re limited to the tools within the program to create the effects of film. Most digital emulations of film within these programs fall short. Then there’s the aesthetic aspect. Like putting lipstick on a pig, slapping an Instagram analog filter on a bad image isn’t going to elevate it to an instant classic. You still need to start with an authentic image that stands on its own.
Every single preset (more than 450) are legit emulations that capture the subtle nuances of films like Kodachrome and Tri-X to classic Polaroids. No gimmicks here. If you can’t find something you like, it’s easy to find something that’s close and customize it. Anything you create, you can save and share as a preset. Later, simply apply your custom preset to your images with the click of the mouse.
Their included presets are the most realistic film effects I’ve seen. The cross-process films are more genuine and authentic than any Photoshop action I’ve ever used. The previews are insanely fast. No more guessing what a preset is going to look like. The thumbnail previews render quickly, the main preview image changing instantly to reflect the thumbnail you’re evaluating, as quick as you can mouse over a thumbnail. If you’d like to see the presets, they have lots of Exposure examples available on their site.
Exposure 6 also includes panels for making global tonal adjustments to exposure, contrast and clarity to name a few. Most notable however, is the addition of Bokeh which used to be a separate Alien Skin plugin. Bokeh on its own is worth the investment–fully adjustable features that include lens simulation, motion blur, tilt-shift as well as realistic vignetting and depth of field. Bokeh is a remarkable lens simulation feature.
What about workflow?
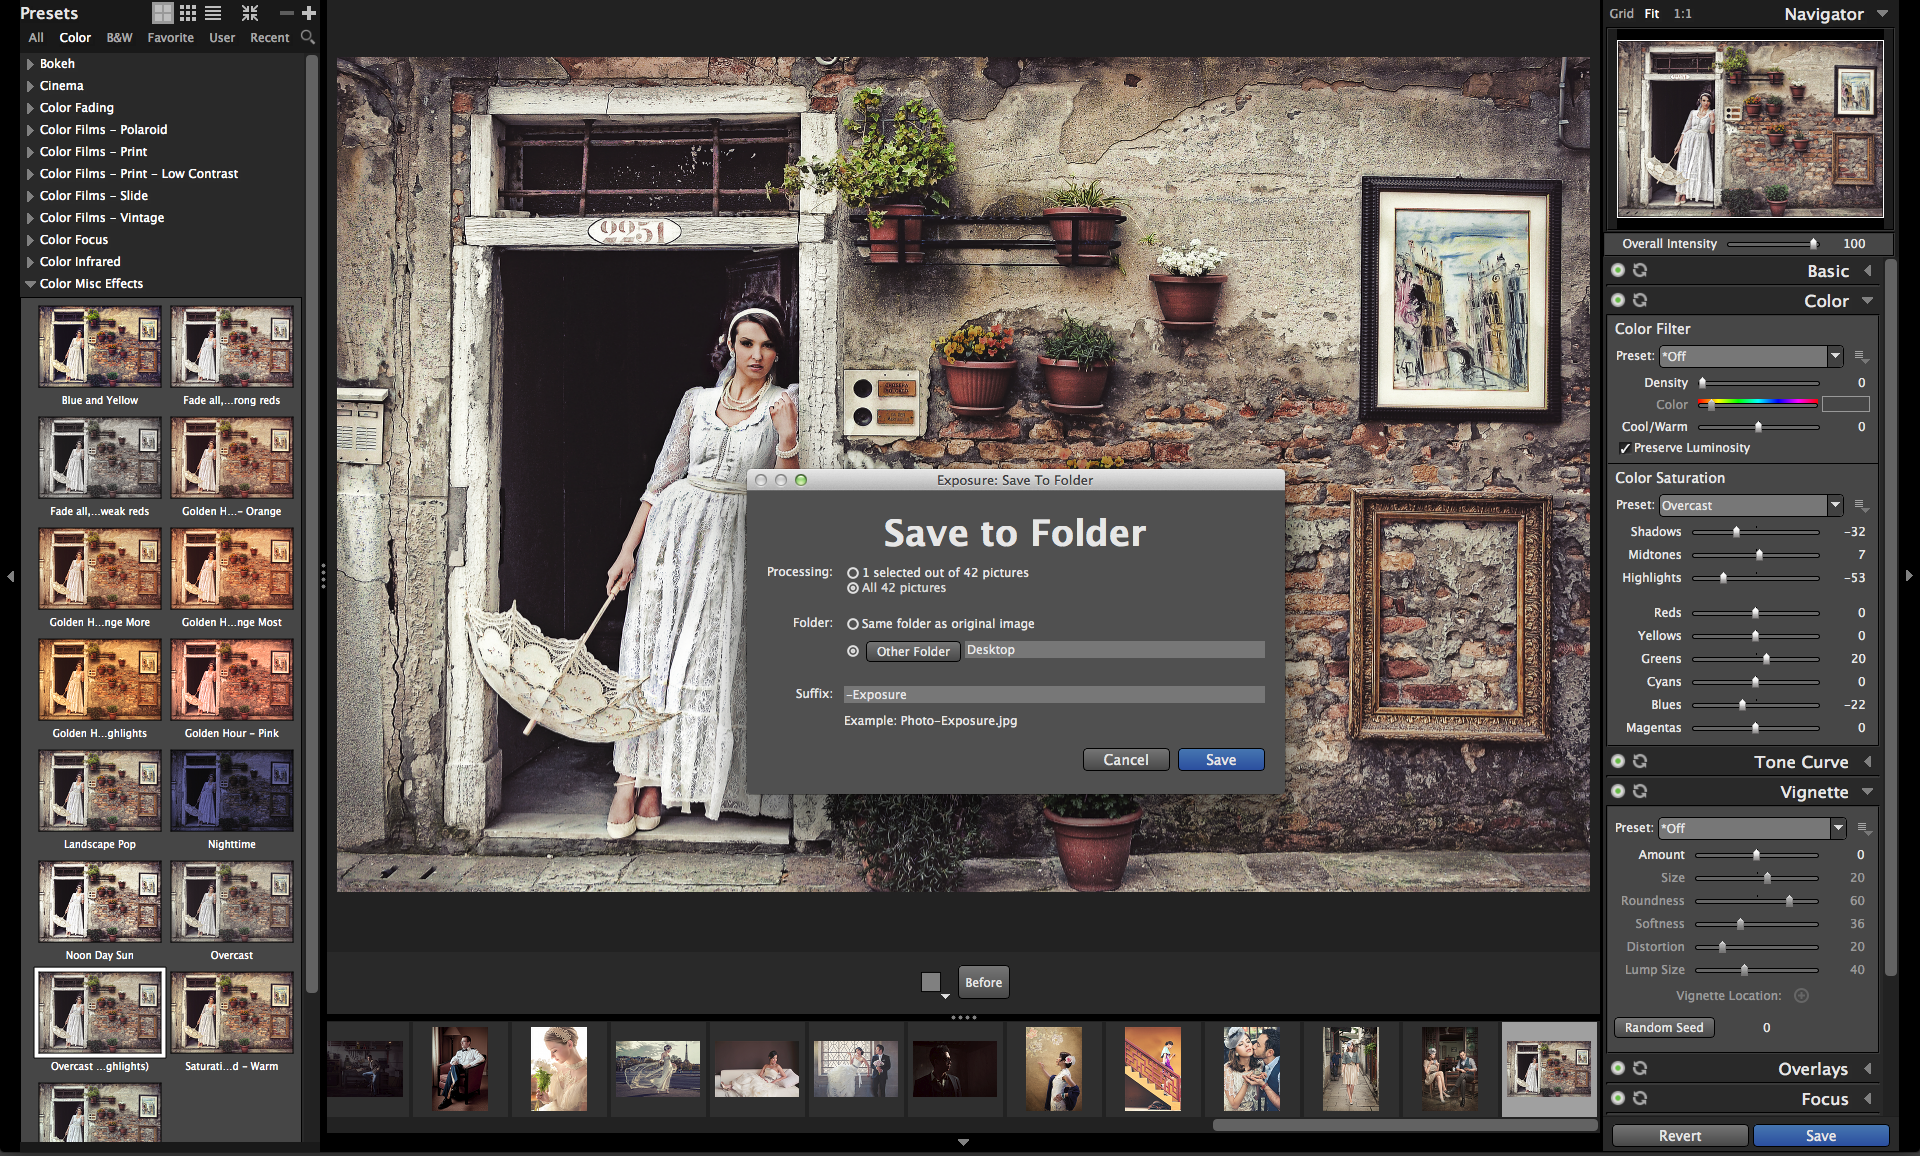
Let’s talk about workflow because this is where Exposure 6 really shines. If you’re a wedding photographer, the last thing you want to do is get lost in Photoshop. Actions are great, but they are not ideal for a production-oriented workflow. Exposure 6 is a standalone application with an emphasis on speed. It’s a great external editor that works in conjunction with Adobe Lightroom or (wink, wink) Fundy Designer allowing you to avoid Photoshop altogether.
There is no right or wrong way when it comes to workflow, just personal preference. Most people use Alien Skin Exposure through Lightroom and the handoff couldn’t be easier. You choose the file format you want to work within Lightroom, the default being TIFF (JPEG works just fine) and Lightroom will create a copy in the format of your choice to hand off to Exposure.
Another workflow option, and just as valid, is to nail down your files in Lightroom and then export your images for further work in Exposure. Basically treating Lightroom as a one-way street for workflow. With weddings, you typically have 4-5 lighting situations. Bridal prep (getting ready), formals, bride and groom art shots, ceremony and reception.
You could take one image that represents each situation and design a preset in Exposure. Then open up all the images from that section and apply a “look” or style preset to those images. A quick way to use Exposure in a wedding workflow and never go near Photoshop.
In Summary
Exposure 6 is one of those rare solutions that quickly establishes itself as an essential part of a professional photographers toolkit. It’s hard to share anything negative about Exposure, and it’s evident they’ve put effort into making this tool solid, packed with features and a focus on performance. I found myself wanting a side-by-side comparison when working with presets. They offer a split with lots of ways to display before and after, but I’d like to see the entire image. A masking feature would be a nice option, too, applying effects to portions of an image. And if Exposure 6 could handle RAW files, I’d consider asking for its hand in marriage. It’s that good.
Honestly, Exposure was on my radar years ago and I haven’t given it serious consideration until this version came out. I’m glad I did because it’s now one of my favorite tools in creating unique and authentic images that capture the best of digital and analog technologies. But hey, don’t take my word for it. Download a copy yourself (it’s a free evaluation) and decide for yourself. Let me know what you think. I bet you’ll be thanking me.


